


Dracula 3: The Path of the Dragon - Walkthrough
Contents
Vladoviste, September 16th, 1920, noon
Budapest, September 19th, 1920
Vladoviste, September 21th, 1920
Turkey, Urguryurt, September 25th, 190
Vladoviste, September 28th, 1920
Budapest, September 30th, 1920
- The Inn
- Dispensary/Shed
- Maria's room
- Photo development room
- Backyard
- Treatment room/Lab
- Janos's room
- The chapel - Part I
- Cemetery
- The chapel - Part II
- The cave
- The maze
- Game with Janos
- Puzzle: Blood, tears, sweat
- Puzzle: Skulls and hats
- Puzzle: Tiles and numbers
- The Well
- Path of the dragon
General Tips:[top]
An advice at the beginning: When you use the walkthrough, make sure to read every paper that you find, look at all pages of books and when you have to examine pictures or objects with the magnifier, you should do so. Also go always through the whole conversations. Otherwise, it can happen, that at a certain point, you will have to go back and do this things, because without the "knowledge" of this, the game will not go one. If you run into something like this, then have a look at your objectives (option in the inventory) and see, what objectives are not marked as done!
- By using the mouse, you can turn around 360° - just move with the mouse over the screen
- You should always have an eye at the bottom of the scene - you will find there sometimes useful informations about what to do, where to go, what you are looking at
- When you see your cursor changing into two gears, you can interact with an object (opening doors for example) by just clicking or using an inventory object
- When you see your cursor changing into an eye, you need to click the object. You will get a closer look and/or an explanation about the object
- When you see your cursor changing into a magnifier, you need to click also. You will get a closer look at something, that is of further interest and you will have to find out, what to do
- Using the space bar will skip the actual dialog line or a video scene
- Click the bible in your inventory on regular base - use the random button at the top - you will get a new biblical saying, which will be always related to your situation, maybe even give hints or showing you a way how to handle
- Make sure, you follow the conversations - that will help you on your way
- When you move your mouth over Latin phrases, you will get an english translation for it at the bottom of the screen
- There are a few parts in the game, where you can, but you will always get to start over exactly from this point
- When you pick up things for your inventory it will be collected in one box, upper right of the inventory
- To see each item or get it out to use, you first have to drag it to one of the empty boxes on the left side of the inventory
- If all boxes are occupied, you can click one of the buttons on top of the boxes and you will get a new page with empty boxes
- With right click, you open your inventory with a few options:
- The menu - here you will find a possibility to save your game or load particular saves. The game does NOT save automatically, so its a good choice to save regular. You have enough room to do it.
- The objectives - when you are unsure, what to do next, have a look at the objectives. They will always tell you're next goals (without telling you, how to reach them). There is no other hint system in the game
- The inventory itself - you will find there everything you picked up and might need
- The documents - during the game you will receive several documents, which you can read back there
- The dialogs - here you can read back every dialog for in case you missed an important information
Vladoviste, September 16th, 1920, noon[top]
- Station
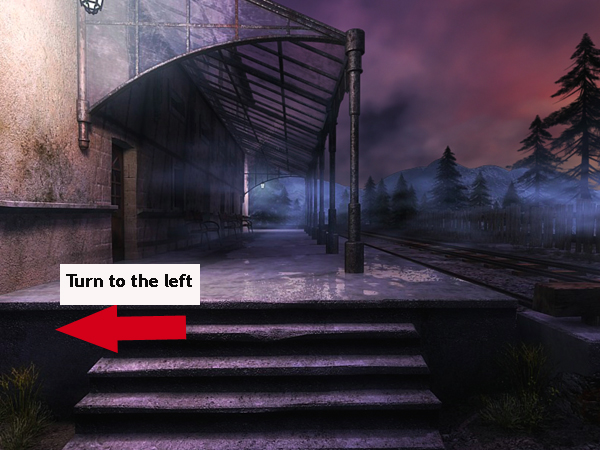
- After leaving the train, you stand at the station.
- Inside your inventory you will find a bible and a list of roman numbers
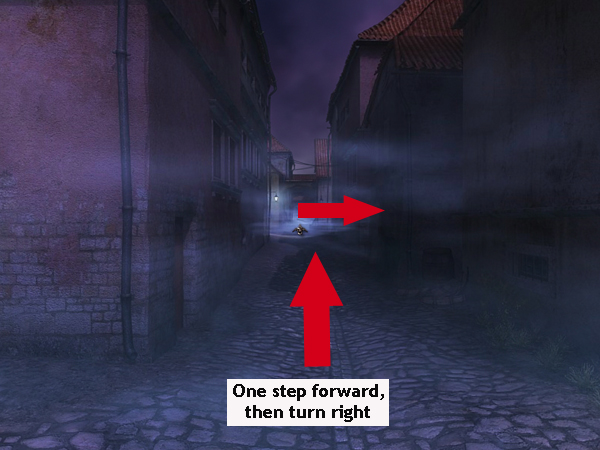
- Turn to the left, go one step into the small alley and turn to the right then
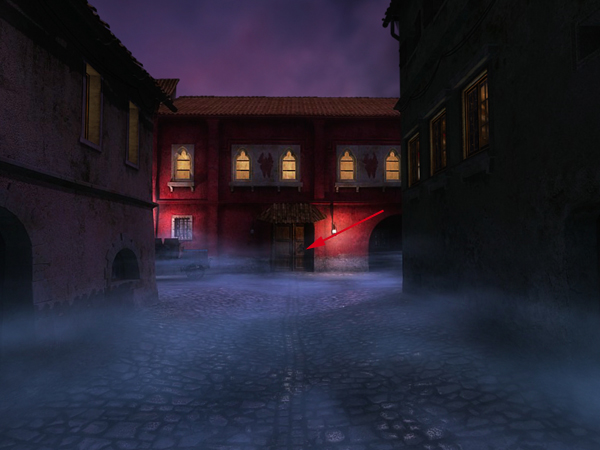
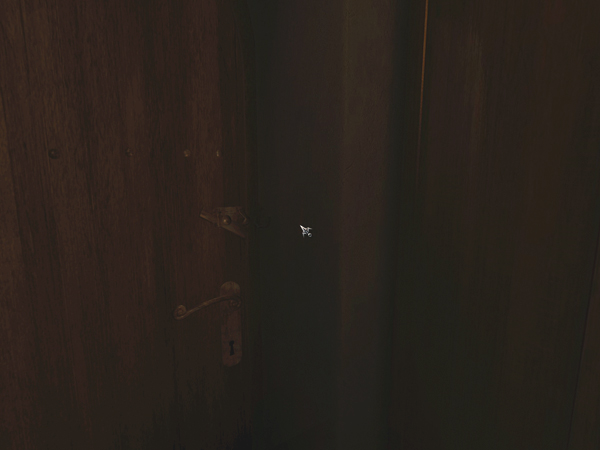
- In front of you, you see a red house, click it to come near and use the door knocker at the right side of the door to enter the inn
- The inn / Reception
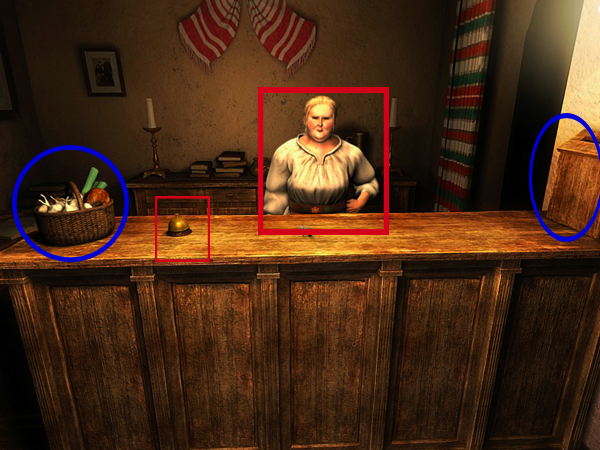
- Have a look around
- To your left you see stairs and the telephone at the left wall
- Straight ahead you see the desk - click the fruit basket on the left side of the desk and the outbox on the right
- Now click the service bell on the left side and Ozana will come
- Ask her about her son
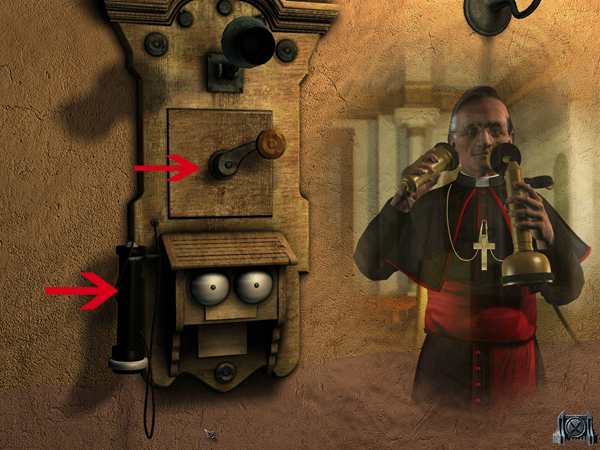
- After finishing the conversation, turn to the left, go one step and turn right to use the phone
- Pick up the receiver and click the handle in the middle
- Choose the option to get a connection with the Vatican
- Ask both questions
- End the conversation
- Turn right
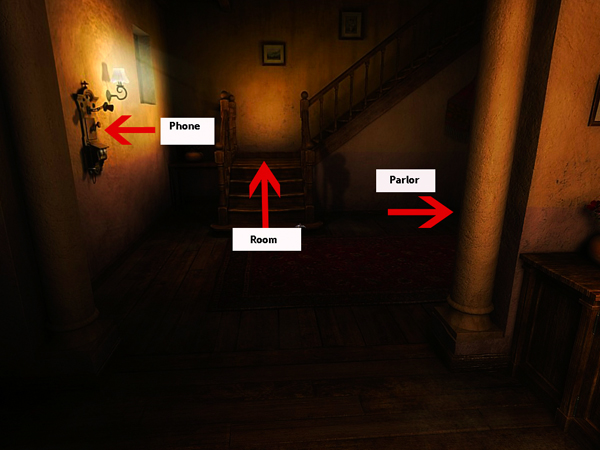
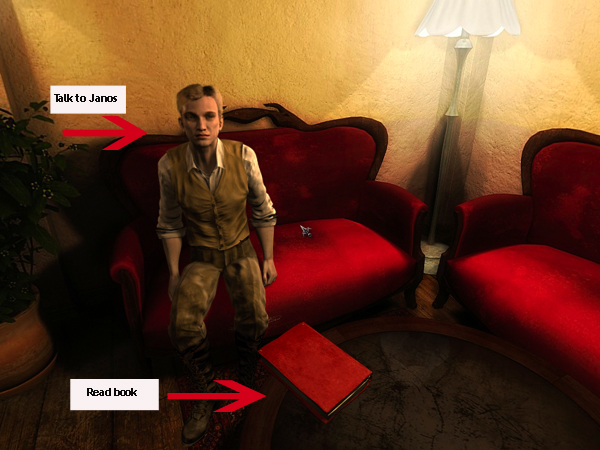
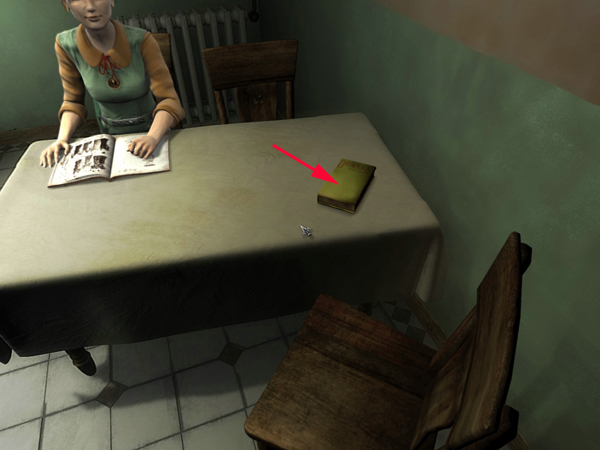
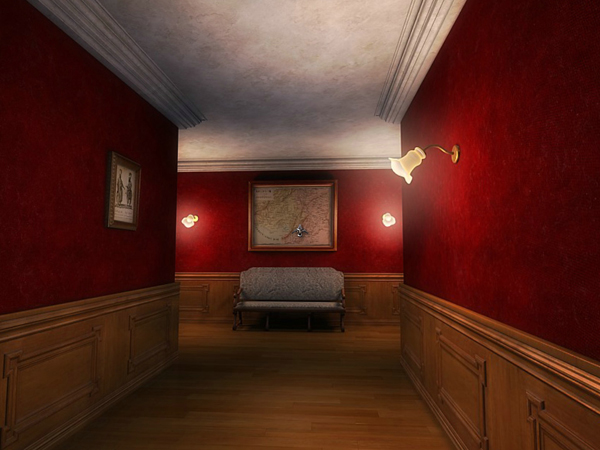
- The inn / Parlor
- Go two steps straight forward
- Janos Pekmester will start talking to you automatically
- Go through the conversation
- Look at the red book after
- Its "War in Transylvania"
- After reading it Pekmester will tell you, that it is propaganda
- The book will be copied into your documents, where you can refer it any time
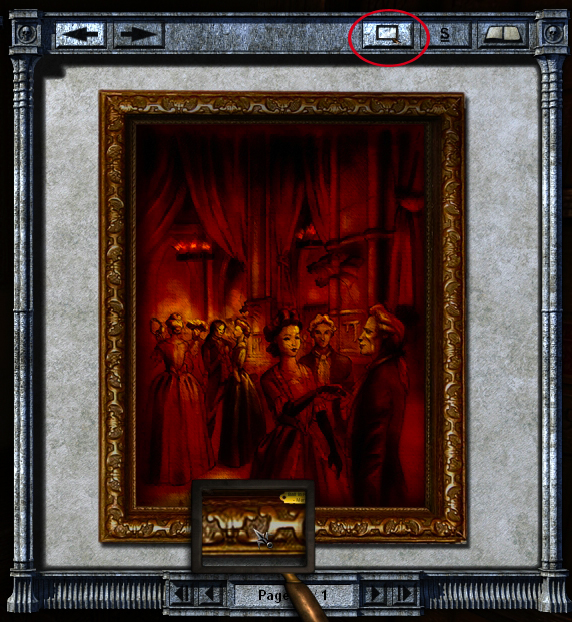
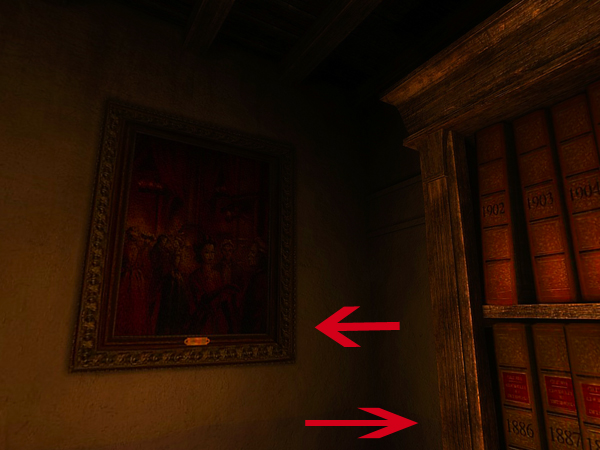
- Turn around and go over to the painting
- Click it to get a closer look - its "Ball in red and black" from Markus Delenker
- It will be also copied into your documents
- When you choose it in your inventory, you can use the magnifier at the top to have a closer look
- Turn to the right and have a look at the books
- This is the regional newspaper archive, in the order from 1870 - 1914
- You have seen all here for the moment
- Turn around, go back to the stairs and up
- The inn / Your room
- When you are upstairs, move on step forward and turn right
- Enter your room, go forwards and get the diocesan file from the table
- You will have to read all pages, otherwise will be told that you are irresponsible
- You might have a look at the wardrobe and then leave the room again
- The inn / Parlor
- Go down and back into the parlor
- Read the following newspapers:
- 1870, 1902, 1905, 1913, 1914
- All articles will be copied into your documents
- Go back to the reception and use the service bell to call for Ozana
- Ask her about the picture, then turn around and leave the inn
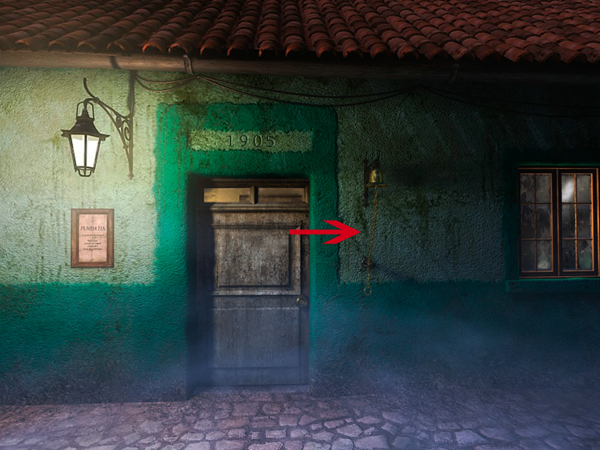
- The dispensary
- Go two step straight head and you are standing in front of the vesnici foundation dispensary
- Ring the bell right next to the door
- When you are in, turn to the right and talk to Maria
- Look around after the conversation - you can't take or do any yet
- After you tried leaving the kitchen through the backyard door, leave the dispensary the way you came in
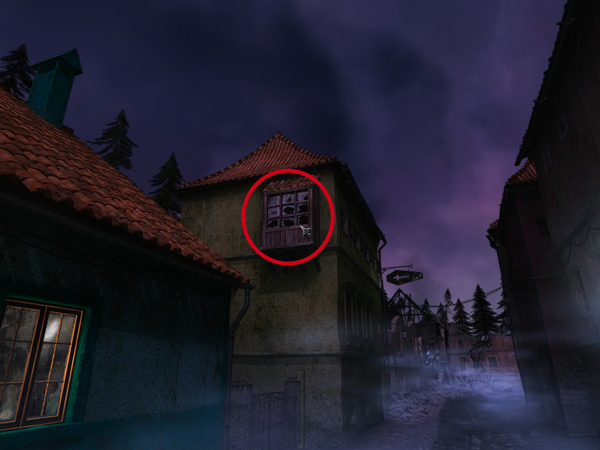
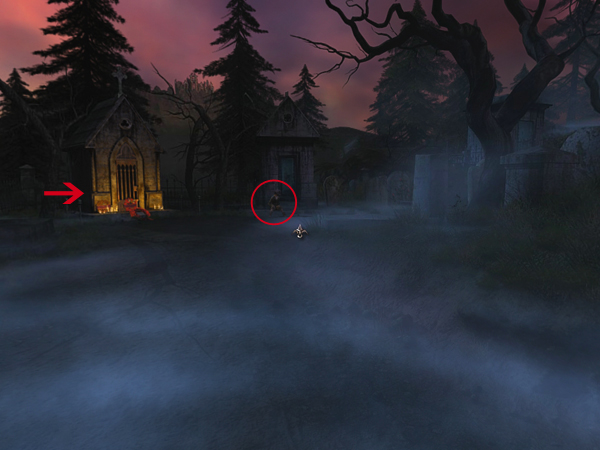
- Streets of Vladoviste/Cemetery
- After you saw the mysterious hand turn left and look at the broken window from the green house
- Go one step further to see the damage, the war caused
- Turn around, go back to the dispensary and two step further forwards
- Look at the memorial stone
- Now go back and further on till you stand in front of the gate to the cemetery
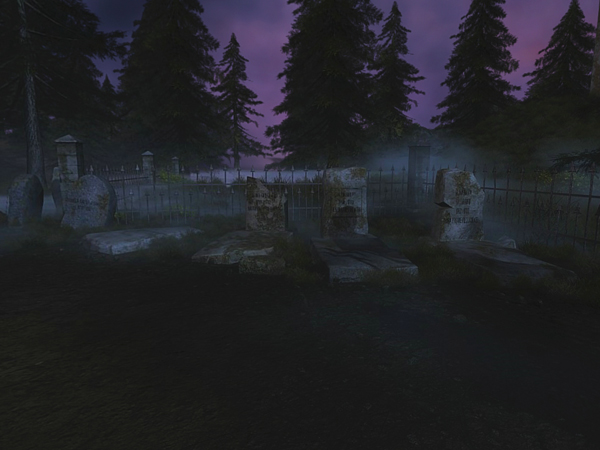
- Look at the sign to the left and enter after the cemetery

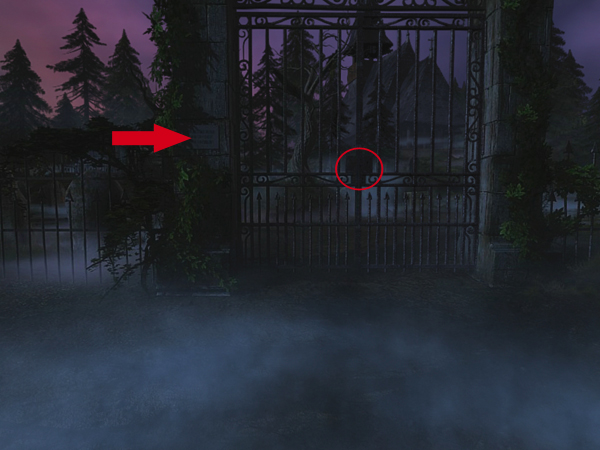
- Look to the right and read the names on the graves
- Go left and click the boy - talk to him
- Have a look to the right at Martha's grave
- Go to the right, look left and you will see the grave of the woman you already read about in the news paper
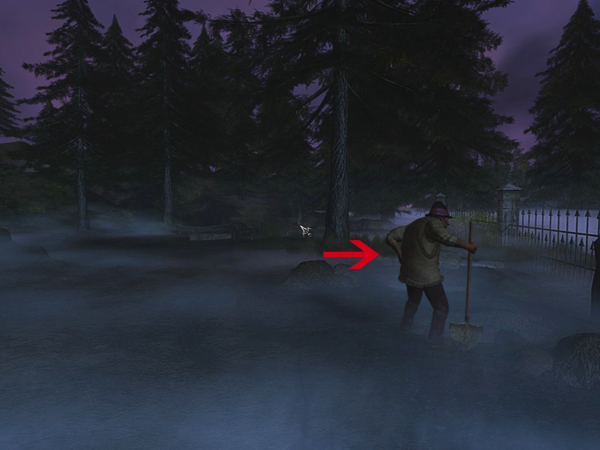
- Go up the stairs, look at the graves right and left and go down the stairs at the other side
- You see the grave digger, look at the right at the children graves first, then talk to him
- You will receive a telephone number to call the local priest, which is out of town for cure
- Leave the cemetery, open your inventory and have a look at the bible
- Click the random button on the top right and you will find another biblical saying
- Click to go down the hill
- When you are down go one step forward, one step to the right and one to the left
- You are in front of the inn again
- Enter the inn and use the telephone to call father Gregorius
- Go upstairs and to bed
- As soon as you click the bed a video scene will start.....
- The inn / Room next door
- Leave your room - Ozana, cleaning the floor wants to talk to you
- Beside the information, that Stephan Luca, a journalist is waiting for you, she has to ask you a favor
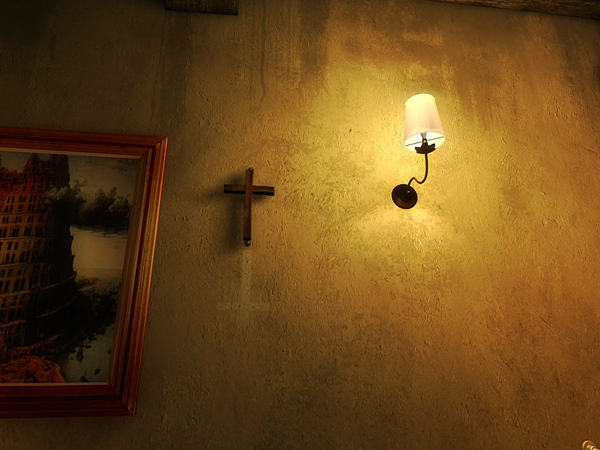
- She wants you to hang up the cross in the other room and praise it
- Turn right and enter the room
- Turn right there also and go one step forward - have a look at the door, which does connect this room with the one of Father Arno - the lock is broken
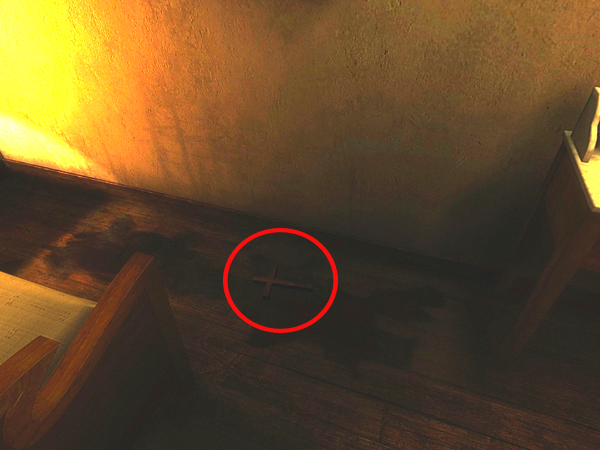
- Turn around and go to the bed - on the floor you see a dark stain and the cross on it
- Grab the cross and look at the wall
- You see a white spot of turned around cross - but you use the upper nail to hang back the cross
- Leave the room and talk again to Ozana
- Open the bible and you will find two new biblical sayings
- The inn / Parlor
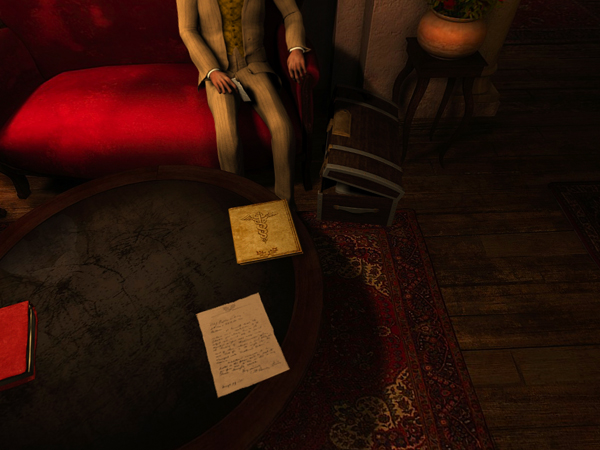
- Go downstairs and enter the parlor to your left
- Go through the whole conversation with Stephan Luca and read the letters he is laying on the table
- Also read the case files he is giving you
- Go back into the hall and call the police
- After the first call, you will have to call again and ask for Inspector General Brutar
- Go through the conversation and back to Stephan Luca
- Talk to him again and call Father Gregoriu after
- Now try to reach Monsignor Briganti, but he is not in his office
- Turn a little to the right
- Try to grab that tile shown a dragon, but you need permission first
- Go the reception and use the bell to talk to Ozana
- Go back to the phone and get the tile
- Leave the inn
- Way to the castle
- Go one step forward and then left
- Meet Luana, the gypsy and talk to her about Maria
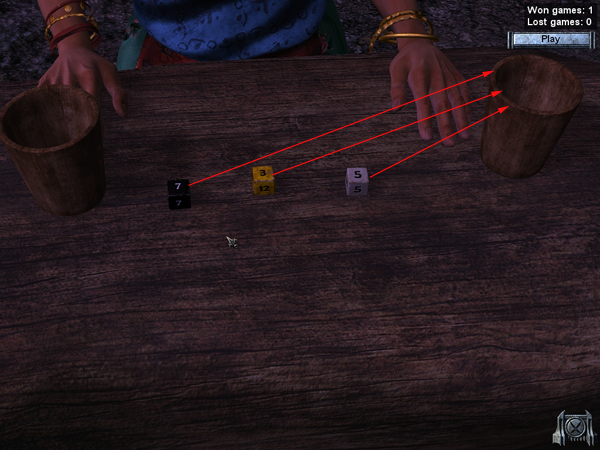
- You might want to play with her, if so, click the crate with the dice in front of Luana
- Hovering over the dice will show you the rest of the dice
- Die 7 gives a 1:3 chance to throw a 1
- Die 5 has only fives
- Die 3 give a 1:6 chance to throw a 12
- You have to choose a die and put it into the dice cup, upper right corner
- Then click it on the table
- Luana will do the same
- The one with the higher amount will win
- If you dont want anymore, just leave the window
- Now go the way right next to Luana, 1 step further and left at the next crossing
- Go straight ahead till you are at the war graves again
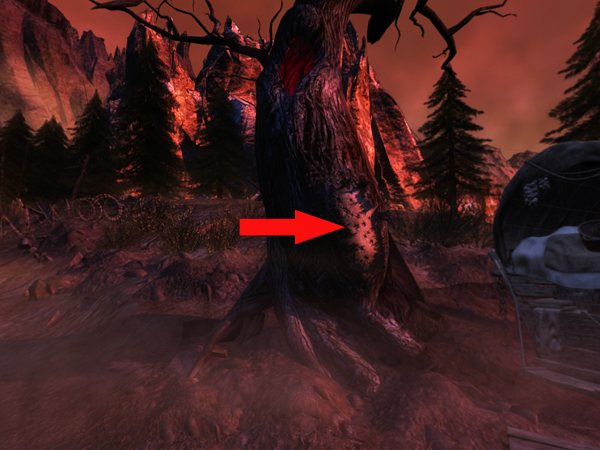
- Have a look right at the oak
- You see bullet holes and they seem to be fresh
- Turn more right and you see a wagon, but no driver
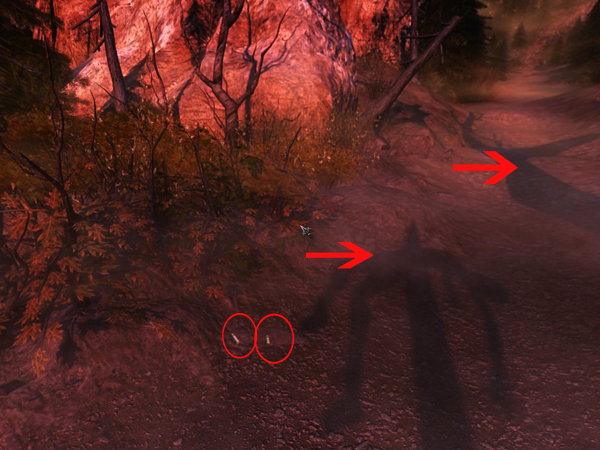
- Now turn left from the oak and look on the ground
- Pick up the two bullet shells
- You also see shadows of people speared to pales, but when you turn around, you will only see the pale - without anyone
- Turn back and go straight ahead till you are standing in front of the castle
- The castle
- After entering the gate, Janos will start talking to you
- Go through the complete conversation
- Turn to the left and have a look at the letters, which are carved into the stone: BM
- Turn more left and look at the skeletons
- Turn back and look a little right from Janos on the floor
- You see three parts of a broken sun dial
- Click the two small parts to fix it and get the part out of your inventory, you found in the inn

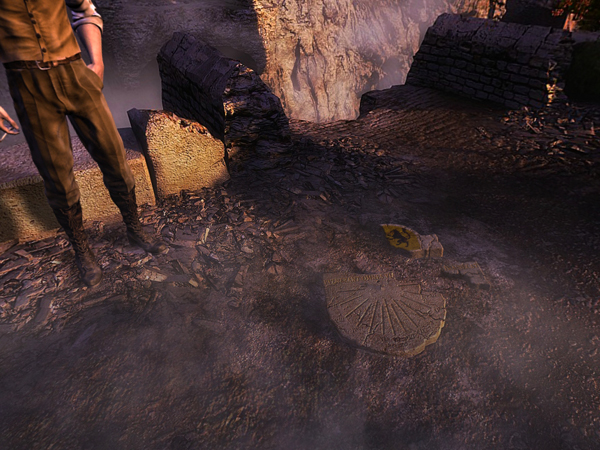
- Turn around a little more, and pick up a few berries - they will go into your inventory
- Now you saw everything here, so go back to the inn


- The inn
- Go to the telephone and call Monsignore Briganti
- Talk to him, he needs to call you back, so stay at the phone and wait a moment
- After you finished also the second call, go back to the parlor and talk to Stephan
- Read the case file, Stephan is giving to you, carefully, to know, how far Martha did come with her investigations
- After this, go to see Ozana at the reception
- She tells you, that Maria asked you to come to the dispensary for a blood donation
- Before you leave the inn, talk to Ozana about all available issues
- Don't forget to have a look at the bible, where new biblical saying are waiting for you
- Leave the inn and go to see Maria at the dispensary

- The dispensary
- To come to the dispensary, you just have to go straight ahead
- Ring the bell, enter and go to the right into the kitchen, where Maria is sitting at the table
- Follow the conversation to find out what Maria needs you to do
- You will have to get a blood sample from yourself
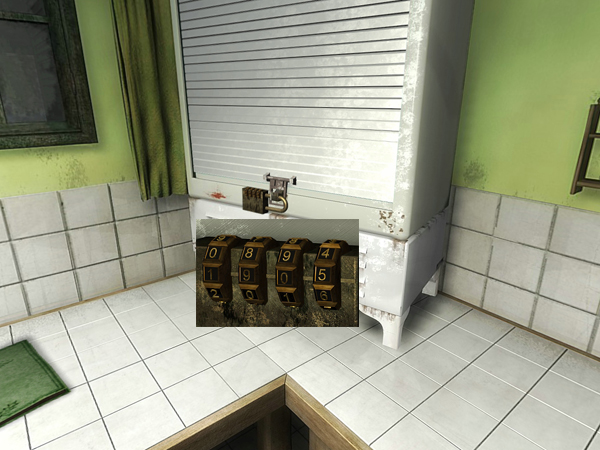
- You will have to put it into the refrigerator box, which is locked with a number lock
- You will have to write down the blood type of your and the last three blood donations in the analysis book
- After Maria left, you will be brought to the surgery automatically
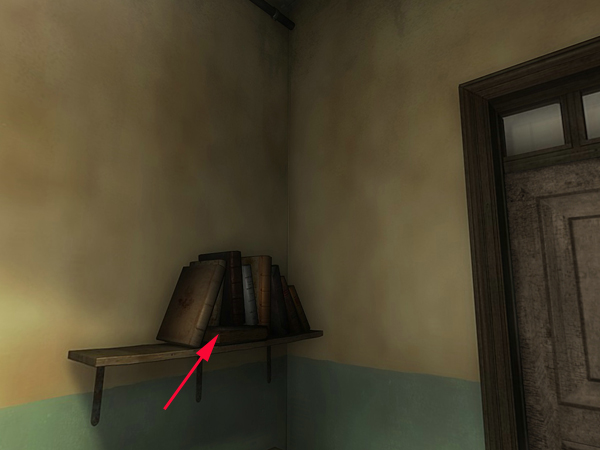
- You are standing in front of a working table, but before you start, look a little right up and you will see a few books
- You can have a look at all of them, but only the Book from Martha, laying in front of the standing ones, will go into your document files
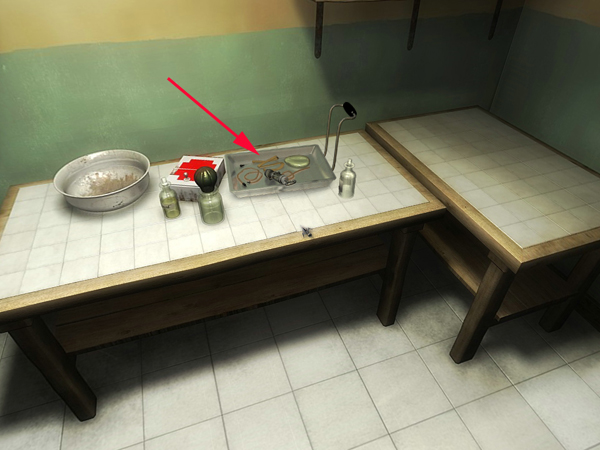
- Now have a look back at the working table and grab the table with the instruments
- They have to be sterilized before you can use them, so go back to the kitchen
- In the kitchen
- Sound needed!
- Go to the sink and open the curtain, get the funnel
- Open left from the sink the right drawer and get the copper wire
- Look at the right and grab the pot, standing on the oven
- Place it at the sink and click the faucet
- Get the filled pot and place it on the oven, left side above the fire
- Open the door of the fireplace and turn to the left
- You see a basket with wooden logs
- Grab one and place it in the oven
- Close the door and wait till the water starts cooking
- Get the instruments out of your inventory and click them into the boiling water
- Go to the sink and wash your hands with the soap
- After a short while you can get them out again
- During all this the telephone will ring (random at what point)
- When you face the door, you will see the telephone in the hall
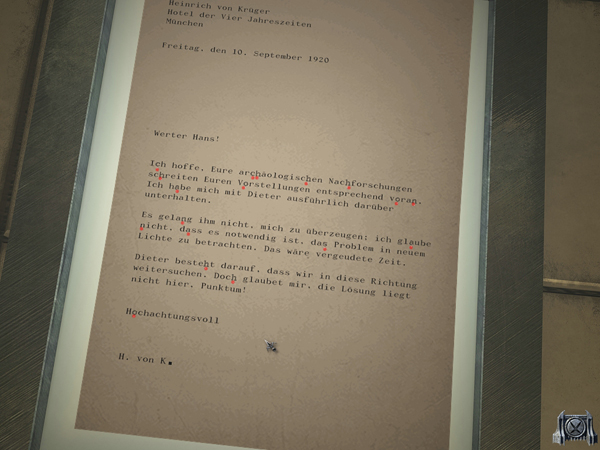
- Answer it - its Prof. Heinrich Krüger from Munich and he asks for Maria to call him back
- Don't mind, if you missed the call the first time, as soon as you turn around to go back to the kitchen, the phone will ring again
- When you sterilized your instruments, go back to the surgery
< 
- Blood donation
- Place the sterilized instruments back on the table and you will get a near by view automatically
- Now connect the left tube connection with the left side of the syringe and the right one with the right side
- The needle goes at the right tube connection
- Open the first aid box left, a cotton is inside
- Take of the top of the left bottle, left side
- It is alcohol - so place the cotton on top of the alcohol bottle and take it back into the first aid box
- Click the glass ampule on the instrument table, it will turn around
- Get the measuring cap from the right bottle, left side
- It's citrate - click the measuring cap at the glass ampule
- After that click the right tube connection onto the glass ampule
- When you click the tourniquet on the table, you will get a near by view of your arm
- Use the tourniquet at the upper arm part
- Now get the cotton and place it at the crook of the arm
- You have to lead the needle now to the vein
- The cursor is shaking a bit, to show that Arno is nervous
- Place the needle at the vein, once it is in, you have to move the mouse a little right to make sure, that it is really in
- Take off the tourniquet by clicking it
- Now you need to draw up the syringe at its top - an arrow will show you the direction the mouse has to go
- After it, get the glass ampule No. 814, how it is called now.
- Turn to the right and open the door
- Lab
- Paper and pen needed
- Look around and click the white refrigerator box to open it
- Maria told you the code is the year, the foundation was founded
- From you newspaper articles you know, that this was 1905
- After giving in the code, you have to drag the lock to the right and then open the door
- Your blood donation has the no. 814, so the other ones you need have to have the numbers 811, 812 and 813
- Turn right and wash your hands with soap
- You will be told to do not leave open the door too long, so close it while washing you hands
- Right next to the fridge box, you can see a shelf with test tubes, each test tube holds a pipette
- Grab the first one and use it on bottle 811
- Get the next pipette and use it on bottle 812, the next to then on 813 and 814
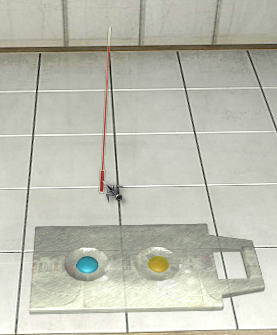
- Also get a sample from the blue and a sample from the yellow liquid
- On the working table there is a testing plate - drop left blue and right yellow liquid
- Now get the pipette with the first blood sample and click one drop on the blue liquid and one for the yellow
- You can see, that the blood reacts - so write down the reactions
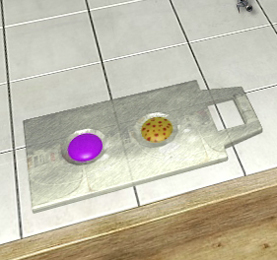
- Now get the plate and clean it in the sink, place it with right click back on the working table
- Do the same with the other samples and write down the results of the reactions
- Now you know, how the blood reacts, but you still do not know which blood type it is
- You also know, that Arno Moriani and Janos Pekmester do have the same blood type as the reaction
< 
- Have a look on the working table left from the refrigerator box
- Get the green file - read it - this are the analyze result of the other blood samples
- Clean the test tubes, except the ones with the blue and the yellow liquid
- Now wash your hands again and get blood samples from the remaining blood samples in the box
- You do not have to test all: When you look at the files, you will see, that the yet tested people do only have type A or type 0
- So just test the reactions of one from each blood type as the example shows
- As you can see in the example below, the samples 808 and 813 show the same reactions, what means that Stephan Luca has to have blood type 0 - this blood samples do not show any reactions with the test liquid
- Arno Moriani (814) and Janos Pekmester (812) show the same reaction - there is a reaction to one of the test liquids, but it's not the same reaction as Ozanas blood type A shows - so they both have blood type B
- Ionel Martinescu's blood sample shows reactions with both test liquids, so his blood type has to be AB
- Now take the green file and fill in the right blood types for the blood samples 811, 812, 813 and 814
Number |
Name |
Type |
Reaction |
805 |
Ozana Vulpesco |
A |
blue-red dots/orange |
808 |
Martha Calugarul |
0 |
purple/orange |
811 |
Ionel Martinescu |
AB |
blue-red dots/yellow-red dots |
812 |
Janos Pekmester |
B |
purple/yellow-red dots |
813 |
Stephan Luca |
0 |
purple/orange |
814 |
Arno Moriani |
B |
purple/yellow-red dots |
- Go to the kitchen and talk to Maria, which is already back
- Talk to her
- She gives you the novel from Bram Stroker to look at
- Take it and read the passages which are underlined by clicking the random button in the right upper corner
- Talk with her about the novel and leave the dispensary after.
- Talk Talk Talk
- You want to talk to Janos again, so you turn right and go straight ahead till you are at the castle
- Talk to Janos
- Go back to the town and there left to the station
- Talk to Luana
- Go back to the inn and talk to Stephan, he is still in the parlor
- Use the phone and call first Irina Boczow, then Prof. von Krüger and last Monsignor Briganti
- Go to the reception and talk to Ozana, making sure, that she won't give your room away while you are in Budapest
- Now go back to the station
- Station
- Enter the train and choose "Budapest" on the map
Budapest, September 19th, 1920[top]
- Office Irina Boczow
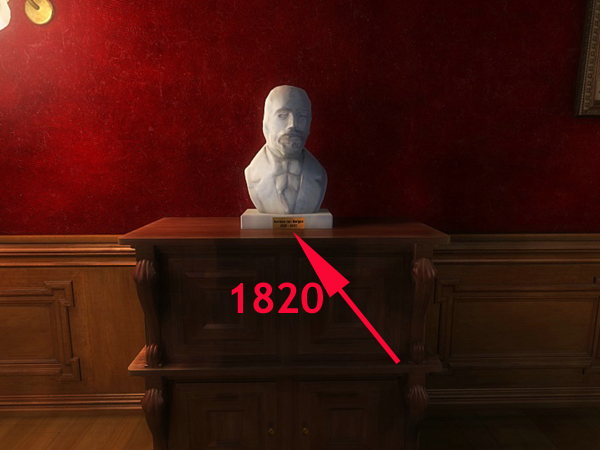
- Before you enter Irina Boczow's office, turn around and notice the bust from Herman van Bergen
- Recognize his birth year - 1820
- Now enter the office and talk to Irina Boczow's
- She mentions that she is sure, that important informations are in the safe, but unfortunately Herman van Bergen didn't gave her the combination before he died
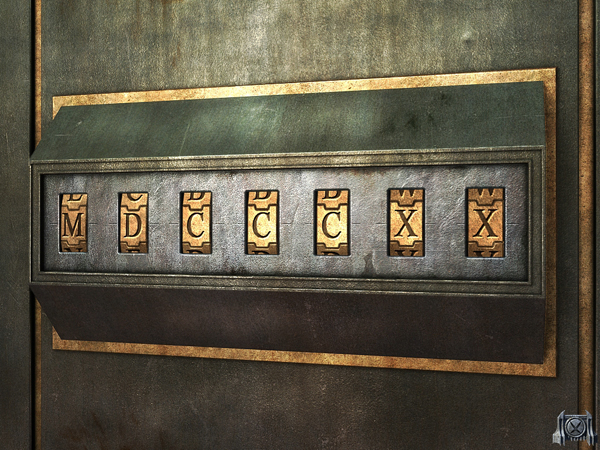
- You can try to open it, but be carefully as the acid on top will destroy the safes content, when you don't do it right
- Click one of the letters and move your mouse with pressed left mouse button up or down
- Only letters, which can also be used for roman numbers do make a noise
- There is only one number we know from Herman van Bergen - 1820
- Romans counted with 1000, 500, 100, 50, 10, 5 and 1
- The romans did not have that much numbers as we are used too, so they did subtraction also
- There were several rules, how to use it, but important for us now is:
- There is no lower number allowed in front of a higher number.
- That made problems, when you are so limited in numbers.
- A number was only allowed to be used three times one after one
- So you can't use I I I I (1+1+1+1) for a 4
- That's why you were allowed to use subtraction, but only with one lower number befor a higher one: a 4 will be written as: IV
- 1820 would, "translated", look like this:
- 1000 (M)+500 (D)+100 (C)+100 (C)+100 (C)+ 10 (X)+10 (X)
- Give in the combination MDCCCXX
- Get the letter and the cylinder out of the safe and place it on Irina's desk
- After she red the letter, she will turn it around, so that you can see it as well
- Read it and go on with the conversation
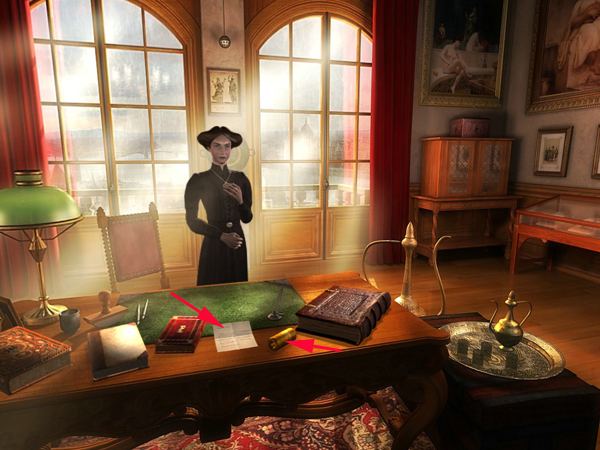
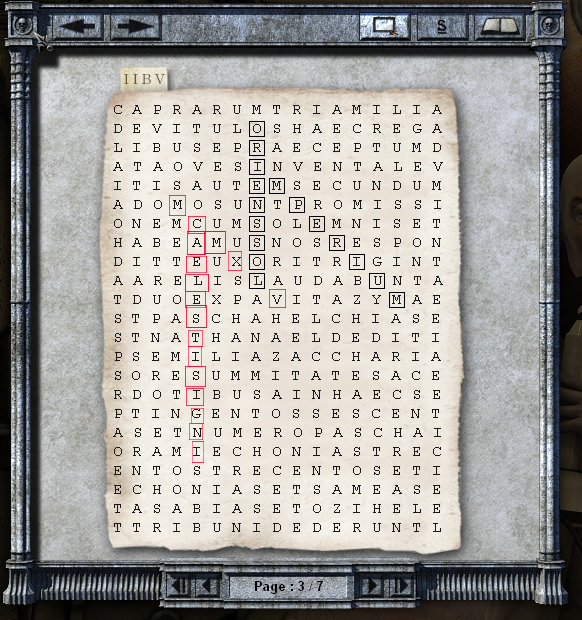
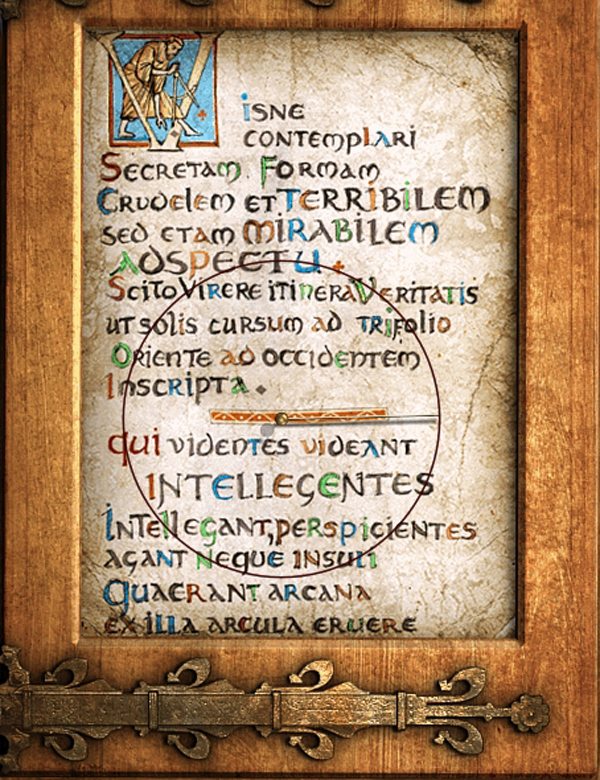
- Irina will show you a book of the Thule society, the eye will go on it automatically
- You will have to find the hidden clues inside all this letters - Irina shows you one: Casus Belli - the cause of war
- It is your goal now, to find the connected two words, that give you the year the war started and the place
- The war started 1914 - remember, we need the roman numerals - so you are looking for
- 1000 (M)+ (1000-100=)900 (CM)+ 10 (X) + (5-1=)4 (IV) = MCMXIV
- The C is used from the word Casus - Use the M diagonally left from the C and go on diagonally right from the C till the V
- The cause of the war was Sarajevo
- For this use the first S of Casus as begin and go diagonally down right
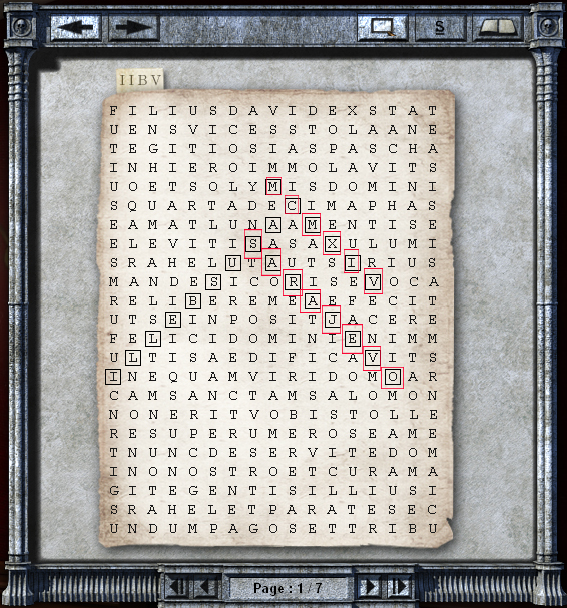
- This was about the past, but there is a document, pointing on the future
- Irina gives you two clues: Thule (the name of the society) and Caedes (massacre)
- The big massacre started 1934 in Germany
- Remember, we have to spell it out in Latin, so according to the explanations above you look for the year: MCMXXXVI
- Germany was called GERMANIA
- For the year use the C of Caedes - start with the M above and go down to the S
- For Germania you use the I from MCMXXXVI
- Start at the G in the 2nd row, 2nd line from above and go diagonally right down till the A
- Now we have to find a connection to THULE
- Start at the M right next to the I from MCMXXXVI and go down over the T of Thule, to the A
- Mali Victoria - Victory of the evil
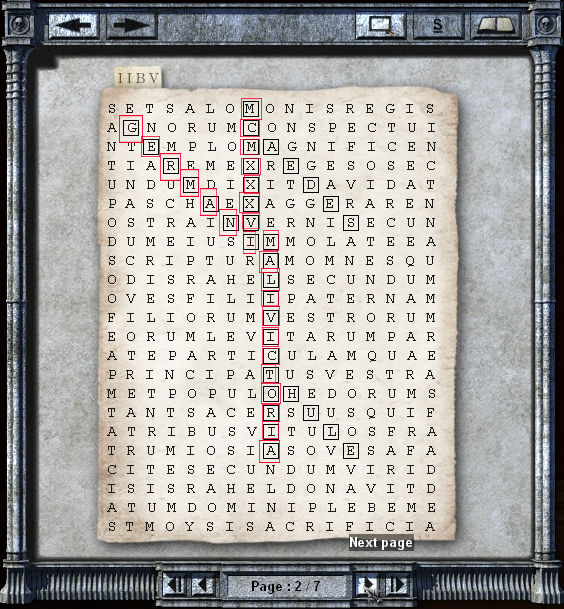
- Go on talking with Irina and she will show you another book, with a picture of Rafael
- You already have a picture of the original in your documents - which you choose from your documents now
- You see at once the huge difference - the original shows, that both angels are holding a goblet in their hand, but the copy (to which you go by clicking the arrow on top) shows only one angel with a goblet
- There is another difference: Get the magnifier from the top of the page and move it to the lower part of the cross - you will see some carved writing there
- Go on talking with Irina
- After leaving her office have another look in the bible
- Now turn right and click the map at the back wall - you will get a closer view
- Now choose Vlaodoviste

Vladoviste,September 21th, 1920[top]
- The inn / Parlor
- Back at the station go first to the inn
- Enter the parlor and talk to Stephan
- The inn / Upstairs
- Now go upstairs and click the package on the table of your room
- Read the book
- Have a look in Stephan's room - the cross is turned, so put it back the right way
- The inn / Telephone
- Go down and call Prof. von Krüger
- Talk to him and you will have to analyze another document of the Thule-society
- The first two words Krüger shows you: Oriens sol = Orient, East (what is a mistake, the correct Latin term for this is : Sol oriens) and Imperium (=Empire)
- By using the L from Oriens sol and look diagonally, you will find a year: MCMXLV = 1945
- By using the C from MCMXLV and going down, you will find the words Calesti Signi (= sign out of heaven)
- Krüger knows for everything a logical explanation, so ask him also about beating Luana
- He tells you (in short term): Let Luana choose first a die - and then choose:
- white will most often win over yellow
- yellow will most often win over black
- So: yellow is better than black and black is better than white
- Like this, you will be able to beat Luana
- Time to have a look at the bible, two new sayings are marked for you
- The inn / Your room
- You will be brought to your room automatically
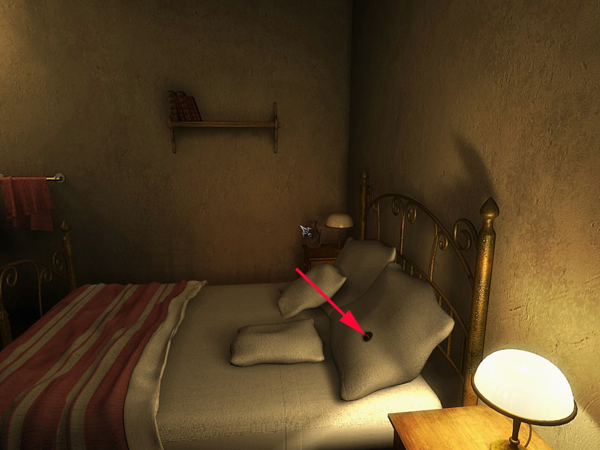
- After working for a while, you go to bed, having another nightmare
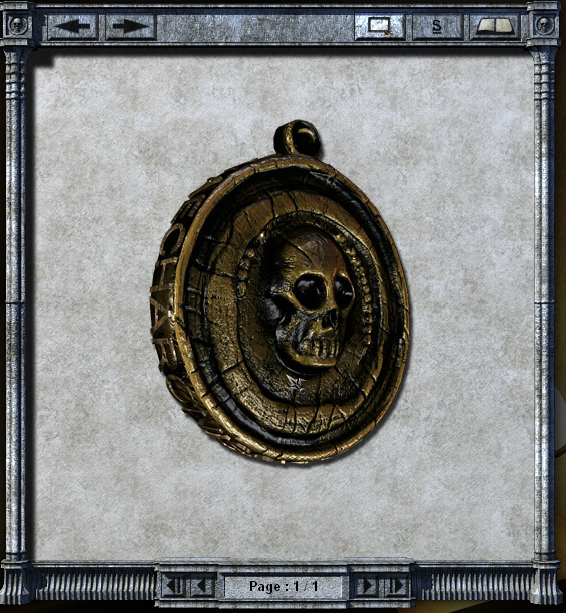
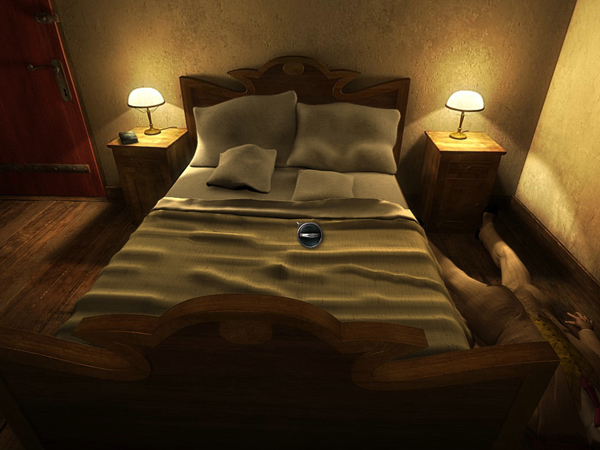
- After waking up turn around and have a look at your bed - grab the medal laying there
- Have a closer look at it in the inventory - its the one Maria was wearing in your dream
- At the left sight, you see a writing: Give Charon back, what belongs to Charon
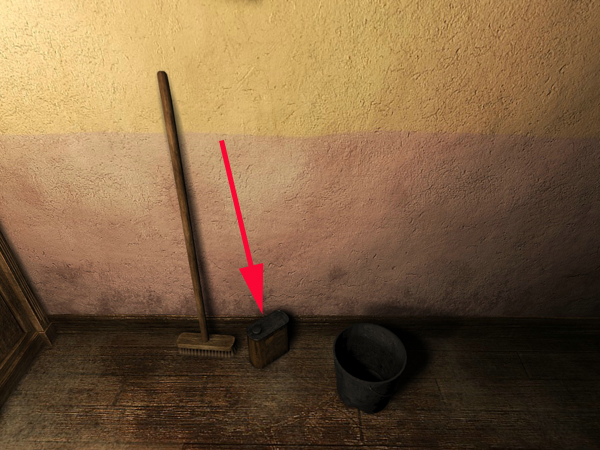
- Go down and talk to Ozana - you have to help her opening Stephan's room with out damaging the door
- Turn right and look down, there is a bottle with wax on the floor - Ozana allows you to take it
- Go up, knock two times at Stephan's door and try the door handle
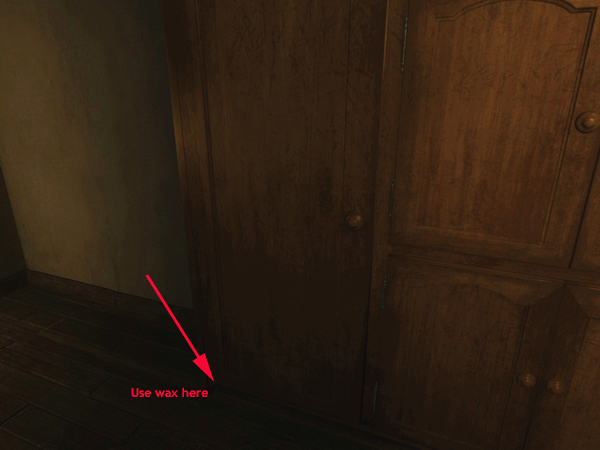
- Go back at your room and have a look at the closet
- You know, that there is a door behind, but when you try, there is no way to move the closet
- Get the wax out of the inventory and place it on the floor, left low corner
- Now you can move the closet and you see the door
- Drag the lock to the right and you can open the door with the door handle
- Enter Stephan's room

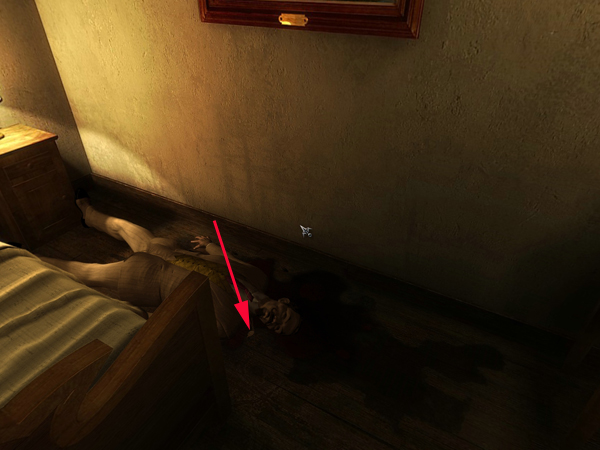
- Stephan's room
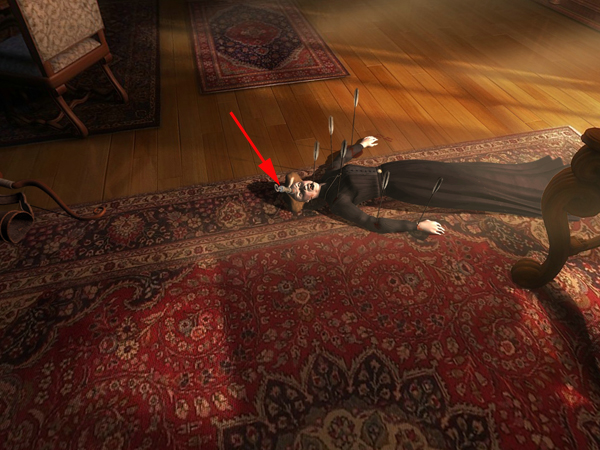
- Go straight ahead and you will find Stephan - he is dead
- Grab his amulet, he will not need it anymore
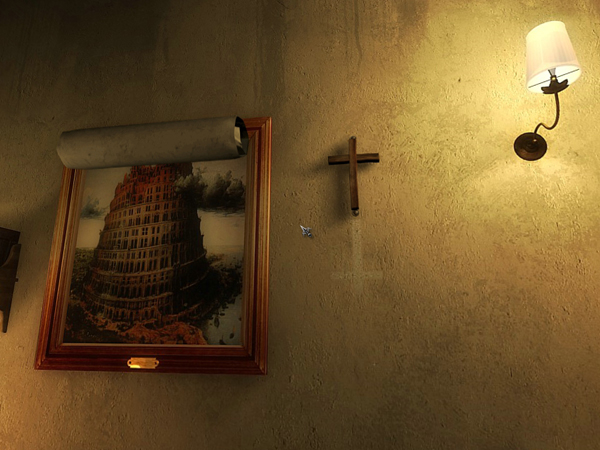
- Look up and you see, that the cross again is hanging upside down
- Place it at the upper nail
- Look at the painting left beside the cross - it was changed - click the low right corner to reveal the original painting again
- Turn to the bed, you can smell a strange medical odor
< 
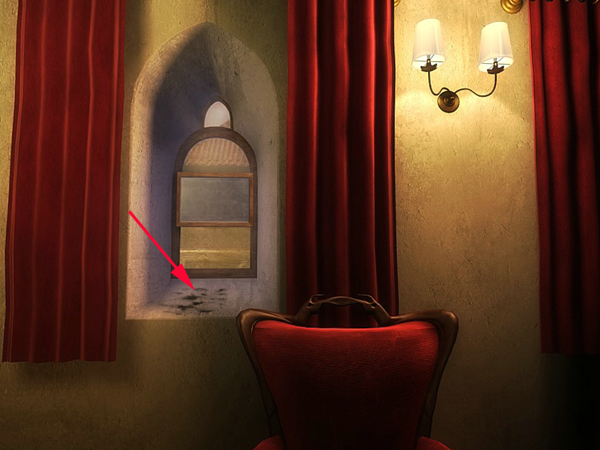
- Now look at the window, you see mud at the windowsill, the murder came through the window
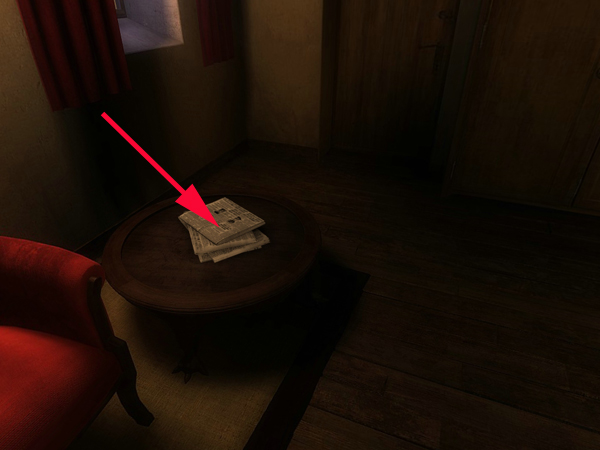
- On the table right next to the window, you can see some newspapers - read the articles, Stephan wrote
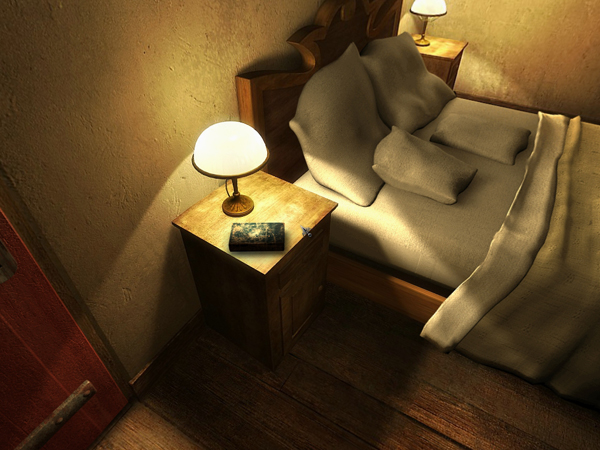
- Before you leave a room have a look right next to the door the nightstand and recognize a Greek bible
- Now unlock the door and go down to talk to Ozana
- To see the content of Stephan's trunk, you have to go up to the attic
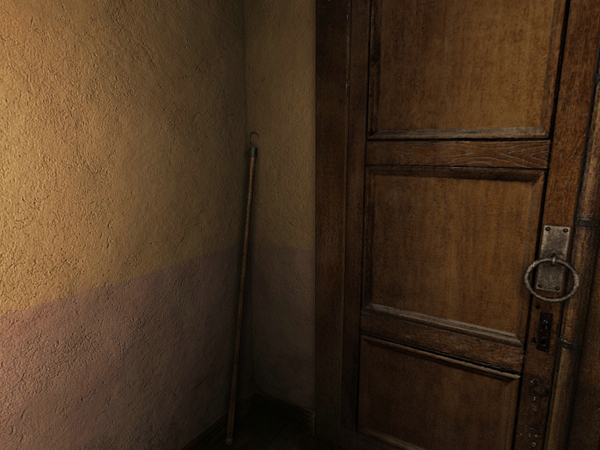
- Turn around and take the rod, the go op the stairs
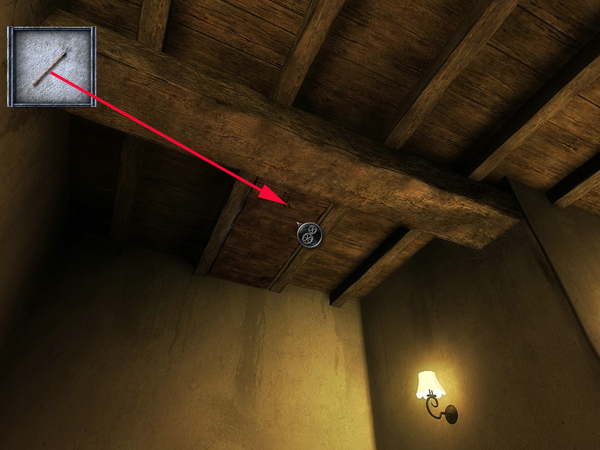
- When you stop, look at the ceiling and you will see the trap door
- Use the rod to open the door and enter the attic
- The attic
- Left side you already see Stephan's trunk
- Click the nameplate in the front to be sure and the click the top of the trunk
- A metal plate is covering the top
- Get Stephan's medal out of the inventory and place it at the empty spot left next to the metal place
- Drag the slot down an the metal plate will open
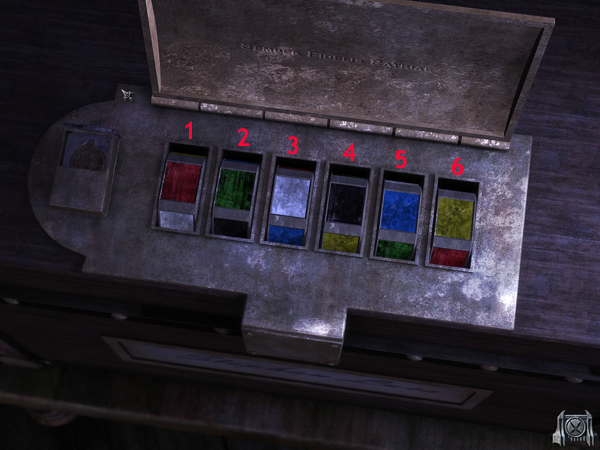
- You see a writing: Semper Fidelis Patriae on the plate now
- And below you see squares
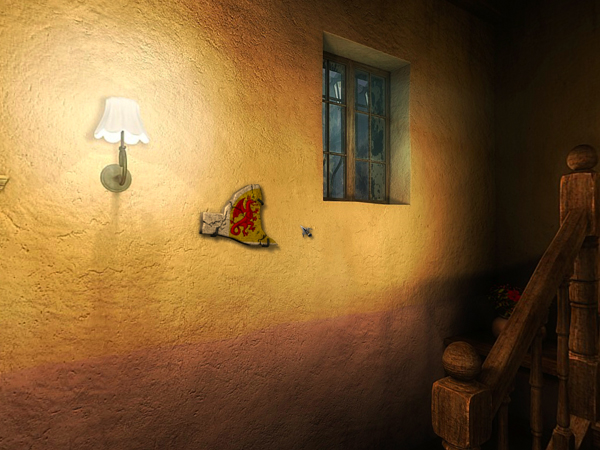
- You remember the flag at the war graves? The colors?
- Right, it was blue, yellow, red from left to right
- To open the box, you have to change the colors
- Seen from left to right 1 and 2 blue, 3 and 4 yellow, 5 and 6 red
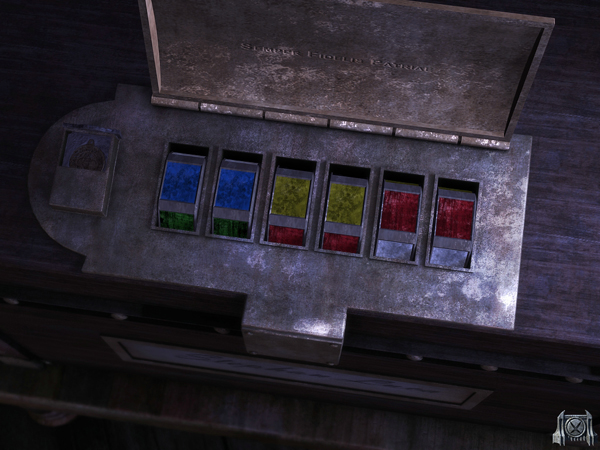
- By clicking one of the squares you can drag them up or down
- But: the squares do not only react alone
| 1 | turns 1 and 6 |
| 2 | turns 2 and 5 |
| 3 | turns 3 and 4 |
| 4 | turns only itself |
| 5 | turns 5 and 3 |
| 6 | turns 6 and 2 |
- Follow the order:
| 1 | turn up | 2x | will be blue |
| 6 | turn up | 3x | will be red |
2 |
turn up | 2x | will be blue |
| 3 | turn up | 3x | will be yellow |
| 4 | turn down | 3x | will be yellow |
- The trunk finally opens

- The documents at the left side, you already have seen
- Right side, you can grab a vial with holy water and a host
- Then click the letter from Martha, which was under vial and host and read it
- Also have a look at the photo - look at it with the magnifier, a symbol is shown on top of the rock
- There is nothing more to find, so turn around and have a look at the other trunk, right behind you
- The metal plaque tells you, that it is the trunk of Ionel Harter, the man who supposed to have killed his wife in 1870
- Look at the documents
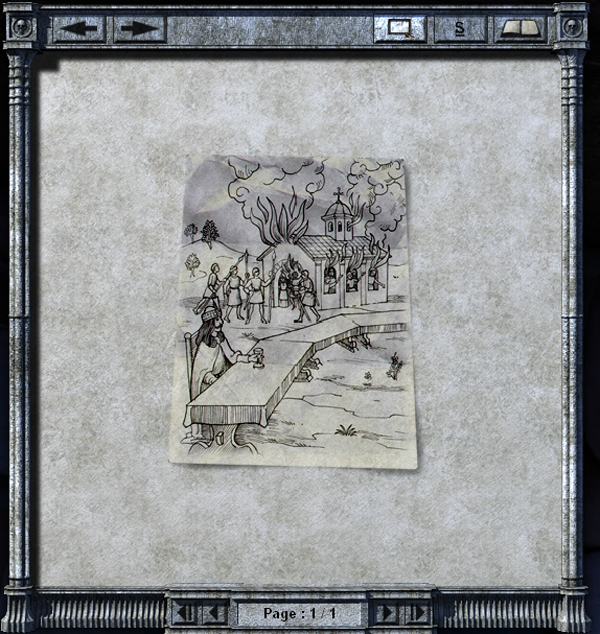
- The red one shows a sketch and a letter from Herman van Bergen
- The beige one shows a picture you have already seen in the book about Vlad Tepes - but this time, the soldiers are having spears in their hand
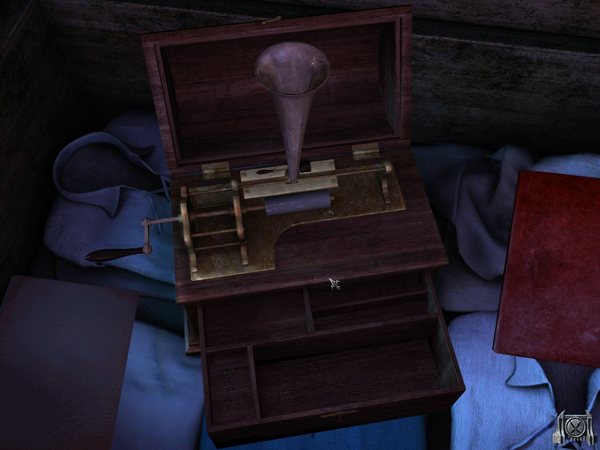
- Click the box behind an it will open
- You see a gramophone
- Get the single parts and place them at their right spot
- The needle is missing, so it is useless, at least for the moment
- Put the parts back and close the box again
- There is nothing else you can do here right now, so leave the attic, go down and leave the inn
- In the streets
- Move one step forward and at the crossroad to the right
- There you see Ionel - talk to him
- He tells you about his game - ask him to play
- Ionel will throw the disc first
- Then its your turn
- Your goal is it, to throw the disc further than Ionel without touching the wall
- Click the disc and hold the left mouse button pressed
- To throw the disc release the mouse button
- As longer you hold it, as more far the disc will fly
- Its a find out of the right moment, but you should play still you won
- When you loose, ask Lonel to play again with him
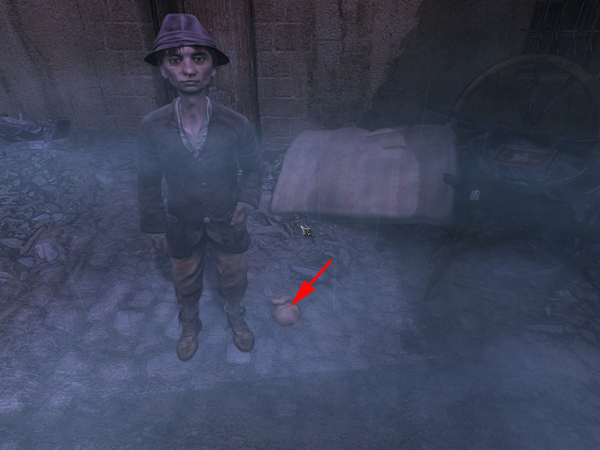
- After you won have a look on the ground, right to Lonel
- Its his sack with all his treasures
- Click it to get a nearby view
- Have a look at all items
- Pick up the silver needle, you will find wrapped in the white paper in the middle
- Ionel will give it to you
- Click the cloth and you will see Ionel's slingshot
- He wont give it to you, but trade it with something precious
- There is nothing in your inventory, he is interested, so go back to the inn
- The inn
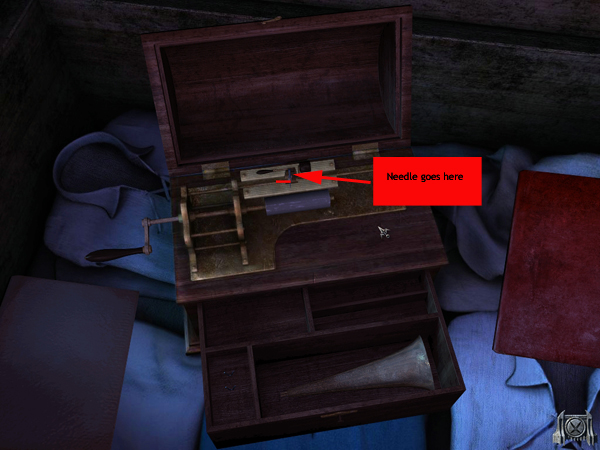
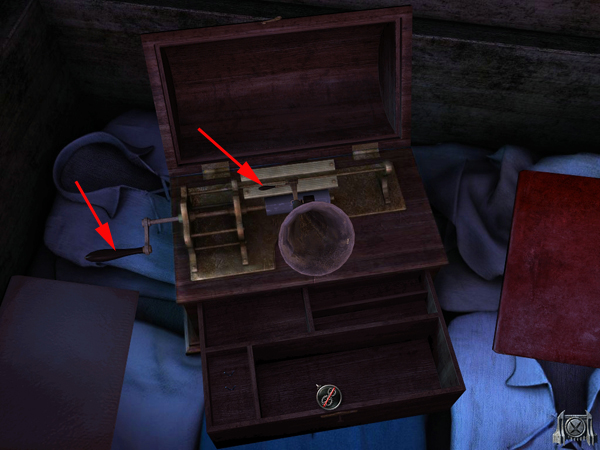
- Go up to the attic and open the chest with the gramophone again
- Place the parts where they belong to and get the needle out of your inventory
- Click the needle at the left side of the golden arm with the black handle
- Now click the arm handle, so that the speaker points with its top to you
- Click the handle left side to let the gramophone play
- Place all parts back and close the box
- You wont be able to take it with you
- Its time to talk again with Maria, so leave the inn and go to the dispensary
- The dispensary
- As usual you ring the bell and will find Maria in the kitchen (seems, she is not a very quick reader ;) her magazine is still open on the same page)
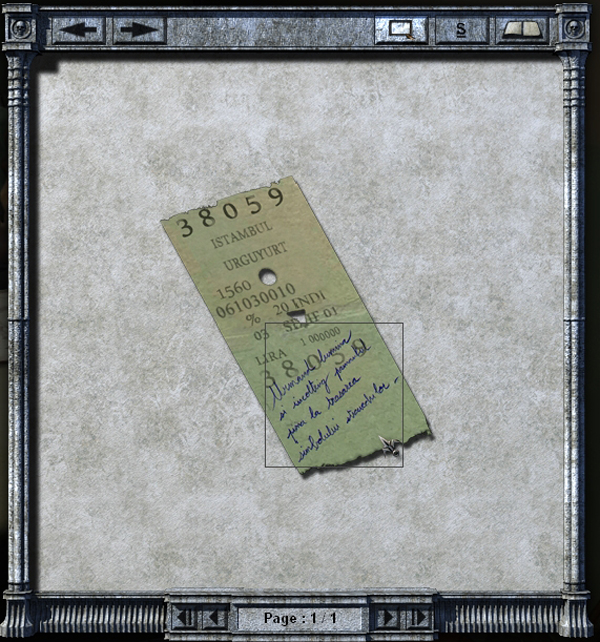
- Talk to her and ask her about Maria traveling to Turkey
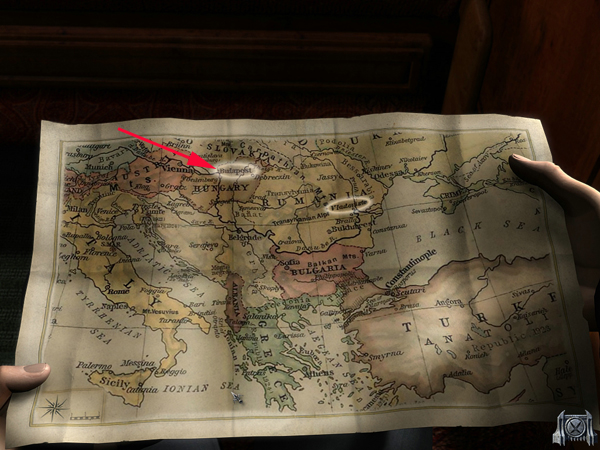
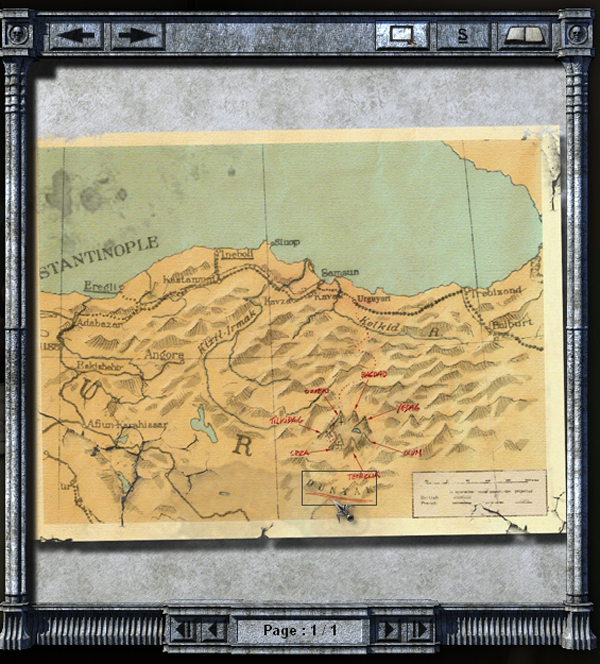
- She will bring you a train ticket - click it and point with the mouse on the handwriting to read, what is standing there
- Now click the card, at the bottom of the map, Maria already found the place, where you have to go
- As soon as you will close the map, you will find your self on the train to Turkey
Turkey, Urguryurt, September 25th, 1920[top]
- Outside the cave
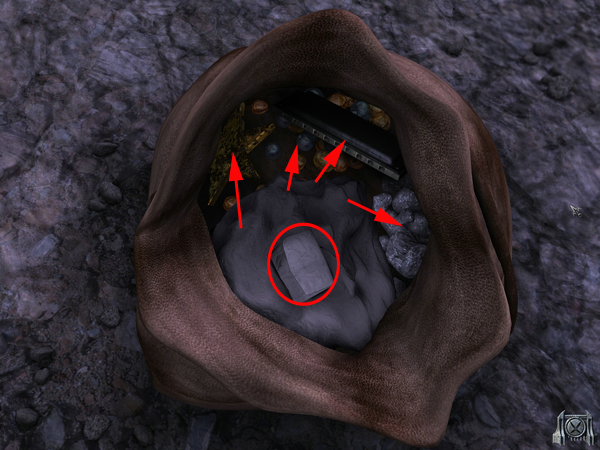
- You already made a fire - have a look at the ground
- You see a big stone - read was is written on
- Turn more to the left and click the bag pack
- It opens, pick up everything
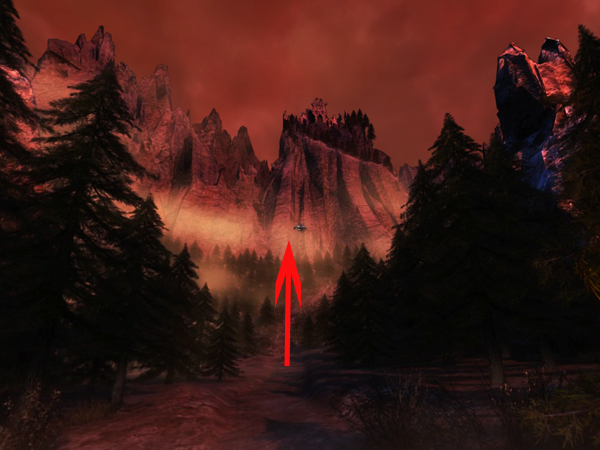
- Now choose the way between the mountains (the way where are no footsteps)


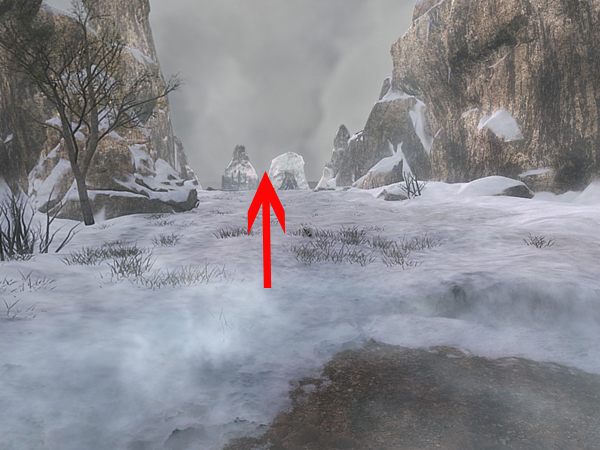
- When you look at the rocks in front of you, you see the rocks with the symbols, you know from the picture in Ions trunk
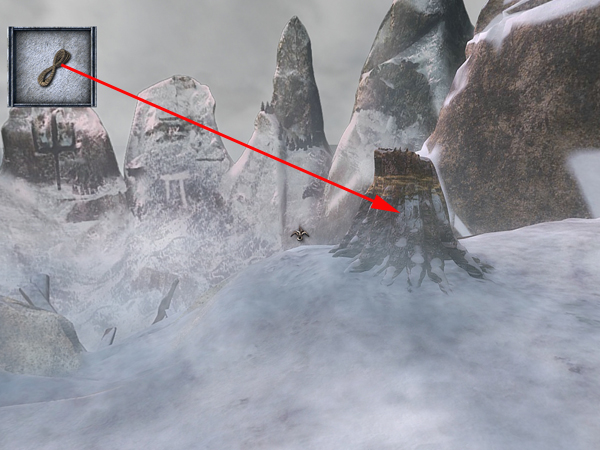
- Right beside you, you see a log
- Get your rope out of the inventory and click it after to climb down into the cave
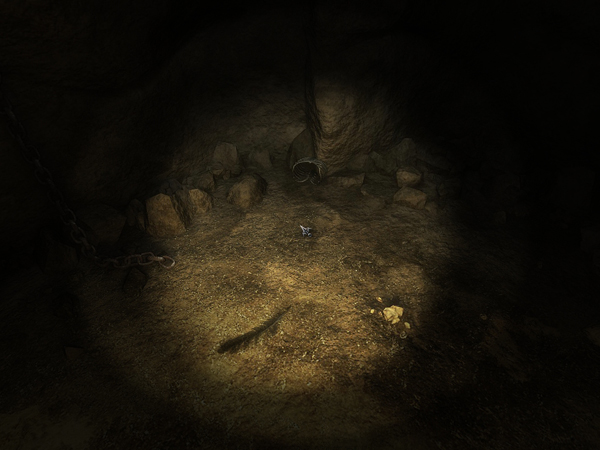
- Inside the cave
- Right side on the ground, you can pick up a feather
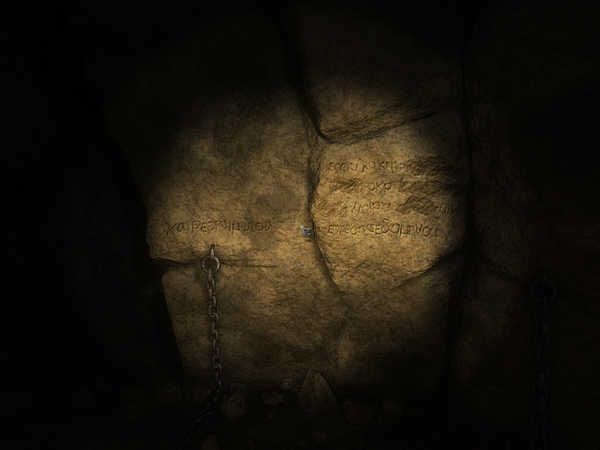
- At the wall behind, something is carved it, read it- it seems, that Vlad was really prisoned here
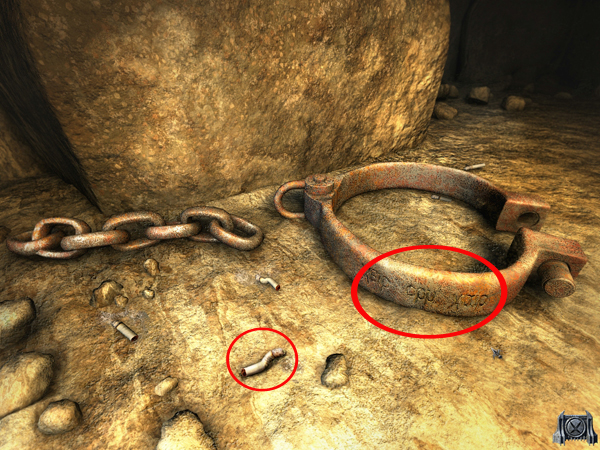
- On the left side of you on the ground, you see romanian cigarettes and an engraving at the shackle, but its not to read
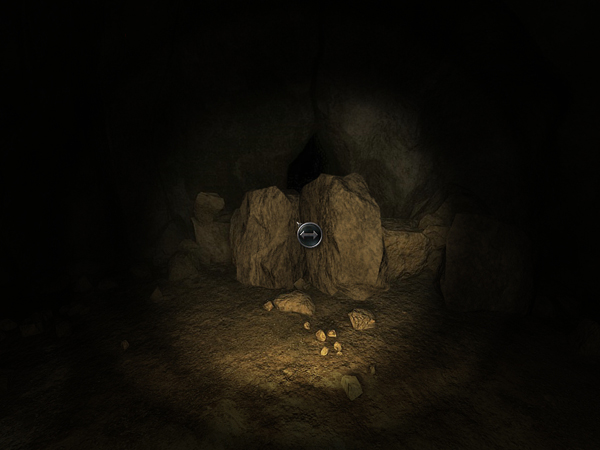
- Straight ahead big stones are in your way - when you move your cursor on it, you can move the stones beside
- Follow the path till you are in a kind of room
- Have a look around - you will see an altar, symbols at the wall and the roots show you, that you are not that far away from the surface
- When you stand with the back right in front of the entrance, in front of the stair, look on the ground at the right sight.
- You will see the gears
- Get the knife out of the inventory and use it a little more right from the stairs, where you see something like a crack on the ground
- Click the knife once and you will see a blue spot appearing.
- You remember the train ticket and what was mentioned on it - follow the blue light
- And this is your goal now - follow the blue light with the cursor by pressed left mouse button
- You have to stay in the blue line, when you are to slowly the line will disappear, another blue spot appears and you will have to start over
- The blue light is drawing a blue star of David
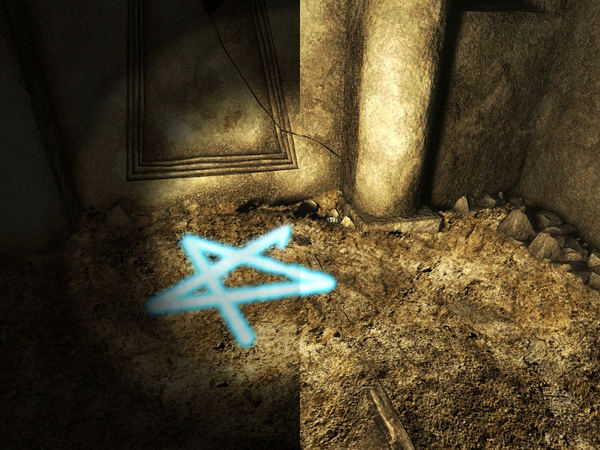
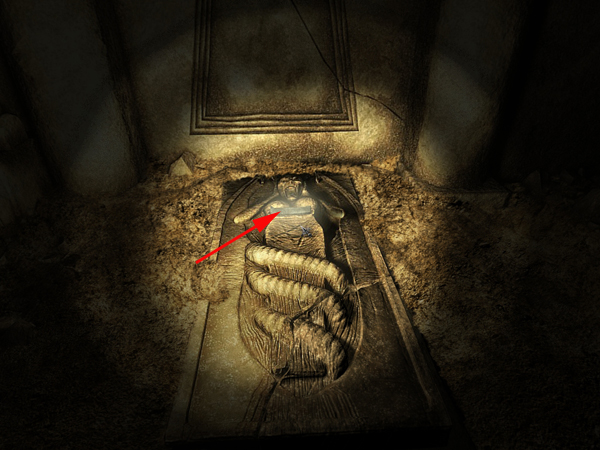
- When you managed it, you will see for a moment a screaming skull - then a statue appears on the ground
- It has kind of shining stone - grab it
- You can see some carvings on it, but others are not cognizable anymore
- As soon a you are out of the nearby view, you will see something slipping through a whole at the door on the other side
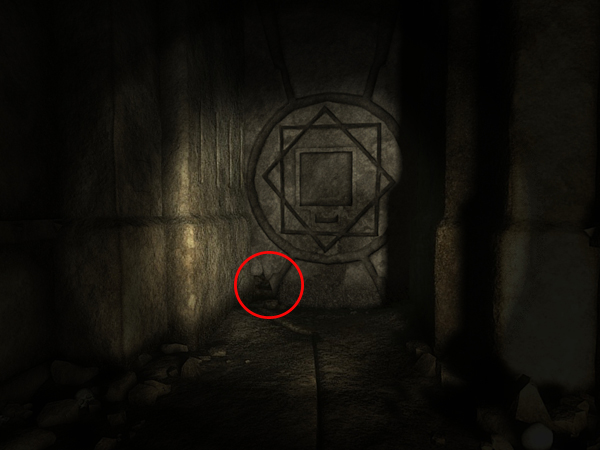
- Go there
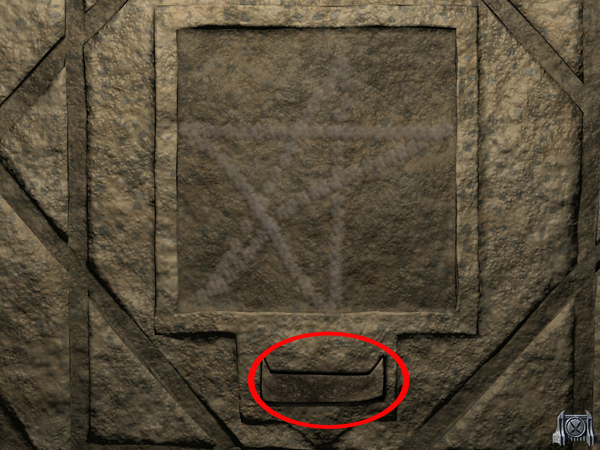
- In the middle of the door you see a square board
- Get the stone, you found before in the empty spot under it
- Hold your mouse button pressed and draw a star of David in one line inside the square
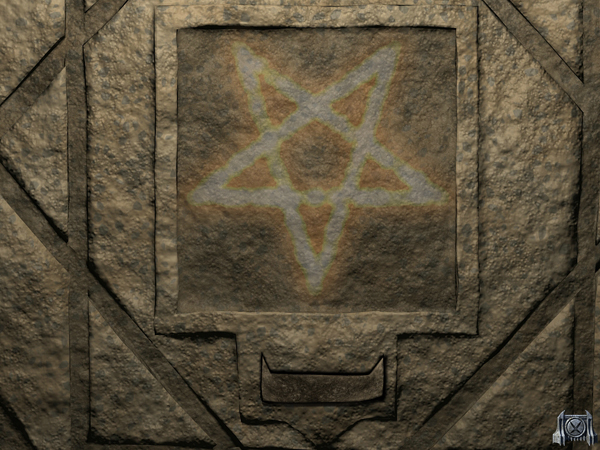
- You do not have to be accurat (as you see at my drawing), but you are not allowed to touch the frame and the star has to be pointed out in the right direction
- If you do it right, the star starts to glow and the door will open
- Outside
- Go up the stairs - you will come out at the place where you had the fire before
- You will see a fox running away and on the ground an injured bird is laying
- You have to make a fire for you and the bird now
- Get the brushwood next to the fire and put it on the cold ashes
- Get out of your inventory the cross and the bible and put it onto the brushwood
- Turn around to the engraved stone, its covered with snow
- Grab the rag out of your inventory and clean it
- Now get a match out and light it at the stone
- Turn around and light the bible with it
- After a night full of visions you go back to Vladoviste by train
Vladoviste, September 28th, 1920[top]
- In the streets
- When you arrive, talk to Luana
- You might like to play with her - if so, make sure you press the play-button in the right upper corner
- This is the only way to make Luana choose a die first
- If you don't want to play it has no consequences for your game
- Now go the street right next to Luana
- Recognize the scribbling at the walls
- Go right to see first Maria
- The dispensary
- You recognize the scribbling at the wall of the dispensary as well
- Ring the bell - you will find Maria in the kitchen
- Talk to her
- As she don't want to leave the town, you go now to the inn (just straight forward)
- The inn
- (Sound needed!)
- Ozana is already awaiting you
- Talk to her and go then into your room
- When you enter your room you hear the telephone in the hall ringing
- Leave the room, you hear Ozana talking - but don't go down stairs. As soon you will do this, Ozana will finish the call
- Then you have to go back, leave the room again
- After Ozana drops the phone, go back into your room
- Read the letters you received while you have been away
- Below the threating letter, you will find the documents about the Thule Society members from Irina
- Read all and go down to call Irina
- She has more documents but she don't want to send them by post, so you will have to leave and go to Budapest again
- Leave the inn, go to the station and enter the train - choose Budapest on the map
Budapest, September 30th, 1920[top]
- Office Irina Boczow
- When you want to enter Irian's office, you see, that the door was forced open
- You enter and find Irina dead on the floor
- Grab the syringe from her forehead
- Look at the desk and grab right side the spool and the box of thumbtacks
- Look at the right side - you know the books from your first visit, but this time you see an index card flag on the top of each book
- Each flag shows four letters: IIBV, INRI, MXVX
- Turn around to the fireplace - the library's catalog is only ashes
- Turn left and click the safe for a nearby view
- The password shown is now DRACULA but the door is closed
- When you try out the old password, you will see, that it is not working anymore
- So Irina changed it, but what could it be?
- The first password was the year of birth of Herman van Bergen, so maybe the year of death now?
- Herman van Bergen died in 1913 - in Latin it would mean: MCMXIII
- It works, the door opens and you can get the wax cylinder
- Now turn around and go to the library
- The library
- Turn left and you see a box - click it to get a nearby look
- You need a code to open it and the text is telling you that the green letter a helping you to find the code. Also you learn, that a circle will help you
- To find out, which letters exactly you need, get a thumbtack out of your inventory and place it in the middle on the colored line
- Now get the spool out and click it at the thumbtack
- When you now drag the spool with pressed mouse button you will see a thread - drag it to the green V of the Word Veritas
- Release the mouse button and make a circle with your mouse - you will see, that the thread will form a circle
- The circle will close as soon as you connect the both parts
- Look at the green letters which are touched by the circle
- In the right order, starting with the V you can spell the word VIRGO (virgin)
- Leave the nearby view and use this as password
- The box opens and you will see a vase
- Look at it and then leave the nearby view
- The libary has the shape of a six point star and has five rooms
- All rooms entrance's do have a latin saying at the top
- Inside you will see in each room 5 shelfs, each with a latin saying on top and each with 5 compartments which also do have a latin title, each book has a letter underneath
- You remember the index card flags? They should help you now
- When you look around, you will find in three of the rooms white "ghost books"
- Irina told you, that she places ghost books, when she takes out a book
- So the ghost books should stand at the place of the books on the desk
- You have to find out, if there is a connection between the placement of the books and the index card flags
- You need the last letter of every special name of room, shelf, compartment and the letter of the book
| Room Name | Shelf Name | Compartment Name | Letter of book | |
| Nil admira i | Uti non abut i | Dene b | V | IIBV |
| Memento Mor i | Possum no n | Iza r | I | INRI |
| Nil minimum, satis est: ne sit et hoc minimu m | Om nis homo menda x | Rotane v | X | MXVX |
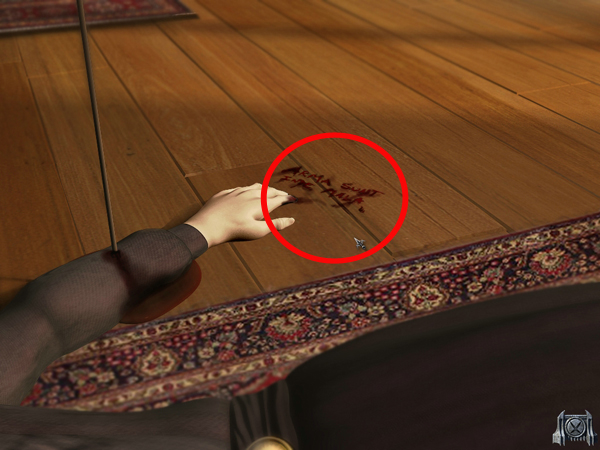
- The words, written in blood next to Irina also had four letters
- Find out, which books Irina wanted to point on shortly before she died
| Room Name | Shelf Name | Compartment Name | Letter of book | |
| Ad astra per asper a | Incerta curatio, certus dolo r | Grumiu m | A | ARMA |
| Felix qui Potuit rerum cognoscera causa s | Possum no n | Iza r | T | SUNT |
| Nil Admirar i | Nomen est Ome n | Alfra d | E | INDE |
| Nil Nimium. Satis est: ne sit noc nimiu m | Acta est fabul a | Niba l | A | MALA |
- The book in the ARMA section is stolen
- Read the books of the INDE and the MALA section
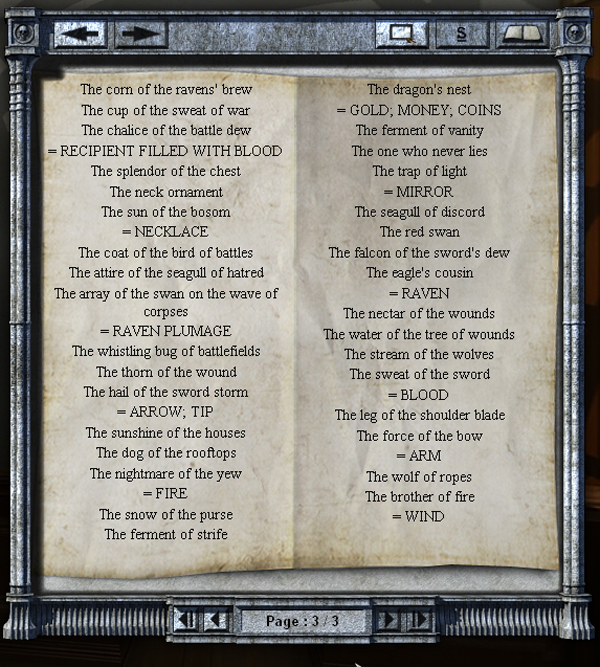
- The book in the SUNT section includes on page 3 a kind of game which you do not have to solve, if you don't want - it has no influence on the ongoing of the game
- Your goal would be to bring the sentences together, which have a referring metaphor
- Click and drag a sentence to where it belongs to in your opinion, different metaphors have to be separated by a break
- You will have 2 metaphors with 2 sentences
- 7 metaphors with 3 sentences
- 2 metaphors with 4 sentences
- Its time to leave
- Leave the office and go back to Vladivoste
Vladivoste, October 2nd, 1920[top]
- The graveyard
- At the station you realize, that Luana is gone
- Go two steps forward to see Lionel and ask him about the inscriptions
- Turn to the left and move on to the graveyard
- Open the gate and see the burning church - move two steps forward and talk to the grave digger
- Go through the complete conversation
- Talk to him twice, then turn around and click to go to the entrance - he will say some more
- Now go and see Martha's mausoleum - its closed
- Leave the grave yard and go to the inn
- The inn
- Talk with Ozana and go up to your room
- Open the door with one click - DO NOT enter, otherwise you will die
- There is string between the door and the door frame
- Get the thumbtacks out of your inventory and place one at the door frame, where the string is attached
- Place a second one at the door, where the string is attached
- Get your knife out of the inventory and cut the string
- Now you can enter and you see Maria's bird sitting at the window and then flying away
- Go to the table and read your mail, but do not open Irina's package
- We will have to come back later to do so
- Go down and talk to Ozana - insist till she hands out the letter to Janos, that is laying on the desk
- Its time to see Maria, so go to the dispensary
- The dispensary
- Ring the bell, but as nobody answers, just open the door and enter
- Turn to the right and enter the kitchen - as soon as you enter the kitchen, a light stroke near by shuts down the power
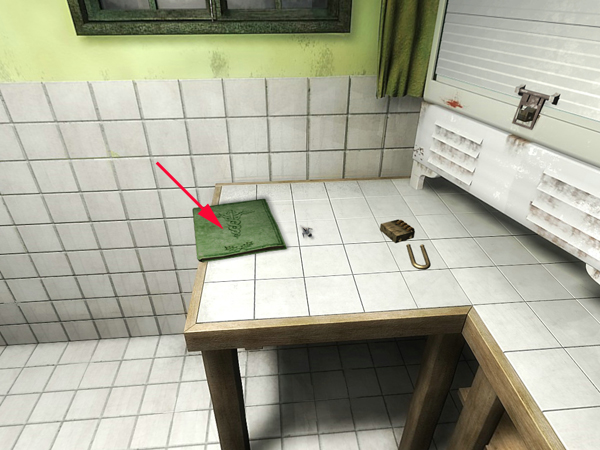
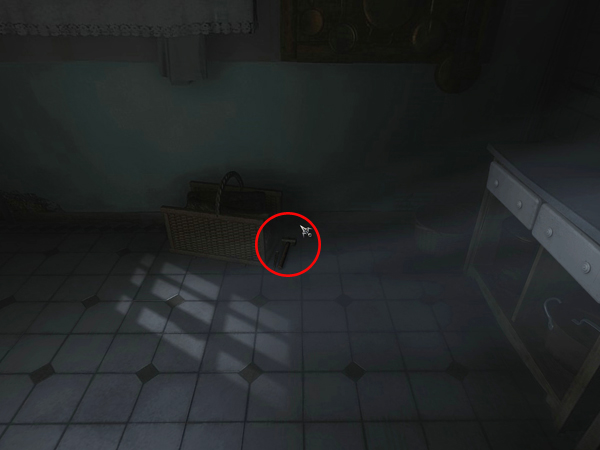
- Straight ahead on the floor you will find stake and hammer
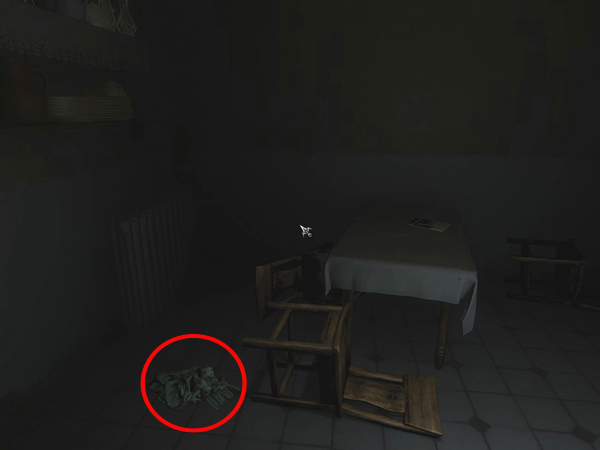
- Turn to the left and grab Maria's shawl, covered with blood, from the floor
- Use the door to the backyard
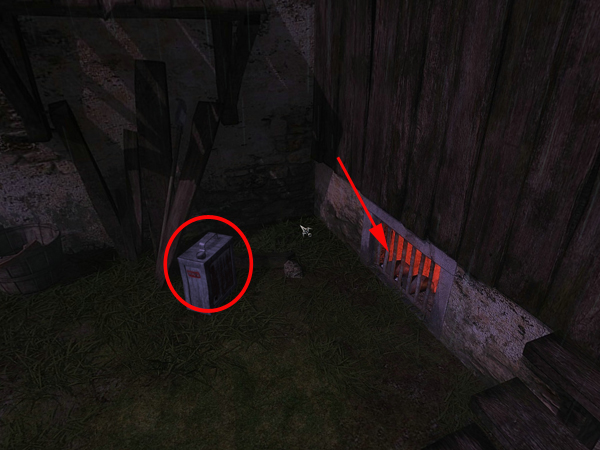
- Backyard/Shed
- Turn right and click the dog - he is afraid of you
- Turn left and grab the empty can on the ground
- You see the red light in the cellar window
- When you enter the shed, you see a shadow dissapearing at the end of the aisle
- Go one step further and turn to the left shelf of the aisle
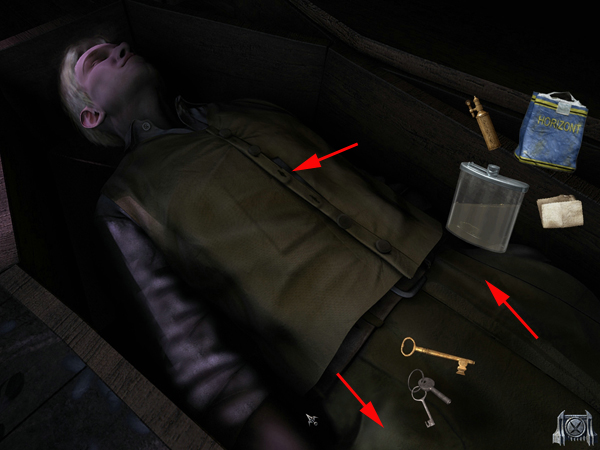
- Click the coffin and open it - it is Janos
- Search his right pants pocket and find a key ring with keys and a single golden key
- In the left pocket you will find cigarettes, a lighter, a canteen and a note
- Click the note to read it - it goes into your inventory
- Click his vest - you will find some paintings, which seem to come out of the collection from H.v.Bergen
- Turn left and open the other coffin - you will find a man, bled dry
- Turn left and look on the ground - click the hatch and go down
- Go one step further and turn to the right - click the wooden fuse box to open
- You will see broken fuses
- Don't touch the ON/OFF handle right now or you will die
- If you do so, you will be able to start over exactly at this point
- You will see 9 slots for fuses, four fuses are blown
- Top row, from left to right: kitchen - developing photo room - hall
- Middle row, from left to right: laboratory - treatment room - maria's bedroom
- For now, grab the first in the middle row and the second in the first row and place on two other spots
- As this, you will repair the laboratory and the developing photo room
- Now get the copper wire out of your inventory and click it on the first fuse in the middle row
- After this, repair the second fuse
- If you have repaired other fuses you can click to get the repaired fuse out and place it, where it is needed
- Now turn the handle on ON
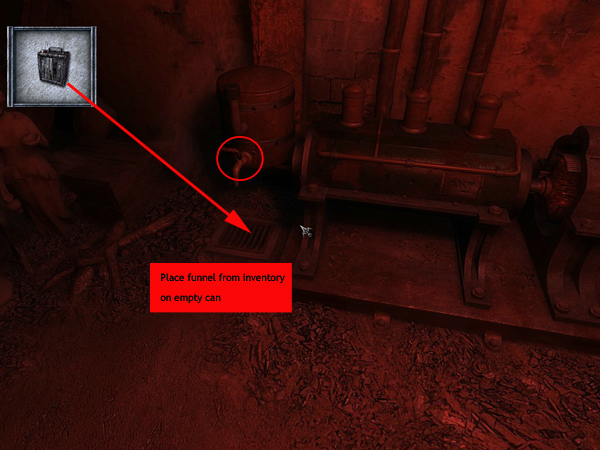
- Turn around and have a look at the generator
- Get the empty can out of the inventory and place it on the grill, left side on the floor
- Get the funnel out of your inventory and it on the empty can
- Now click the faucet and the can will be filled with oil
- Grab the oil can to get it back into your inventory
- You are done here now, leave the shed and go back into the house
- You will hear the telephone
- Go in the hall and answer it
- It's Prof. von Krüger - he wants you to do the analyzes
- Leave the dispensary again through the kitchen door
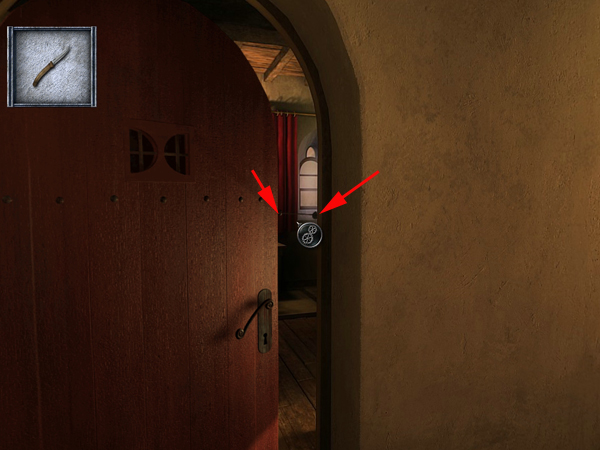
- Go left and again left at the shed
- Turn right and use the golden key from your inventory at the door
- Maria's room
- Enter the room and have a look around
- The voice you here is a bird in the corner behind you
- Grab the grain, that is in the feeder
- On the floor you will find a feather
- Now pick up the tweezer, right side of the dresser
- On the left side you can grab an empty metallic box
- Left next to the dresser you will find a box on the floor - open it and get the acetic acid can
- Behind this, you see a red cloth - click it to move it to the side and get the painting
- Its a painting form Martha and Maria (the bible figures of course)
- Place it at the free spot on top of the dresser
- Have a look at the bed and see the magazines
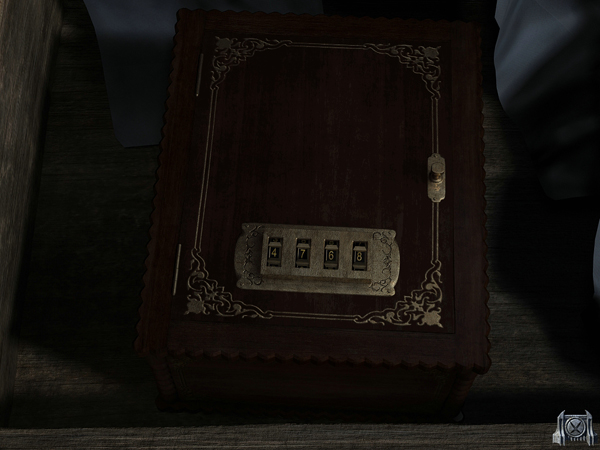
- Turn back to the dresser and open the bottom drawer
- Click the clothes, at the left side you will find Martha's box
- It has a number lock, so you will have to find clues for the code
- Remember what Martha was writing in one of her letters: To find the key, carefully observe the order of the paintings on the wall
- You can replace paintings by clicking the on the hook - have a look at the different colors at the wall and bring them in the right order
- To storage a painting for a moment, place it next to the drawer, where you found the painting from Martha and Maria
- The right order is:
- Right side above the dresser - Martha and Maria
- Left side above the dresser - Funeral of Patroclus
- Wall at top of the bed - Gymnosophist
- Wall at side of the bed - St. Sebastian
- Click at each painting at the wall and have a look at the low right corner of the frame- use the magnifier
- You will find references there:
- Gymnosophist: A4
- St. Sebastian: A7
- Funeral of Patroclus: B6
- Martha and Maria: AD8
- Martha said: Observe the ORDER, so get a nearby look from the box again and try out the orders, that she could have talked about: The references of the paintings from left to right or from right to left
- The correct order is the one from left to right, change the numbers to 4 7 6 8
- The box opens - have a look at the contents
- You will find a picture of Martha with uncovered face and a key with a tag
- Turn around and open the closet - the dresses seem to be from Martha


- The photo development room
- Now open the door where you see the light - it's the photo developing room
- On the light box you see a photo from Martha - click it
- By accident you will throw a bottle with acid over it
- Click the bottle (upper shelf, left side) - get the acid out of the inventory and refill the bottle
- Clean the light box with the sponge from the sink right next to the table and put the sponge back afterwards
- Now get the letter from Janos out of the inventory (you got it from Ozana after you came back from Budapest) and place it on the light box
- Have a close look, you will see that some of the letters are having holes underneath
- When you write down all letters, you will get:
- CCHHHHOONANASHHO
- Or, in "chemical" language: C2H4O2, Na2S, H2O
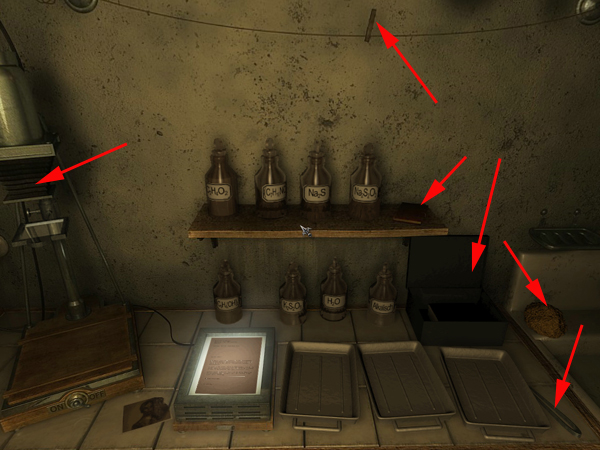
- Get each bottle from the shelf (or under the shelf) and mix one drop each on one tray only
- Click the faucet and clean the sponge, dip into the mixture and wipe Janos letter with it
- Have a nearby look at the letter again: Behind the last K on the letter there is something looking like a square
- Get the tweezer out of the inventory and grab it - it goes into your inventory
- Get it out there and click it on the glass plate of the enlarger left from the light box
- Now get the book at the right side of the shelf. It tells you, what you need to develop a photo
- Clean the sponge and the tray in the sink
- Now prepare the mixtures
- Left tray: Hydroquinone C6H4(OH)2, Metol (C7H10NO)2SO4, Sodium Sulfite Na2S, Alkaine mix and distilled water H2O
- Middle Tray: Acetic Acid and H2O
- Right Tray: Sodium thiosulfite Na2S2O3 and Potasiium Metabisulfite K2S2O5
- Now change the light with the switch above the sink
- Open the black box left next to the sink and take the tongs from the table in front of it
- Click with the tongs into the box, hold the mouse button pressed and drag the paper onto the enlarger on the left side
- Release the mouse button and turn the switch from off to on
- Take the tongs and drop the paper into the left tray - count off 12 seconds
- The game will not give you any clue, but when you get the paper out to early or to late, it tells you, that it can go into the trash. So you have to count off. The same for the next two trays
- Place the paper in the middle tray and count off 7 seconds
- Place the paper in the right tray and count off 7 seconds
- Now place the paper at line with the clothspin above the shelf
- Look at the dried photo and use the magnifier - its the place in Turkey, where Vlad was prisoned
- The three hills show a symbol each - the symbols of the Thule society
- Now leave Maria's rooms and go outside
- Backyard
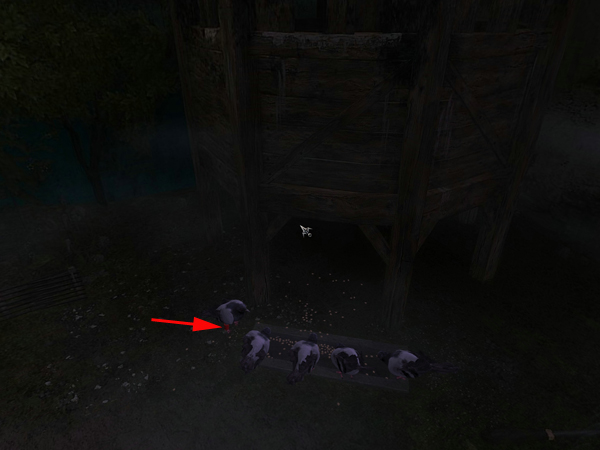
- Have a look at the ground in front of the pigeon coop - there is a bird feeder
- Get out the grain from your inventory and place it there
- The pigeons will come down
- Have look a the left one, it seems, there is something at her leg
- Click it and you will receive a Schwartz filament and a note from Prof. Krüger
- Read it and enter the shed again
- Go down, open the fuse box and pull the handle to off
- Change the fuse from the developing photo room to the treatment room
- Go back to the dispensary
- Dispensary / Treatment room
- Paper and pen is needed
- Go to the treatment room
- The first steps are the same procedures as the first time - sterilize the instruments
- After you got the instruments back have a look at the door to the backyard - because of the steam from the cooking water you can see a message on the glass part of the door now.
- Go into the treatment room and draw blood
- The bottle 815 does have to go in the fridge box
- Dispensary / Laboratory
- Go into the next room - the number code has been changed
- To find out the new one, you start with the changing the number left
- Just move one step up or down
- After this, click the hook, to see, if it moves a little
- When you found the right number, do it with the second number from left- and always click the hook after each number, so see, if the hook move a bit more
- Go on till you found all numbers
- The right combination would be 1 0 4 2
- Place the bottle 815 in the middle shelf
- Click the bottle 814 - there is not as much blood in as it was before
- Close the fridge box - go back into the kitchen and sterilize the filament, like you did before with the instruments
- Go back into the laboratory
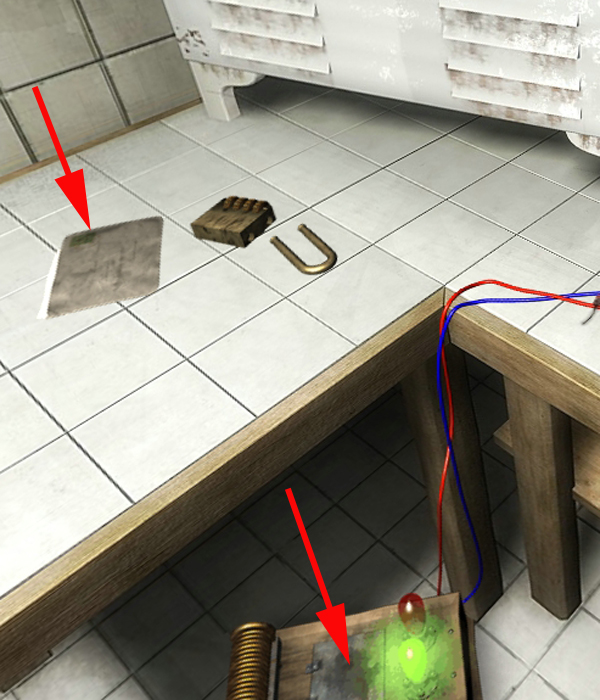
- Look at the battery on the floor - the bulb does not work
- Open the panel and get the acetic acid out of your inventory
- Fill it in the open panel and close it again
- Now place the filament on top left at the sampler right next to the fridge box
- Get the letter, that is laying on the left table and read the instructions - make sure, that you read the last page
- Wash your hands at the sink, then grab one of the test tubes. open the fridge box and click the test tube at one of the bottles with blood samples
- Close the fridge box
- Place the filled test tube at the holder at the bottom of the sampler
- Click the handle at the left side, so that the filament will go inside the test tube
- Cick the + button so that the filament will be charged
- Take the filament with the sample and place it on the microscope at the right side
- Click the eyepieces to look at the sample
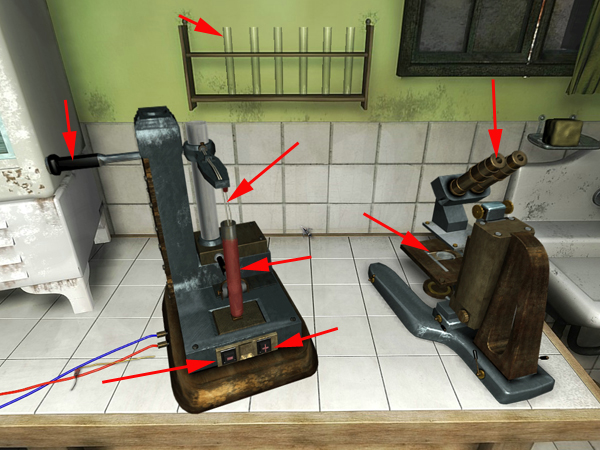
- You will have to note three readouts
- On the top right you see two icons
- The left one is for the mononucleated granulocytes
- The right one is for the polynucleated granulocytes
- 1. Readout: When you click one icon it will be highlighted and show above the readout
- 2. Readout: To get the result from the second icon, you first have to click the left one again
- Note both % - quotation
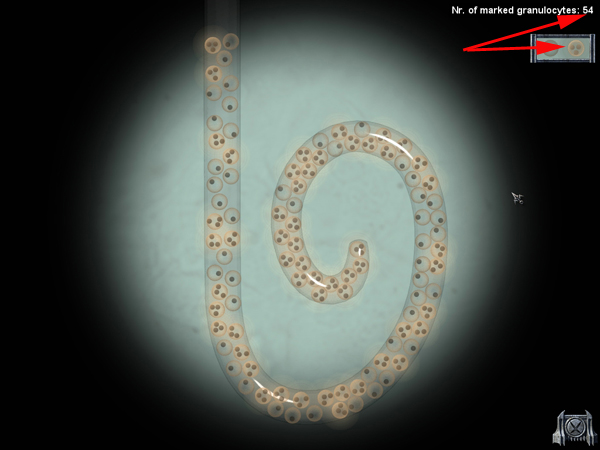
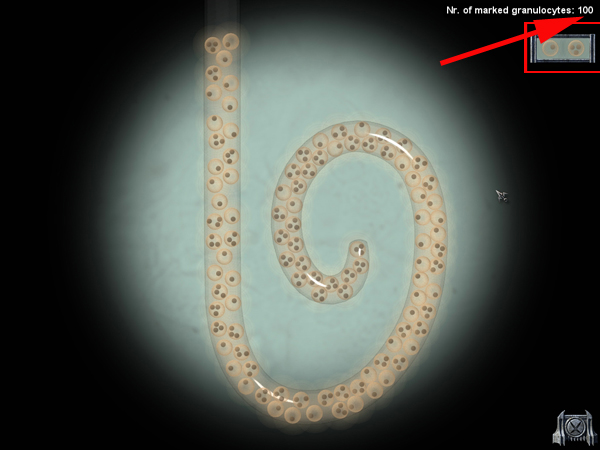
- 3. Readout: Now highlight both icons by clicking and note the % - quotation of the total marked cells also
- Take the filament and place it back on top of the sampler
- Now follows the second part:
- Lower the filament by using the handle at the left
- Press the - button at the bottom of the sampler - this will eject the marked cells into the test tube and mix it with the unmarked cells
- Use the lever, lower the filament and use the + button to get the next sample
- Grab the filament and place it on the microscope, click the eyepieces
- 4. Readout: On the top right, you will again see the % - quotations - note it
- Make sure, that NONE of the icons is highlighted and note it
- Place the filament back on top of the sampler, use the lever and click the - button
- Get the test tube out, place it back on the shelf, open the fridge box, get a clean test tube and do this now with
- Now we come to the interpretation:
- As exampler we use Janos Pekmester (812)
- Get the blood test report - There are 3 results have to be entered
- 1. the percent of mononuclear granulocytes - Janos sample show 89%
- Click the right empty field from the field in front of the slash and click till it shows the 9, then click the field left to the 9 and click till the 8 is standing there
- The percent of polynuclear granulocytes changes automatically - for Janos you will see the 11 in the fields behind the slash
- 2. Total granulocytes/ml of blood by calculations using the percent marked granulocytes in the mixed sample
- 100 (total marked granulocytes (number that was shown in the 3.readout)) x 100 : % marked in the 4. readout
- For Janos, that would mean: 100x100/7= 1428,5714 = 1429
- 3. Diagnosis:
- P anomaly: % mononucleated granulocytes is a lot less than polynucleated granulocytes
- Unknown anomaly: % mononucleated granulocytes is a lot more than polynucleated granulocytes
- No anomaly: % mononucleated granulocytes is approximately equals to polynucleated granulocytes
- Do this with the donors 811, 812, 813, 814, 815

| Number | Name | Readout 1 |
Readout 2 |
Readout 4 |
Total |
Diagnosis |
| 810 | Maria Florescu | 100 |
0 |
6 |
1666 |
Unknown Anomaly |
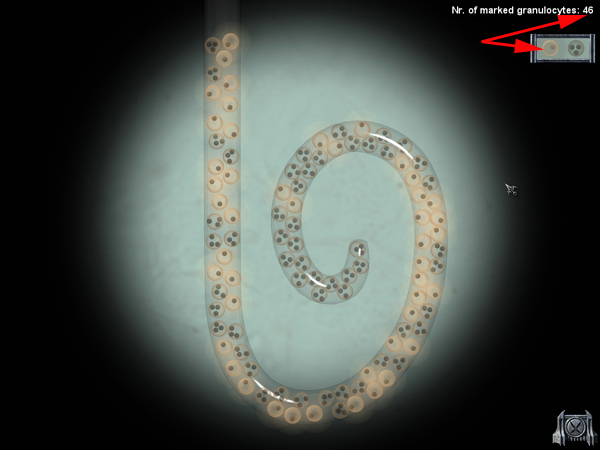
| 811 | Ionel Martiescu | 46 |
54 |
10 |
1000 |
No Anomaly |
| 812 | Janos Pekmester | 89 |
11 |
7 |
1428 |
Unknown Anomaly |
| 813 | Stephan Luca | 57 |
43 |
10 |
1000 |
No Anomaly |
| 814 | Arno Moriani | 56 |
44 |
9 |
1111 |
No Anomaly |
| 815 | Arno Moriani | 81 |
19 |
7 |
1428 |
Unknown Anomaly |
- When you filled out everything right, Arno will tell you after the last result
- If not, you might have to test then Readout 4 again or redo your calculation for the Total
- When you where right, you will hear someone and the door will be slammed shut
- Click the door to make sure, that it is really closed
- Get the acid out of your inventory and use it at the door, on the top hinge
- Leave the lab and go into the hall - before you can leave, you will automatically call Prof. Krüger
- Leave the dispensary and go to the inn
- The inn
- Go upstairs and enter your room
- Open Irina's package with the knife from your inventory
- Get the metal box from your inventory and click it onto the garlic
- Leave your room and enter Janos' - the one across from yours
- Janos' room
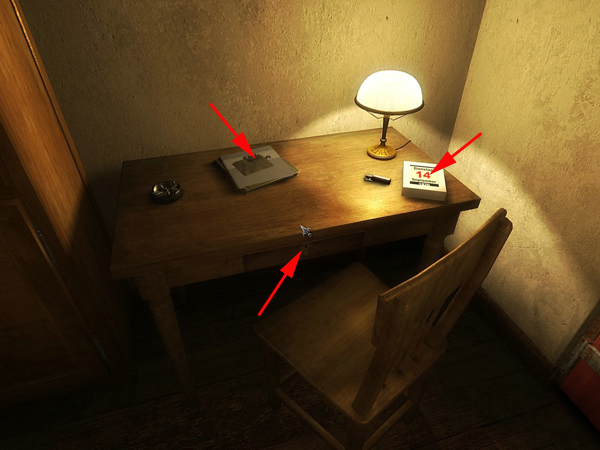
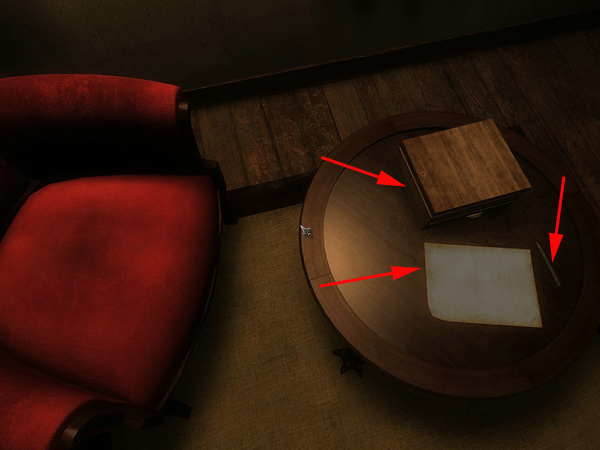
- Turn to the left and examine the desk
- Take the lighter and and look at the calendar, that shows Dienstag (Tuesday) September 14, 1920
- Read the letter and the Thule brochure, have a look at the Blood of Dragon
- Get the bunch of keys out of your inventory and open the desk drawer
- Look at the german passport - Hans Beckermeyer, but the photo of Janos
- Hans Beckermeyer is of the subscribers to Thule Society
- Look at the pages of Vlad's biography
- Turn to the left and have a look at the table by the window
- Pick up the pencil and use it three times in a row on the paper
- A code map will appear - each one with four letters
- The word September has the first five letters underlined and roman numerals (IV III I V II (4,3,1,5,2)) behind
- Use the bunch of key again to open the box
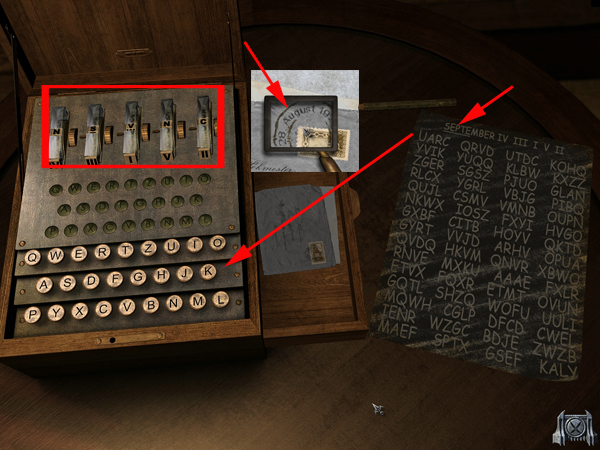
- The bars on top of the box show roman numerals and letters
- The letters can be changed by the little wheels right next to the bars
- Make sure, that the bars are showing the roman numeral order, you see on the code paper
- If not, you can change them by clicking one - it gets out of its spot
- Now click it at the position you want to have it - it will change place the one at this spot
- Do this, till the order is correct
- Now change the letters of the bars by moving the golden wheels up or down (pressed left mouse button)
- They have to show the underlined letters from the code S E P T E
- When everything is ok, start clicking the letters from the code paper at the keys at the bottom of the decode machine
- You have to read row wise from left to right
- UARCQRVDUTDCJOHQYVIKYUQQ
- Have a look at the bottom, you will see that typing this code letters will bring readable words which are shown.
- After typing a few lines, the code will automatically decode the complete letter
- Read the decoded report
- When you are making a mistake, you will have to leave the nearby view of the box and then come back to start over
- (Note beside: When wondering about the order of keys on the machine: Remember, its coming from Germans - and they use a diffrent order on letter keyboards, as they do have more letters like ä, ü, ö, ß)
- Now get the letter which is laying in the drawer of the machine and place it onto the code paper
- Click the envelope and use the magnifier to see the date on the stamp: 20th of August
- Remember the calender on the desk? September 14th is a Tuesday - counting back brings you to the result, that August 28th is fallen on a Saturday.
- There is a note from Janos in your inventory with days and numbers, but the numbers for Saturday are not to see
- To find the right numbers you have to study the note carefully
- The numbers move position based on its number to the right
Day |
1 |
2 |
3 |
4 |
5 |
| Sonntag (Sanday) | 2 |
5 |
1 |
3 |
4 |
| Example: On the right side of the 2, we find the five - 2 has to be at the fifth place on Monday | |||||
| Montag (Monday) | 5 |
4 |
1 |
3 |
2 |
| The five is still at the right side of the 2, so it does not move | |||||
| Dienstag (Tuesday) | 4 |
3 |
1 |
5 |
2 |
| Now the four is at the right side of the 2, so on Wednesday, it moves to the fourth place | |||||
| Mittwoch (Wednesday) | 3 |
5 |
4 |
2 |
1 |
| Now the one is right to the 2, so Thurday, the 2 has to be on place one | |||||
| Donnerstag (Thursday) | 2 |
4 |
1 |
5 |
3 |
Based on this, we now have to fill up the list with the numbers for Friday and Saturday
|
|||||
| Freitag (Friday) | 4 |
3 |
5 |
2 |
1 |
| Samstag (Saturday) | 2 |
5 |
4 |
1 |
3 |
- Now change the bars so that the roman numerals in the right order
- II V IV I III
- As we had the first five letters of September as code for the first paper, use now AUGUS - the first five letters of August
- Enter the letters from the coded letter as you did before
- YGROWRCBJCDRZJDO.....
- Read the letter
- You can leave the room now and go up into the attic
- Build the gramophone together, but instead of using the cylinder inside the box, use the one you found in Budapest
- Click the handle and listen to the last words of Herman von Bergen
- Leave the inn
- Streets of Vladoviste
- Go and see Ionel first
- Get the gramophone out of your inventory and click it on Ionel
- For trade he will allow you to get the slingshot out of his sack
- Click the sack right next to Ionel on the ground and grab the slingshot
- Big Oak Tree crossroad / The chapel
- Now go to the Oak Tree crossroad (Field of fallen soldiers)
- At the right, you will see Luana sitting at the wagon
- Talk to her and then go the way right behind you, Luana is pointing to
- Look down and see a gravestone of Lord Mircea XIII, you used as bridge to cross the water
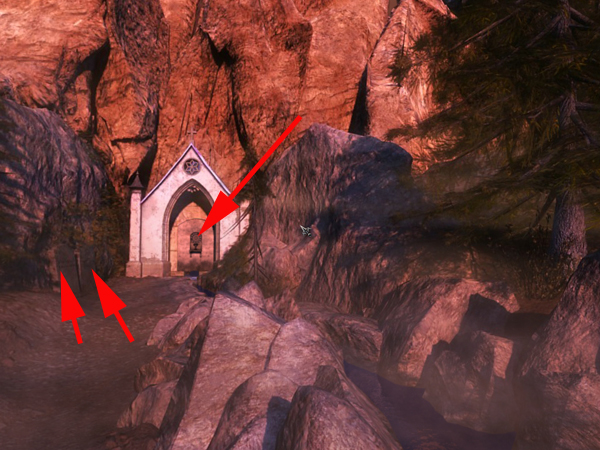
- Look right and you will see a chapel
- Left side of the chapel you see two grave stones: Vlad I and Vlad III - there is a grave stone missing at the right
- Go back to the one you used as bridge and click it to turn it around - it is for Duke Alexander VIII
- Go back to the chapel and click it to get a nearby view
- Its looks like a page you saw in Vlad's biography - Punishment
- But the gold cup at the bottom is missing, same as two keys in the circle on the top
- Go back to Luna and talk to her

- Luna tells you, that the bowl was stolen
- Go back to Vladoviste and talk to Ionel
- He tells you that Ariel and Celdric stole the cup
- Go and talk to Ariel's mother, Ozana
- As you do not have any success, go back to Luana and ask her for help
- Luana wants you to bring her a few things
- Blood of a lost battle, ashes of a vampire, blossom of a rose bush, ring of a killer, hazel wand, berries of mountain ash
- Go to the cemetery
- The cemetery
- Blood of a lost battle - you already have this, its the Maria's shawl, you found on the floor of the dispensary kitchen
- Berries of a mountain ash - you might already have them, they have to be collected from the tree at the castle - if not go up to the castle, you will find the tree at the right side
- Hazel wand - you already have this one also, when you trade the grammophon for the slingshot with Ionel, if not go to Ionel and give him the gramophone, for this, he will allow you to get the slingshot out of his sack
- Ashes of a vampire and blossom of a rose bush
- Remember, what you've learned by listening to the wax cylinder from van Bergen: Luciana Hartner became a vampire
- Enter the cemetery gate and go one step inside and look right - try to grab the shovel
- You will need the gravedigger's permission first
- Go one step forward and talk to the gravedigger, who is sitting on the stairs
- Ask him for the shovel and give him the matches in trade
- Get the shovel, turn right and go one step forward and then one step to the left
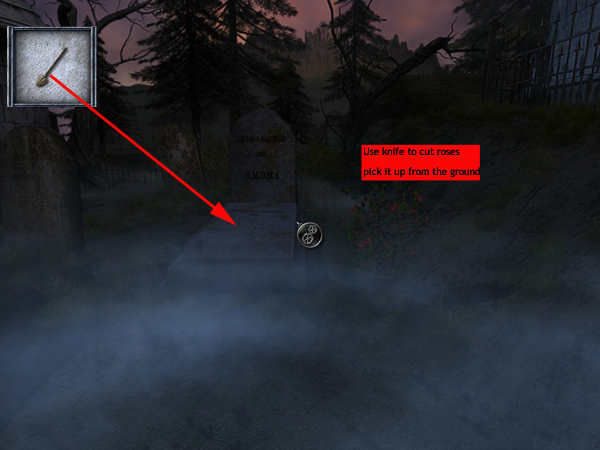
- Now you see the tomb of Luciana Harner and right beside it a rose bush
- Get your knife out of the inventory and cut a rose
- It will fall on the ground and you have to pick it up
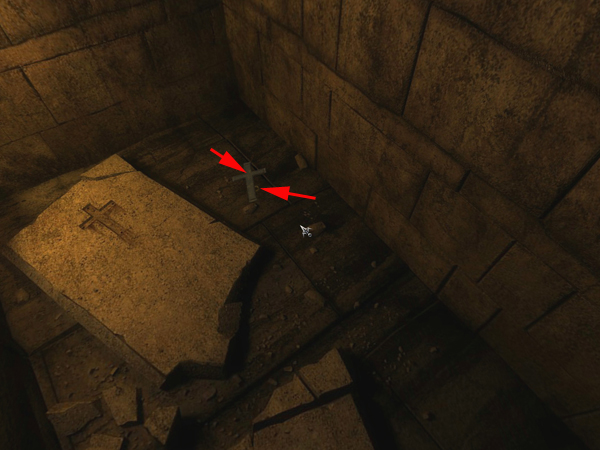
- Use the shovel on the top of the tomb
- Take ashes from the body
- Now turn to the left and go to Martha's mausoleum
- It's closed, but you found the key in the box of Martha's dresser
- Get it out of the inventory and open the mausoleum
- The sarcophagus is empty
- Read the sign with inscription at the wall
- Look at the ground to your left and see a spare key - you can't take it
- Look at the ground right from the sarcophagus and you will see the broken cover
- Right from it you can pick up a crucifix and a ring, an iron guard lost there
- Now go back to Luana and give her all she wants
- She will tell you to leave and you find yourself back in your room in the inn, writing in your journal
- Grab the letter for the mail and go down
- Talk with Ozana and get the hazel stick from the desk
- Place the letter in the mailbox
- The chapel
- Go up to the Big oak crossroad
- Luana is gone, so go left to the chapel
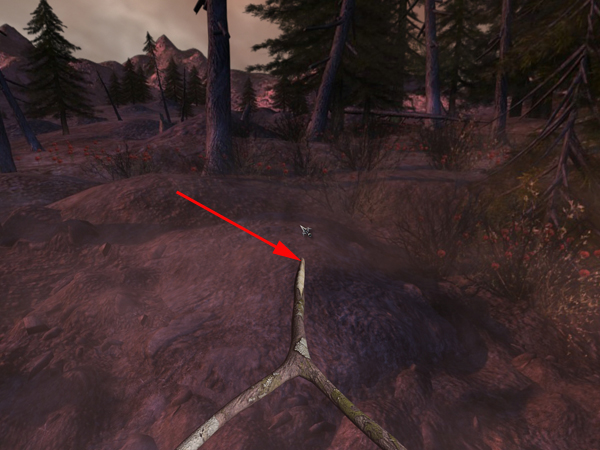
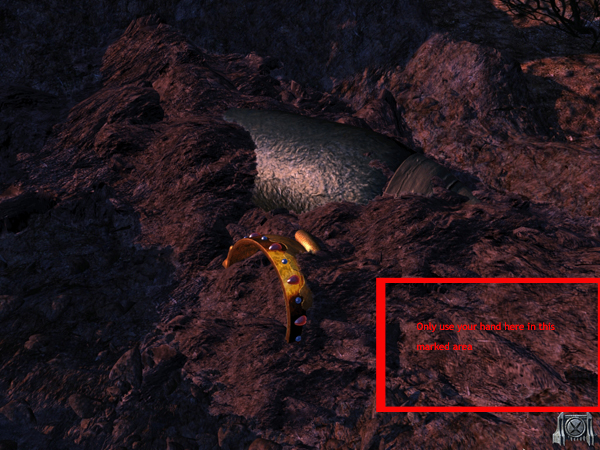
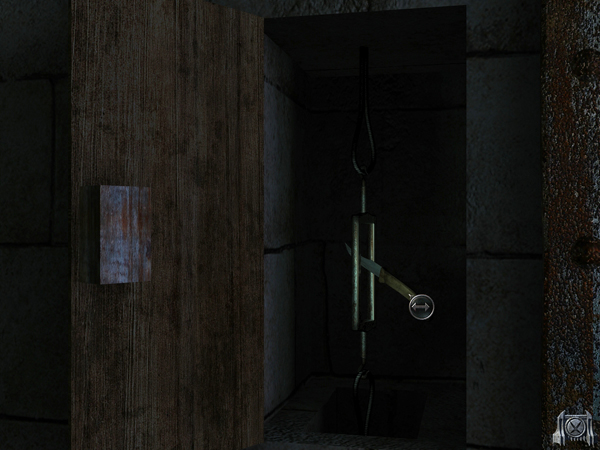
- After the first step, get the hazel stick out of your inventory
- You will see it at the bottom of the screen
- The top will point you to direction you have to move with the mouse
- When you see the gears, click there
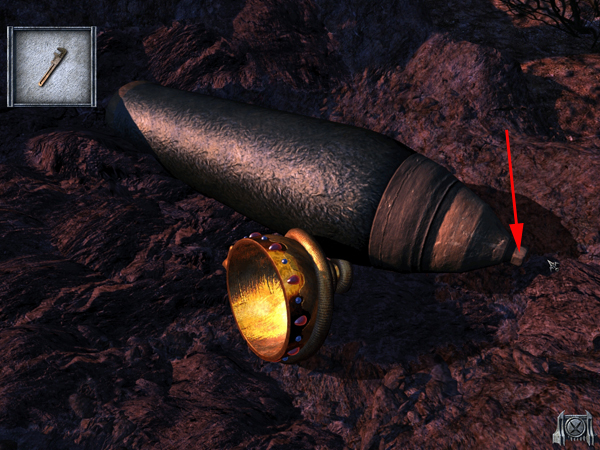
- Get the shovel out of the inventory and dig
- Click to get a nearby view - you found the cup but also a bomb shell
- Now click with the hand icon two times "gently" the soil in the low right corner
- If you try to do it somewhere else, the bomb will explode and you die
- But the game of course will give you a new chance at once
- You will find out, that you need a tool to disarm the bomb
- Go to the cemetery and talk to the grave digger - he will give you a monkey wrench in trade for the lantern
- Go back to the bomb shell and use the monkey wrench
- Click the cap-tip of the shell, hold the mouse button pressed and move the mouse two times towards you
- The tip falls off, you can push the mortar shell away and grab the cup
- Have a look at the cup and read the engraving
- Go to the chapel and place the bowl where it belongs to
- You see, that there are two keys missing
- Get the cartridges from your inventory (the will be both placed same time)
- If you do not have them yet, go to the oak crossroad and pick them up from the ground
- The engraving on the cup said: Three engraved stele give the six on the dial
- We already found the stele - Vlad I and Vlad III are standing left to the chapel, used as bridge was the one for Alexander VIII and Lord Mircea XIII
- The dial shows the numbers from 1 - 13, we have the numbers 1, 3, 8, 13, the hint says, we need 6 numbers
- There should be a mathematical solution for the two missing numbers:
- 1 + 2 = 3 / 2 + 3 = 5 / 3 + 5 = 8 / 5 + 8 = 13
- By adding the sum of the previous calculation, you will get an increasing mathematical sequence
- So press the keys I, II, III, V, VIII, XIII
- The door opens
- Read what is standing on the side
- Its to dark to get in, so use the lighter from your inventory to lit the torch left side of the entrance and enter

The castle
- The cave
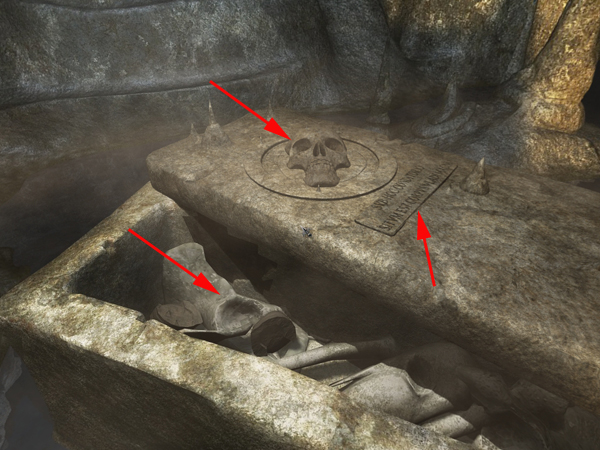
- Go deeper into the cave and click the sarcophagus to get a nearby view
- Read, what is standing on the cover
- You see that the rats are coming out
- Click the skull to open the sarcophagus and find horse bones
- There is no way to leave the cave, as long as the rats are blocking the entrance
- Get the oil can out of your inventory, click it onto the water and lit the oil with the lighter
- Watch what happens
- Wait a moment and you will be able to see in the dark (!)
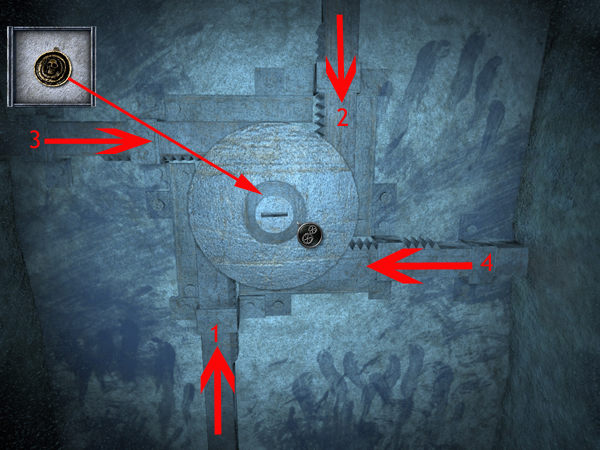
- Get the coin, you found on your bed in the middle at the round spot
- Now now have to move the bars
- Click first the one at the bottom and drag it with pressed mouse button up
- Next is the one on the top that goes down
- The left one goes right and at last the right one to the left
- Click the cover and it will move
- The maze
- The path you came in is still burning, so use the one behind the sarcophagus
- You wont come far before you fall down a trap door
- You are in a maze - have a look a round: you see spiked doors and on top are roman numbers
- Read the inscription on the floor, as it will give you a clue how to come through the maze
- There is one door open - MDXCVII (1597)
- The inscription says, the sequence of immortals is not suitable to grow infinitely
- Remember? The entrance had a mathematical sequence, increasing
- The hint tells you, that this time, the progression has to be decreasing - so we count back
- For "translating" the roman numerals please have a look at the first visit in Budapest , where I explained it
| Forward | MDXCVII |
1597 |
|
| Right | CMLXXXVII |
987 |
|
| Left | DCX |
1597 - 987 = 610 |
|
| Forward | CCCLXVII |
987 - 610 = 377 |
|
| Forward | CCXXXIII |
610 - 377 = 233 |
|
| Forward | CXLIV |
377 - 233 = 144 |
|
| Forward | LXXXIV |
233 - 144 = 89 |
Look at the floor, you will see fresh blood |
| Right | LV |
144 - 89 = 55 |
|
| Right | XXXIV |
89 - 55 = 34 |
Choose for the answer: Advance in spite of risk |
| Left | XXI |
55 - 34 = 21 |
|
| Forward | XIII |
34 - 21 = 13 |
|
| Forward | VIII |
21 - 13 = 8 |
|
| Left | V |
13 - 8 = 5 |
|
| Right | III |
8 - 5 =3 |
|
| Left | II |
5 - 3 = 2 |
|
| Right | I |
3 - 2 = 1 |
|
| Forward | I |
2 - 1 = 1 |
|
| Forward | blank |
1 - 1 = 0 |
- The game with Janos
- You fall through another trap door and find Janos
- Talk with Janos and make sure, that you go through the complete conversation
- You will have to play a game with Janos
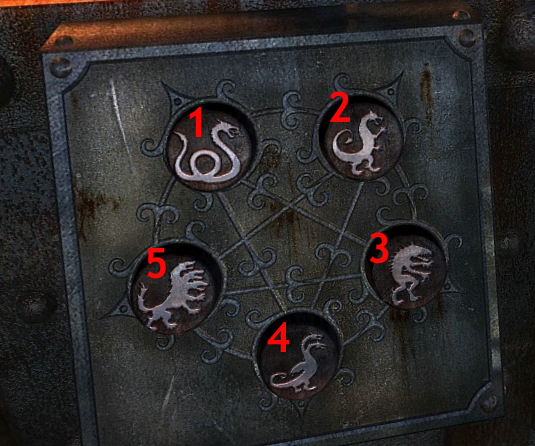
- There is a panel with five beasts
- 1 Water serpent
- 2 Basilisk
- 3 Griffin
- 4 Hydra (2 heads)
- 5 Cerberus (3 heads)
- You have to choose a beast and Janos, who will not see which one you choose, also has to choose one beast
- Some beasts are stronger than others or have better possibilities, so one of them will win, one will loose
- When your beast looses, the partition pushes the wall closer to the back wall. After four times loosing in a row, the back wall will move out spikes
- Of course the same for Janos
- The fifth win will kill the loser
- There are arrows - they point from the beast that can defeat to the beast that can be defeated by it
- The water serpent (1) defeats 2, 3 and 5
- The basilisk (2) defeats 3 and 4
- The griffin (3) defeats 4
- The hydra (4) defeats 1 and 4
- The Cerberus (5) defeats 2 and 3
- Make your choice and after Janos also did so, you can see at the two panels above, who chose what and who will win
- For me it seemed, that it was random and that there is no way to say, what beast Janos will choose next
- I won with 4311 and 1, 4111 and 1 and 4113 and 1
- If none of this works out for you, there is a trick with saving
- You win - safe the point and make your next choice
- You loose now - load the save, where you won
- You win - save the point with the two winnings now and choose your next beast
- You loose - load the save with the two winnings
- And so on
- You can only win four times in the row - your conscience will not allow you to kill Janos (Janos by the way does not have any worries, if he wins four times in a row)
- But: when you win for times, turn around, go one step and have a look at the right wall
- There is a panel free now
- Use the monkey wrench to loose the screw
- You see steel wires and a metal link - this is the mechanism, that makes the spikes come out
- Use your knife and place it inside the link (click when you see the gears)
- You will get two arrows - move the knife to left (with pressed mouse button) till the handle is in the back
- Click to get the knife back and do it again
- You will have to do it three times
- Click to receive the upper steel wire
- Play the game one more - you win and partition moves and opens the door completly
- Exit through the door
- Tears to tears. Sweat to sweat. Blood to blood.
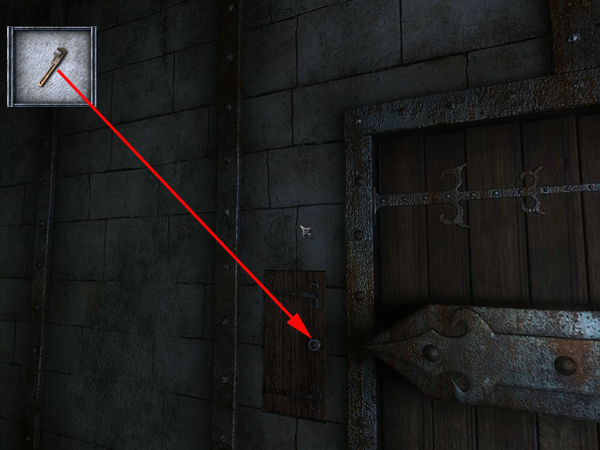
- You enter a hallway with a door on the other side
- The door has two bars to close it
- Left and right on the wall is one puzzle each
- Have a look at the left side
- Click and it will give you a description: Tears to tears. Sweat to sweat. Blood to blood
- Your goal is exactly what it says - you have to bring tears to tears, sweat to sweat and blood to blood
- You see six squares with liquid
- The other squares are empty
- Each square has four close gates, which open by clicking
- Do you open a gate filled with liquid, the liquid will flow into the opened gate
- Two gates are filled with sweat, two with blood and to with tears
- Each liquid has a taste, blood tastes like wine, tears salty and sweat is both acrid and acid
- To find out which is which grab the empty cup and click it at the liquid
- You will taste what it is
- Now find the two matching tastes and plan a way for the liquid two flow
- One liquid may not come in direct contact with another one
- When you did it right, one bar of the door will move

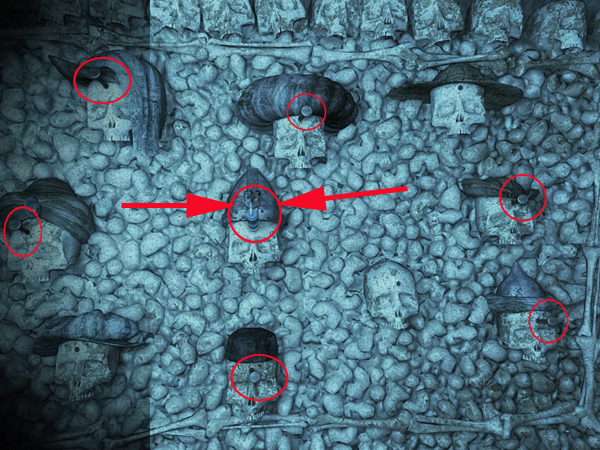
- Skulls and hats puzzle
- Now have a look at the puzzle on the right side
- You will see skulls, all except one is wearing a hat and six are having a nail on the skull
- Your goal is it, to place the nails on the right skulls
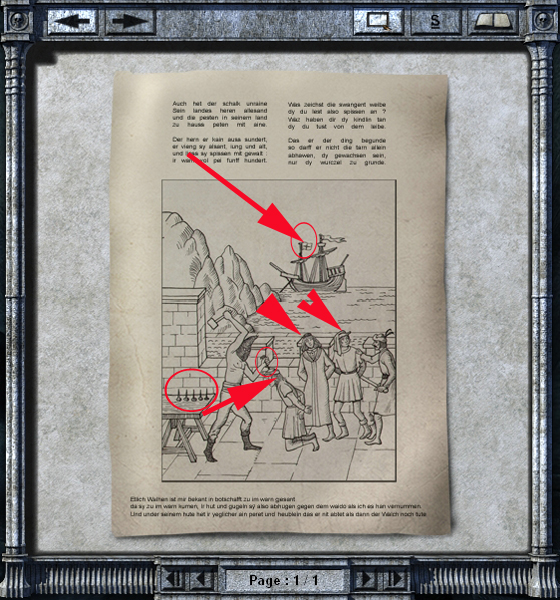
- Something like this you have seen before - open your document inventory and look at the two documents called "Punishment"
- One "Punishment" (Vat.) and "Punishment" (Berg.)
- Use the magnifier to see the differences
- The original (Vat.) shows at the left side 6 nails on the table and one in the hand of the executioner
- The copy (v.Berg) shows 5 nails and one in the hand of the executioner - so one is missing
- See the ship in the background - the copy does have two flags - one with the Geneose flag
- The hats of the men are different
- Place one nail on each skull which has a hat as one of the six standing man on the pictures
- There is a skull with a helmet with the geneose flag on it
- Get the syringe out of your inventory and use it as a nail for him
- Enter the next room

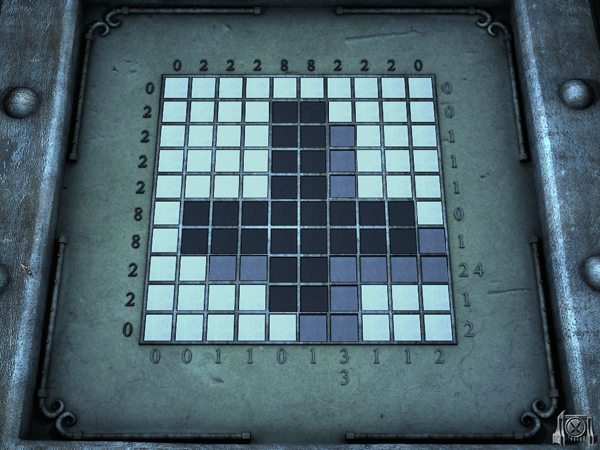
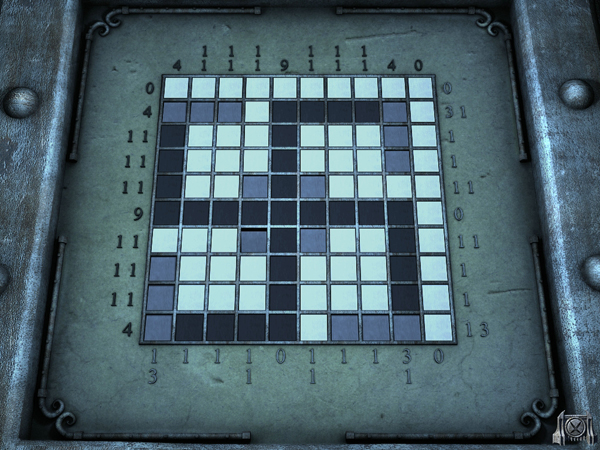
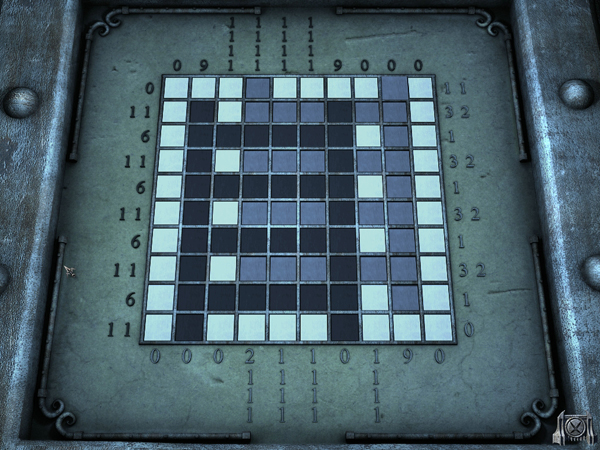
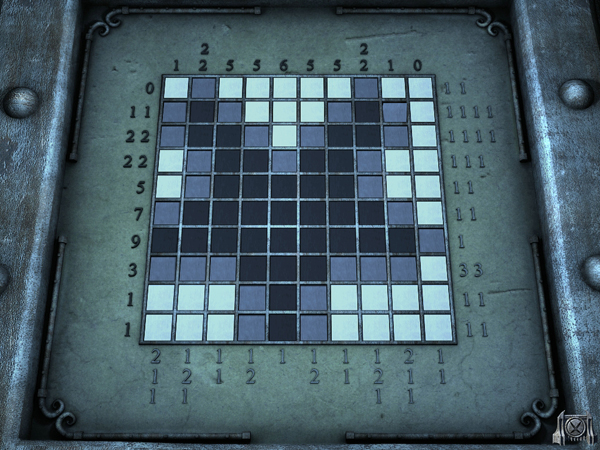
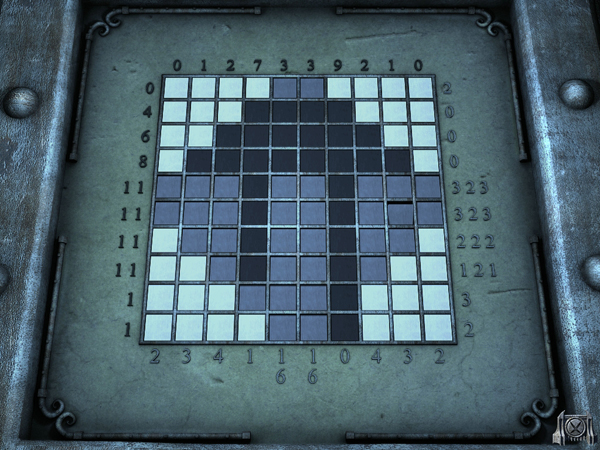
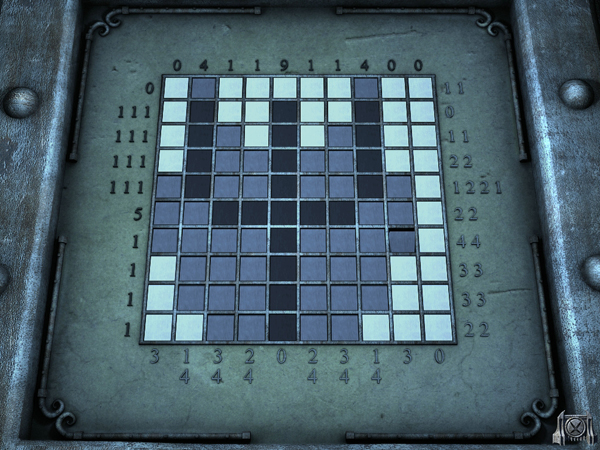
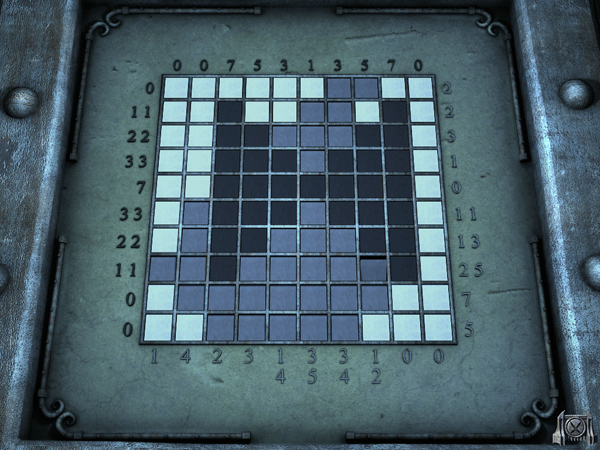
- Tiles and numbers puzzle
- You stand opposite to a big skull - turn around and look on the floor - when you move your mouse of the panel it says: Don't look back
- Take it litterly - if you turn around now, you will die
- Click the panel
- Its a puzzle
- You see a square with white tiles
- On the top and left you see black written numbers
- On the bottom and right you see gray written numbers
- When you click a white tile once, it will turn to grey
- You click it twice and it will turn to black
- You click it three times and it will be white again
- The numbers present the amount of tiles which have to be colored in the color in this row or column
- If there are several numbers seen, it means, that the numbers of tiles are separated - for example you see left side 3 4. That means, that there are three black tiles connected to each other in this row and somewhere else, separated by at least one other colored tile, there are 4 black tiles connected to each other
- You goal is to color all tiles according to the numbers and colors on top, bottom, left and right
- The puzzle is random, but there are only seven solutions possible
- The Well
- After you finish it, steps will appear, give you the opportunity to get out of the well
- Click them to climb up
- When you are half way, you hear a voice - someone lost its bracelet
- Climb down again and stand on the first platform right in front of the big skull
- Face the skull, turn to the left - there is a hook in the wall
- Get the steel wire out of your inventory and place it at the hook
- Climb down - a skeleton is laying there
- You will find the bracelet at the skeletons foot
- Climb up again, but half way the skeleton growls and you let fall the bracelet again
- Jump to the other platform - left on the ground are stone
- Grab one and throw it into the water - it does not help
- Get the syringe back from the skull puzzle and go to see Janos
- Ask him for his lighter
- He will give you, but only if you bring him some to drink
- Receive his flask and go to the blood, sweat, tear puzzle
- Fill the bottle with blood (everything else he will taste but ask for something else)
- Bring the bottle back to Janos and receive the lighter
- Climb down into the well again
- Turn to the left and you will see a torch at the wall
- Light it with Janos' lighter - a few bats will fly up and extinguish the torch
- Light it again
- Now you can grab the bracelet - the skeleton won't complain anymore
- If it does not work out with the hand - try the forked stick
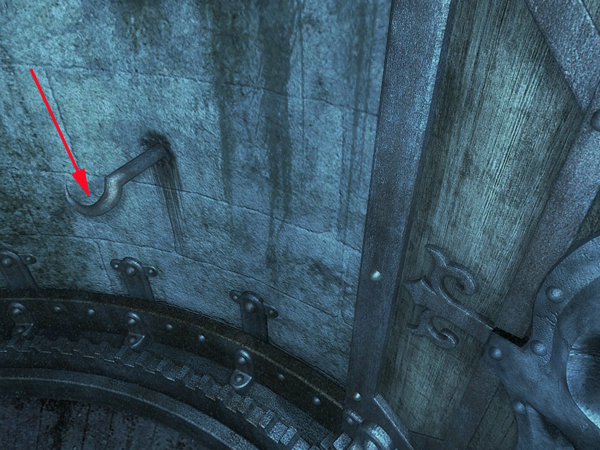
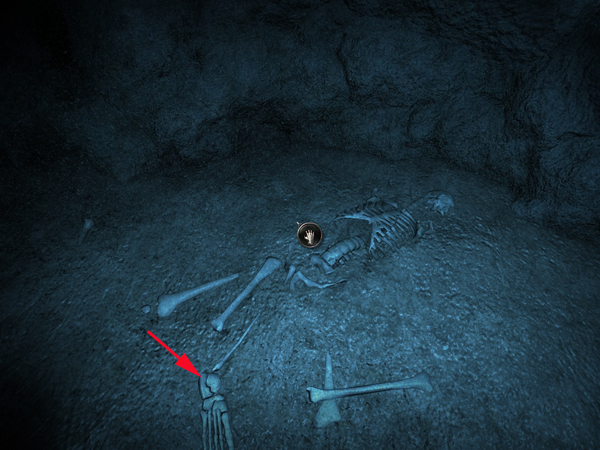
- Climb out of the well
- Turn around to the well and see the mirror on the well
- Try to go in any direction, it will not work, all entrances are closed
- Place the bracelet next to the mirror
- In the following scene you see footsteps and following them, you find the way to ballroom
- When you move your mouse over the pillars, you can move them with the arrows to the side
- Click the stones behind and they will falls away
- A bird flies away, grab the feather which is falling to the groand
- Go back and get the mirror
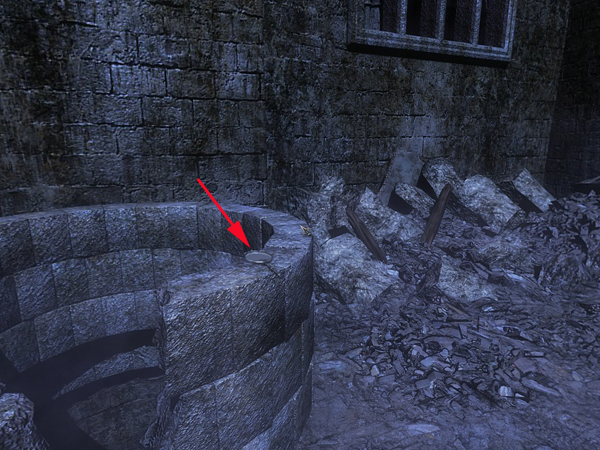
- The Path of the Dragon
- Enter the ruined ballroom
- You see 7 Pilars - each of it has a gargoyle, a panel, and on top and unlit torch
- Each pilar presents one path of the dragon - your goal is it, to find the right item and the right sign for the right pilar to place in the right order
- To find out, what you need, you will first have to look at three pictures
- Open your document inventory
- Map of Turkish Prison
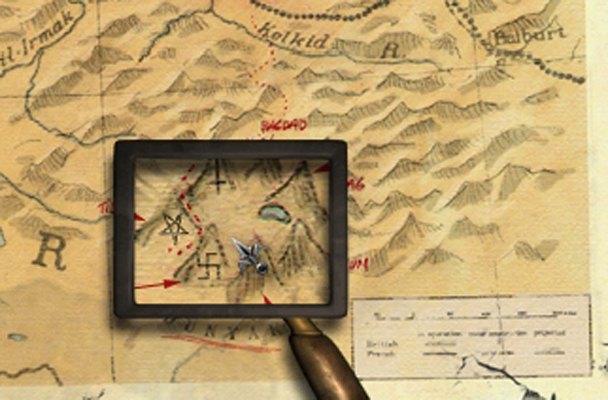
- By using the magnifier you see that the seven pillars on the map are going counter clockwise, first is the Mount of Offering and last the Mount of Dragon
- You also see the meaning of the name of each pillar and the order of some of the symbols
- Mountain (Martha's photo)
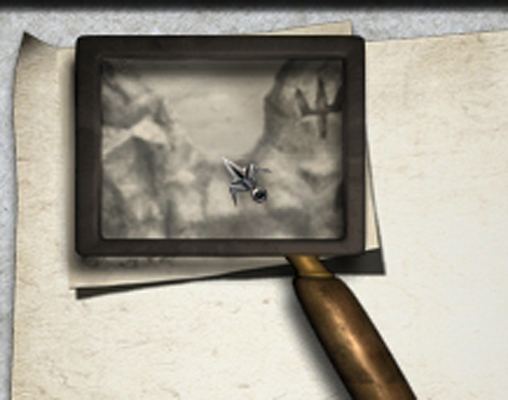
- On Martha's photo you can see, that the wedge shape symbol is left of the trident
- Microfilm
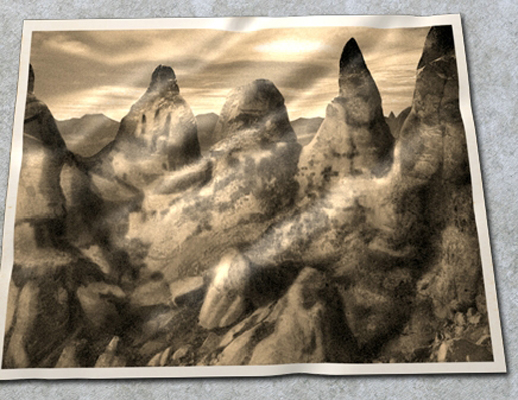
- Here you see, that the pi-symbol is right to the trident
- The ladder is right to the pi-symbol
- How to find the objects:
- For finding the right objects, you have to look at your drawings and search for differences between original and copy (as you did for the skull puzzle for example)
- Also the Runic Anthology gives you clues which objects to place where
- Beside this: you have all objects: So you only have to look for objects, which are familiar
- The 7 path' of the dragon
- From your point, you have to start at the pilar opposite of you - the gargoyle already has a bottle of blood in his mouth
- The path goes counter clockwise - so your next pillar will always be the one to the left
- It does not matter if you first draw the symbol or first place the object
- When you draw, try to use the room of the panel complete - if you draw to small it will not work out
- The drawing has not to be absolutly accurate - but do not touch the outer lines of the panels
- One line has to be drawn at once (as this: __________, not like this: __ ___ _)
- Path 1
- Mountain: Mount of Offering
- Test: Blood Offering - Father Arno offered blood
- Symbol: Wedge Shape
- Drawing/difference: Crucifixion: one angel has 2 chalices, the other one only 1
- Object: Bottle of blood (already there)

- Path 2
- Mountain: Peak of Sacrifice
- Test: Sacrifice ander an oak - Father Arno took Stephan's medalion unter the painting of an ok
- Symbol: Inverted cross
- Drawing/difference: Necklace on Iphigenies vases - one with, one without
- Object: Stephan's necklace
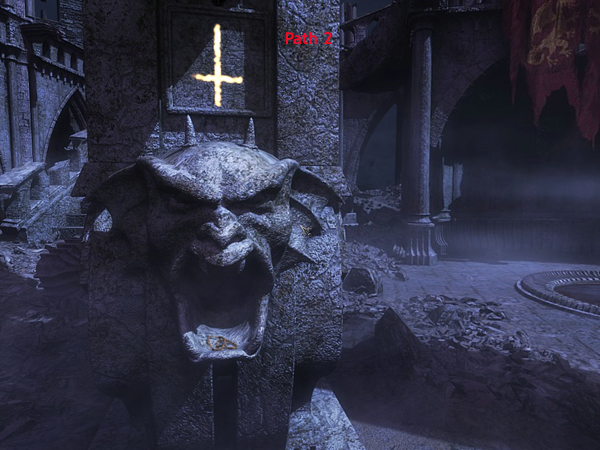
- Path 3
- Mountain: Fox Peak
- Test: Fox Flight - Father Arno escaped from Vlad's prison
- Symbol: Inverted pentagram
- Drawing/difference: Fox Flight drawings - one with bird, one without
- Object: Feather
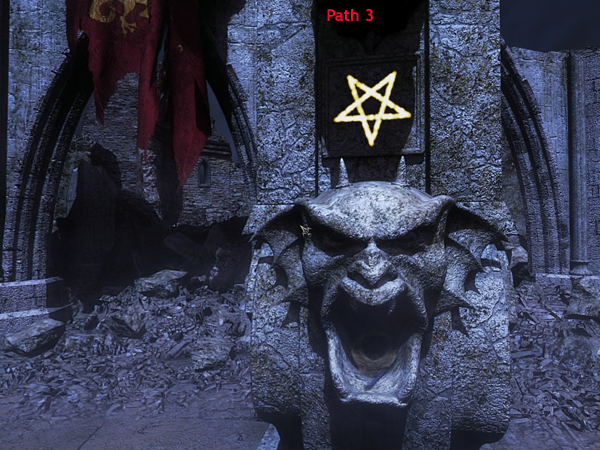
- Path 4
- Mountain: Mount of Punishment
- Test: Punishment - Father Arno took the syringe from Irina's head
- Symbol: Ancient cross
- Drawing/difference: Punishment pictures - diffrent amount of nails
- Object: Syringe

- Path 5
- Mountain: Mount of Purifying Fire
- Test: Purify by fire - Father Arno made fire in the cave
- Symbol: Jacobs ladder
- Drawing/difference: Fire Pictures - one man stands with torch at the building, one without
- Object: Light the torch on top, no objcect into the gargoyles mouth
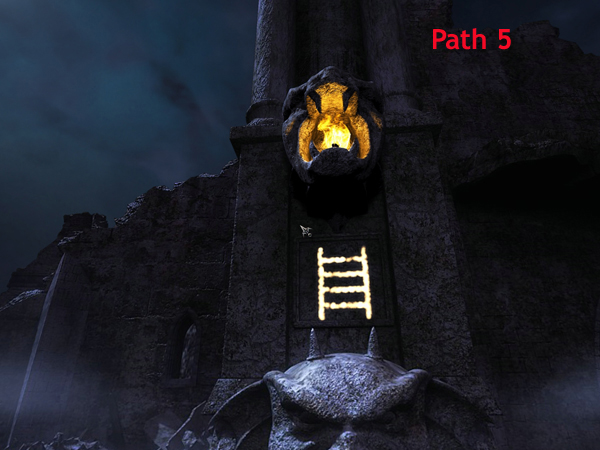
- Path 6
- Mountain: Mount of Death
- Test: To die - Father Arno was in the sarcophagus
- Symbol: pi
- Drawing/difference: Furneral of Patroclus - one with, one without coin in the mouth
- Object: Old Coin
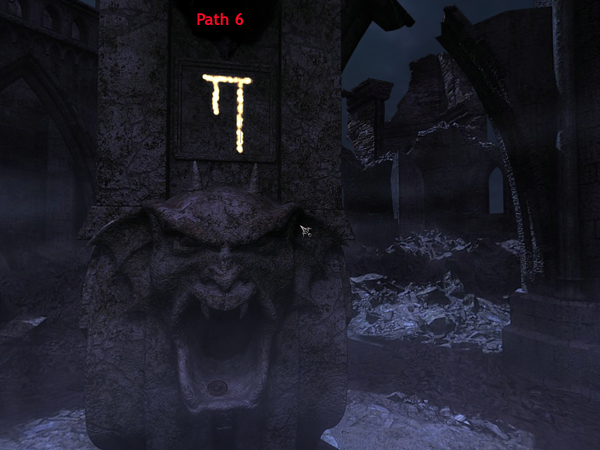
- Path 7
- Mountain: Mount of Dragon
- Test: Baptismn of blood - Father Arno isn't baptisted with blood yet
- Symbol: trident
- Drawing/difference: Blood of Dragon - one with, one without mirror
- Object: Mirror
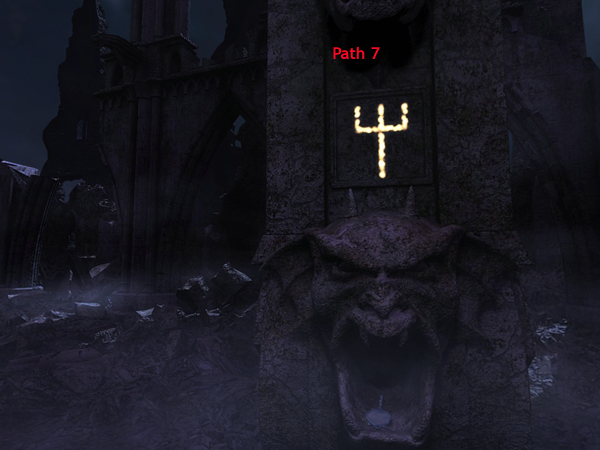
- FINAL
- When you did all correct - between path 1 and path 7 a hatch opens
- Go down
- At the left wall you see a lever - click it to close the hatch cover
- If you do not, you will die in the next phase of the game
- Go forward and to the sarcophagus
- The text tells you, it's Vlad the Great's sarcophagus
- Click the skull two times and then click the cover to open the sarcophagus
- Click in any order the following items on Vlad:
- Hammer and stake, host, holy water, garlic, rowan berries, curcifiy, wild rose
- You will hear von Krüger - he wants you to let him in - if you do so, you will die
- But you can talk to him, if you want - its not neccessary but does not harm as well
- While placing the objects on Vlad you will see that his hand grows older - after the last one the sarcophagus dissapears
- Martha/Maria is coming
- Talk to her
- Now Count Dracula come himself - he will talk to you and ask you 6 questions - you will have mulitiple choice answers - only one answer is good
| How shall I judge your deeds | I had no choice. It was the only way to come to you |
| Twice your enemy Janos was at your mercy and you spared him. Why? | Yes, I spared Janos and now I am here for you |
| Let's talk about Maria. You desire her, do you not? | Yes, I desire her |
| Who gave me immortality? | Lilith the rebel |
| Do you fear me? | I do not fear you since I have come here |
| Tell me, Priest, you can't have come with the absurd idea of fighting me? | Like Siegfried, I was resolved to do anything to reach my goal |
- Your answers are good enough for Dracula - he tells you do go on your knees to be baptisted in blood
- Watch the final


Ugh I was so annoyed at the end of this game!!!!
Possumus non is not in the felixqui room but in the Mento mori room. The book is in Felixqui under Mirabile visu under the Aldebaran shelf. Took me 15 minutes to find it but worth it and thought I'ld save the confusion.
Ok another fix up...4678 is not the combo. The correct combo is 4867. Took me 3 minutes to figure out this one. Well back to the game and if I come across another correction I will post it to save the confusion.
Doing fine up until the developing...I cannot find a empty BOTTLE anywhere in the lab or my inventory (besides the holly water vial) to use to mix the A. Acid mix to develop the photos...Did i miss something (not grabbing it) somewhere?...This is driving me nuts!
When i do krugers test and i go to enter the results in the lab book there are no fields to enter the info. just a blank page on the right had side and no personal info is on the left!
played this on iphone generally ok but cannot get past skull and nails puzzle aaargh where do you get the nails from ???????
I am playing this game on my iPhone, which is kind og different. Bit know i tried to Solve the skull puzzle with the hats so Many times, but i havn't made it yet? No where in the game before i Got to the room with det skulls and the hats i Found nails! Can anyone please help??
Ugh, why is everything in the iPhone/iPod version of this game different than the walkthrough? I am stuck in Part 3 at the part where you go into Janos' room. There's supposed to be a passport in there and there's not one. Then you're supposed to go to the Crossroads and talk to someone and no one's there. Also you're supposed to take the gramophone and give it to Ionel and you can't even pick up the gramophone to take it with you. This is really annoying. There are parts that are listed in the walkthrough that you don't even have to do in the iPhone/iPod version. Why is it so different from the PC version? This is confusing! It makes no sense! Help!!
Am now in the skulls and nails game, it says use the syringe as the 5th nail, but where are the rest of the nails. The syringe doesn't even work. Irina just keeps saying what she said when I originally took the syringe out of her head and then when I click other places nothing happens at all. Why is this game so confusing??? And why is the PC version of the game so different from the iPhone version that the walkthrough doesn't work??? Is there a version of the walkthrough specifically for the iPhone version of the game??? Man this sucks!!!
regarding the ipod or iphone version, Vlads prison, what you have to do are:
1. don't equip yet the old coin
2. go through the tunnel
3. when arno says i must have done smething wrong, move forward once
4. equip now the old coin
5. move back to the prison
and eventually you will find yourself in another room.
got this from another user. i just forgot what site.
hope this helps
I am playing the pc version. I am at the part where I have fallen and found Janos on the other side of the door. There are beasts on the door and he tells me about the game. I click on the animals to play the game and instead it leaves and Janos is yelling at me not to leave him. I go forward play the game of the tears, sweat and blood and part of the door lock falls off. I cant play the skull and hats game because I have no spikes. I found a walkthrough that said i was supposed to play the game and win and have spikes fall. I asume I am supposed to use those spikes for the skull game. But the game wont even let me walk back to Janos and try to play the game. Anyone else having this problem. All the games I am reading in this walkthrough arent even in this game I have solved no puzzles. The game just skips it and moves forward. I think this time I am supposed to play this game.
ive played 1 & 2 im on 3 but most of the games are not on the pc version and im on the skull game but i dont have a magnifier like it says. i tried using the hammer and stake nothing happens except it keeps telling me something is missing. i use tyhe syringe and a woman tells me the answer is in some documents but nothing else happens. how do i do this part??
a few of us have posted but have gotten no reply. what gives??
they are mean and i learned at the very end pull out the bomb and blow yourself up by clicking on him with it then you win this walkthough is not for the pc it's for the iphone hope this helped
i have the same problem as most of you.... I'm at the skulls on the wall has anyone found how to get past it?
In the skull game for the PC (shorter) version of the game, use the syringe and select the skulls in sets of three matching the pictures - I had to look at the walkthrough to see the second picture. The sets are the three turbanes, and the other three. It took me forever to stumble on this. Hope this helps.
I am playing the short PC version and I am at the castle where you put the items/symbols in/on the gargoyals'. I cannot put items in the mouths but I did choose the symbols and nothing happened/ Now I have all the required items in my inventory Except for the mirror. Does that matter since I cannot put items in their mouths anyway? I have been pulling my hair out on this one. What do I expect for the $10 version of the game right? LOL I learned my lesson - for sure- but any help will be greatly appreciated. :-)
Thanks in advance
Dakk
Dakk -
If you purchased the retail game from some place like Walmart and not the downloadable PC game from BFG, you apparently have a whole different version of the game according to all the comments I have read about the game.
You can go check the other Dracula 3 posts, other than this walkthrough one to see if you can find your answer in the comments.
Our walkthrough is based on the BFG version of the game so may or may not be able to help you with your problem, but feel free to check it out because it is posted above the comments.
I bought the retail version and i downloaded from the big fish games site but I still seem to have the same version and I do not see any of the extended puzzles, why?
Cindy -
I'd suggest asking that question to BFG customer support.
I'm playing this on my iTouch and I'm stuck in the library after Irina has been killed.
There is thumbtacks but no spool.
When I go to the safe and although the 1913 password works, it does not say 'Dracula' when I first walk to it.
There is no box to open.
I'm basically stuck here. I've searched everything (well, there's obviously something I'm missing seeing as I'm freakin' stuck) in the entire library and am lost.
I can't get the needle inserted into Arno's arm no matter how long I hold it to the vein. I am playing on my iPad. This is really ticking me off. I start out by washing my hands and nothing seems to work. I am playing part 3. Please help.
Update