Search This Blog

Wednesday 26 October 2022

VW BAY WINDOW CAMPER

Hello to you all, hope you are enjoying the sun.....Bellow are some photos showing Des and Olivia's bay window van .
I am re-trimming the rock and roll bed and all front and rear door / panel cards. Also i am installing some units with a sink and a fold down table, I hope you all like.

you can contact me on : 
email : incavilla@aol.com
tel : 07794978914


Day one....all the rear units arrive form.... IKEA, yep that's right , its a great way to get some good quality units and in the size needed to fit the van.


The door card before removal , these usually come of very easy......Not this one....GRRRR a cuppa and head scratch, the window winder screw had seized on, but hay all in a days work, and it was sunny while i was doing it.


This shows the new door card ready and the fabric all cut , just waiting for me to sew.


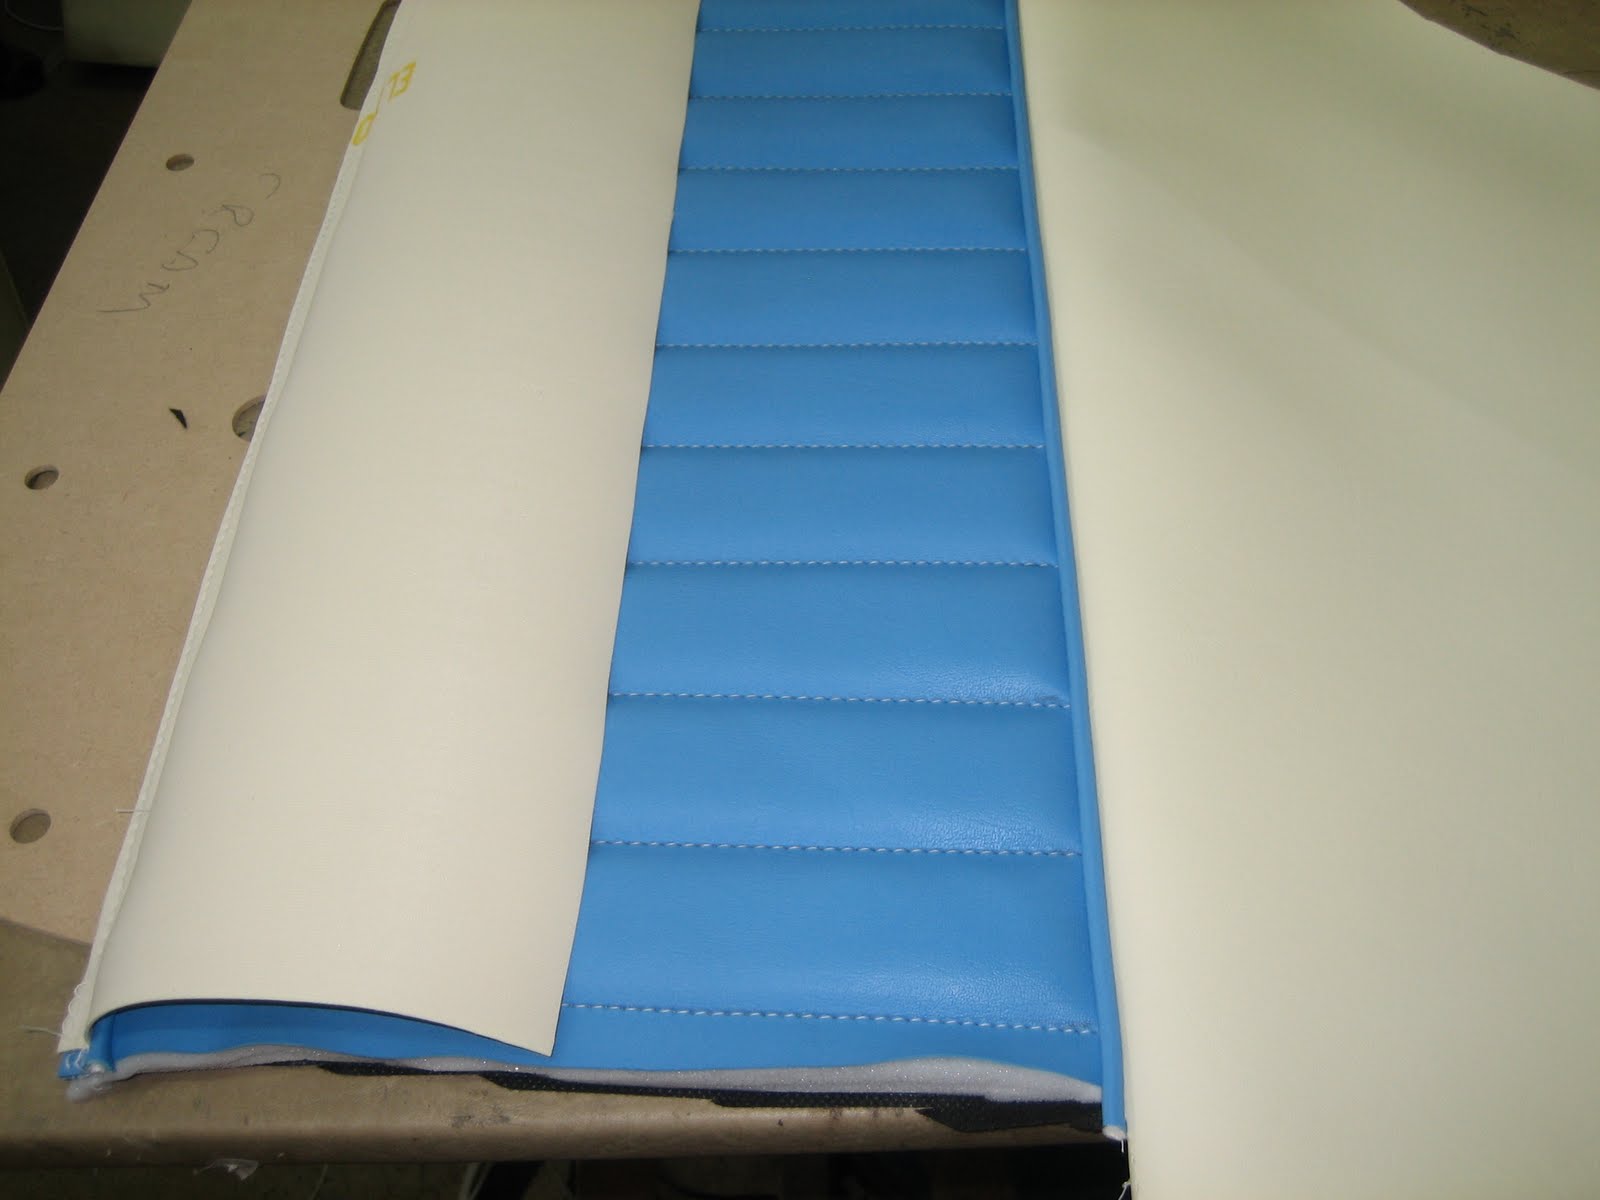
A close up shot of the stitching, this shows the fabric sewed through foam and a backing cloth .This gives the tuck and roll style.


All done....ready for the fitting to the panel.


As you can see i staple the material on the reverse of the board using 3mm stainless steel staples this makes the job so much neater.


The last panel ready to be fixed, you can see the half inch foam used to give the nice padded look.


The door ready to take the new panel, I make sure all the fixing holes are clean and all the old fixings are in good order and also clean to go back on.


There all done.........with speakers fitted as well..... great sound to..... i hope you all liked the pics and info, there be more pictures to follow soon. See you all soon,

Colin.

VW SPLIT SCREEN PANEL VAN

Hello to you all ....its a lovely summers day and I've finally managed to put together the finished photos of Ewan and Alie's van just before it rolled out to go on the road trips of all road trips.......i hope you like and please leave comments. Thanks Colin.
contact me on : 
email : incavilla@aol.com
tel : 07794978914
 
The van before i started the work...in Ewan's garage, what a garage I'm so jealous...lol.


A front shot showing the gorgeous shape and paint job.

 
This is a shot showing the complete interior from the rear hatch ,note the inset roof lights...great touch gives the van a real plush finish.


The rock and roll bed laid out showing why making sure that's is so important to get all the lines and patterns matching.


Hear you can see the three colours mixing well together with the speakers wired up ...put on your ear protectors...


My best pick... i love the retro look of the colour and styling, this front seat alone from start to finish took over ten days, but I'm sure you agree its a one of a kind.


This is a shot showing how i lined the tuck and roll with the dash to get the flow ans styling looking right !!!! well that's what i thought.....I'm sure some one tell me different, note the custom fitted map holder in the door cards......cool.


Trying to get an angle so you can see the carpet toning with the piping on the seat and with the tuck and roll on the doors.


As you can see the instrument cluster from earlier blog, now all in place and looking very retro.


The last picture before Ewan took he of for a spin......Great van Ewan have fun... i hope you all liked what you saw and if you would like any advice or pricing please feel free to contact me on my mobile : 07794978914 or my email : incavilla@aol.com
Thanks Colin.

VW Bay Window Full Width Rock & Roll Bed................

Hello to you all..... Here are some pictures and info on a rock and roll bed which i have just done.....hope you like what you see and thanks for all the great feed back you have given me.... Colin
you can contact me on :
email : incavilla@aol.com
tel : 07794978914
 

This shows the bus fitted with the rock and roll seat and back fitted, this shows the third cushion foam being cut to fit and working out the alignment of the tuck and roll.


A very nice blue vinyl was chosen to compliment some excising colours in the van....my little book or my bible they call it at the shop..

..


A action shot showing me profiling the foam, this is a special foam cuter that i use. A good tip for cutting foam is to use an electric calving knife they do the same job and are easy to get hold of.


Measure measure measure....then cut once.........even after all these years i still do this and as my mum says better safe than sorry.....this shows the top panel, the side boarder and the piping cut into strips ready for sewing.


Getting there.....this shows the top panel with the tuck and roll style being sewn in to the vinyl.


A closer pick.... you can see the back all in place , as you can see marking out the foam to make sure all the patterns line up....


There the seat in place, hope you can see the look in the top panel....with piped side boarder all that needs doing is the other two cushions.......not before a cuppa tea.....


There all done, surprising what a cuppa tea can do...lol. I hope this shows you how important measurements are to get this finished look, nothing worse than the lines not matching up. well mine did PHEW....
.

The final shot, the seat in place with the camper ready to go.... customer was over the moon.....COOL. hope you looked what you see, if you need any advice please contact me and I'll be glad to help you.
Colin.

VW SPLIT SCREEN PANEL VAN

Hello to all my viewers and i hope you find of interest this new project i am working on at the moment. It is a very gorgeous and now quite rare original panel van. Ewan has given me the task of re trimming the van. there are a number of pieces to do to the van, starting of with the front bench seat. This seat is called a hump back (because of the hump half way down the back section ),as you can see bellow Ewan and Ali had some very nice ideas of how they wanted the seat to look. Their wish is my command................as you will see there is a vast amount of work to transform this plain bench sea into a gorgeous looking retro style bench seat....
you can contact me on :
email : incavilla@aol.com
tel : 07794978914

This is the van in all its glory....looking very nice, cant wait to get started.


The bench seat in its place....as you can see the hump in the back..


Planning, measuring and working out proportions to get the look that is in balance with the style Ewan and Ali wanted.


There we are all ready for the next stage, making templates may take a long time but in the end it makes the job a whole lot better.


What a sorry state the seat was......well over 40 years of use......time for a make over.....


All striped back and springs were in good condition, a clean down and a lick of paint....look like new. The same process was done on the back.


A new canvas was cut and attached with special clips called hog rings........


The rubber mating was in very good condition ...so with a wash.....yep that's right put in a washing machine it comes up like new....TIP OF THE DAY... With the new foam cut and starting to take shape, you can see the look of what's to come.


A bit of a jump forward , this is the seat and back all ready for the materials to be applied. The centre sections on the seat as well as the backs are now all inset to create the look.


This is the first step , cutting the material to the templates....as in all trades measure twice cut once.... that's what i still do and I'm glad I did .


This is the main area of material to be cut, this is a very awkward shape and you also have to allow for stretch of the new material...BIG headache.


Hear you can see all three colours together ready for the sewing to begin....wish me luck.


The first step is the centre sections, with a tuck and roll style with two inch to a three inch finish with the stitching to highlight this look.


Now the piping.... a strip of material cut to a set width then rolled together with a cord in the middle .this is how it done simple.


The seat ready to be put onto the unit, along the base of this cover there is a wire. This allows you to pull all the material into place and make a stronger edge to finish with.

 
OLD SCHOOL .this long needle and special twine, this is used to stitch through the salvage of the centre panel to get the roll affect of the seat and back.


As you can see the seat all done.....ten cups of tea and many hours of hard work........ but i love this job so satisfying to see the end result.


A different angle so you can see the three colours and the stitching on the home straight just the back to go.


As if by magic well six hours of hard work the back in all its glory.


Closer look, showing the contours of the upholstery and the line of the piping.


There all together and all lining up and looking great....i love the look and colours......very retro.


A face on view .I hope you all liked the info and pics, keep looking as there is a rock and roll bed to do plus a whole van of panels and roof lining to come. thanks again for looking and if i can help with any info or questions you may have on this or any other trimming questions please feel free to contact me.
Colin.