After working with SharePoint for any length of time, virtualization will soon become a way of life. Across Mac and Window environments there are a number of virtualization platforms available to you;
- VMWare Workstation for Windows
- VMWare Fusion for Mac
- VMWare Server platforms (ESX etc)
- Microsoft Hyper-V
- Microsoft Virtual PC
- Parallels for Mac
- Sun VirtualBox
All of these environments use different virtual hard disk formats, VMWare uses VMDK’s, Hyper-V uses VHD’s, VMWare Fusion uses VMDK’s packaged up into a bundle known as a .vmwarevm file.
Being able to migrate between these environments is a valuable feature and in this post we’ll migrate a Microsoft Hyper-V VM over to VMWare Fusion for Mac.
Export the Hyper-V VM
Using the Hyper-V Manager, right click on the VM in question and choose Export. In order to do this, though, the VM must be powered down. After choosing the export location, the VM’s VHD’s (virtual hard disks) will be exported, along with the VM configuration and it’s snapshot files.
If you are using Hyper-V R2, you can choose to export the baseline VM or any of it’s snapshots. If you are using Hyper-V v1 you cannot export from a snapshot, you can only export from the baseline VM. If you want to export from a snapshot you’ll have to merge all previous snapshots up to the one you wish to export (so that the selected snapshot effectively becomes the baseline VM).
Convert the VHD to a VMDK
Now we have the exported VHD’s we’ll need to convert them to VMDK’s, there are a couple of tools available for this, both of which are free.
Using your tool of choice, convert the VHD’s to VMDK’s. Note that these tools will also convert the other way too, from VMDK’s to VHD’s so you’ll be able to migrate back from VMWare to Hyper-V/Virtual PC.
Create a New VMWare VM using existing VMDK’s
My preference is to use VMWare Fusion for the Mac, but the process is applicable to Windows versions of VMWare.
Open VMware Fusion and create a new Virtual Machine
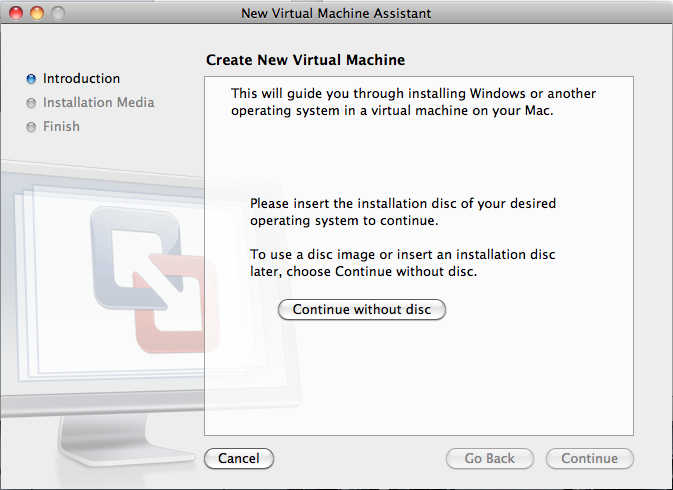
Select “Continue without disc”, and at the next screen…
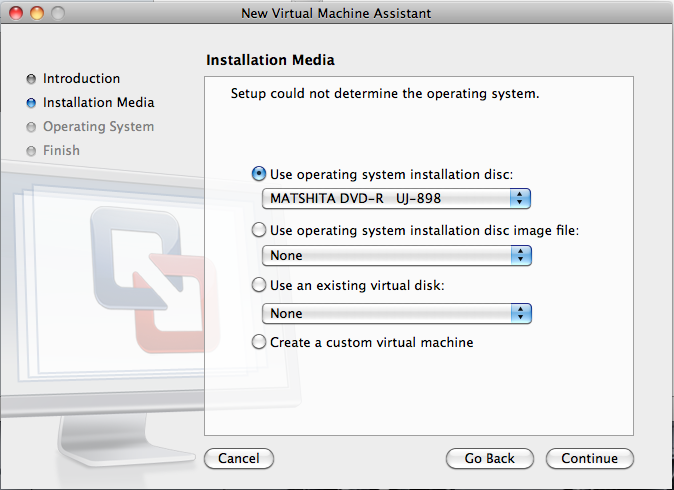
Select “Use an existing virtual disk”….
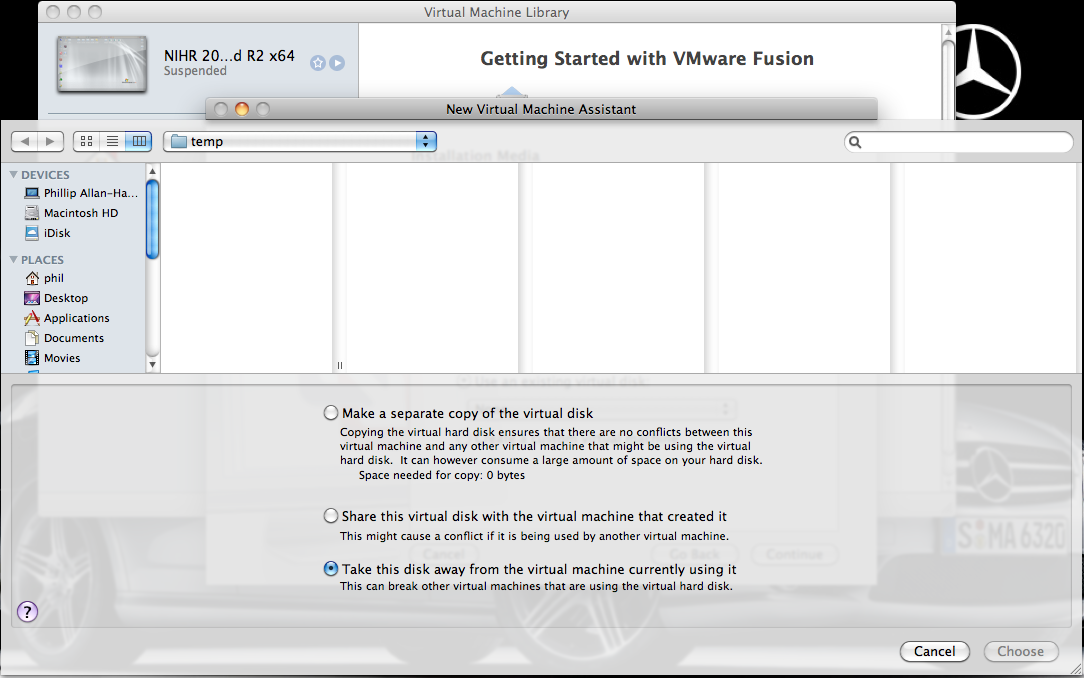
Choose the VMDK file you want to use and select either “Take this disk away…” or “Make a separate copy…”.
Note, if you have multiple virtual disks (VMDK’s) you want to bring into your new VM, you can only select 1 at this point, so choose the virtual disk which is the system (boot) disk. Once this stage is finished you can add further virtual disks using the VM settings dialog.
Once you’ve chosen the virtual disk to use, the process is complete, a new VM has been created using an existing virtual disk. At this point you’ll no doubt want to change the VM settings as required, add further virtual disks etc before starting the VM up.
Migrating back from VMWare to Hyper-V
To migrate back is also easy enough, copy the VMDK’s over to your Windows machine, use one of the V2V tools to convert the VMDK’s to VHD’s and then import the VHD’s back into Hyper-V/Virtual PC.
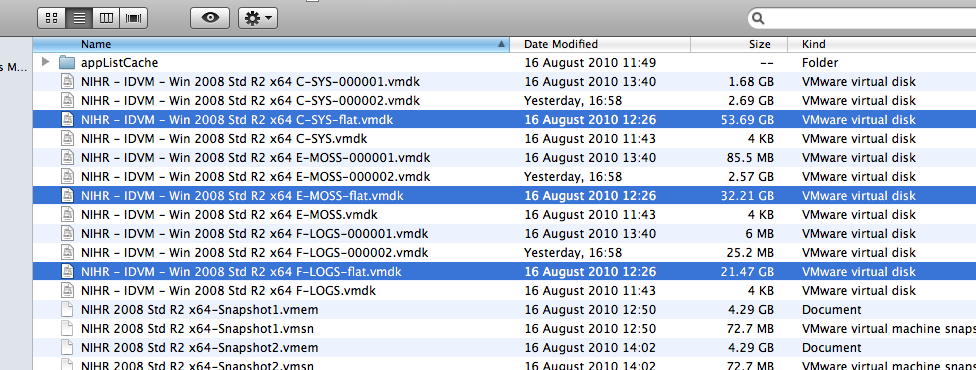
Note for VMWare Fusion for Mac, the VMDK files for a VM reside inside the .vmwarevm bundle. To get at the VMDK files, in Finder, right click on the .vmwarevm file and choose “Show Package Contents”…
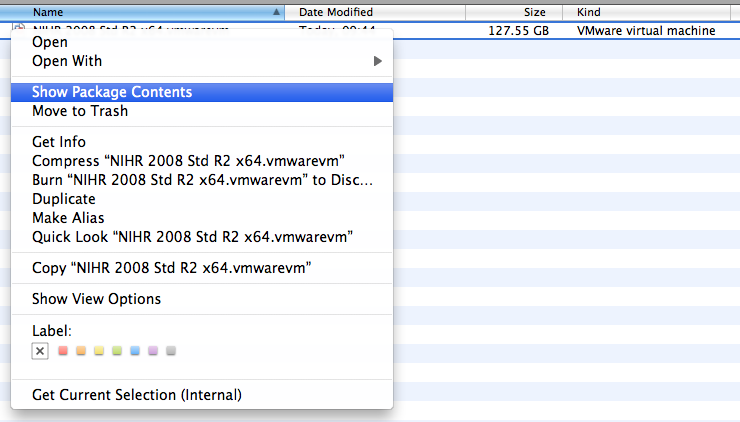
This will open a new finder window showing the contents of the bundle, from which you can then copy the VMDK files.

Thanks, this was very helpful!
Hi Phil,
I am using Hyper-V currently and wish to move to VMWare Workstation, My Hyper-V environment is set-up as Parent Child mode i.e. Deferential disk. How shall I start exporting my virtual machines, The parent disk (.vhd) is not being used as any virtual machine.
Thanks for your time and advise.
Can’t help I’m afraid, not done anything with Hyper-V for a long time
Good information. Lucky me I recently fpund your website by accidrent (stumbleupon).
I’ve saved as a favorite for later!