
TUTORIAL OF HOW TO MAKE ICONS
Ok, a lot of people have been asking me to make a tutorial, IT’S REALLY EASY to make icons…
1- Open your picture on photoshop (if you don’t have it search for the download here http://yeahps.tumblr.com/tagged/download)
i’m using this one

2- Select “Rectangular Marquee Tool” or press M and select the area you want to make the icon.

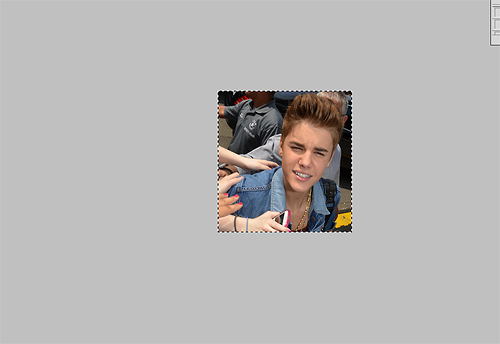
3- Now go to Image > Crop.
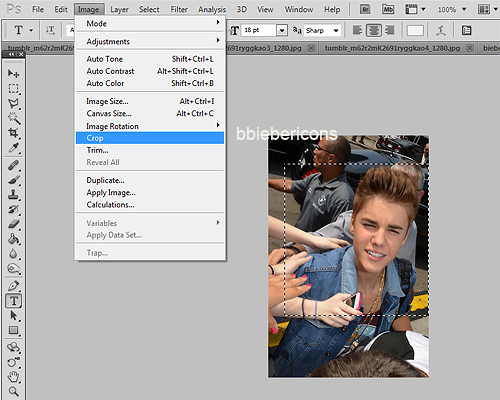
The picture must look like this.
UPDATE: THE NEW IMAGE SIZE FOR TWITTER ICONS IS 240X240
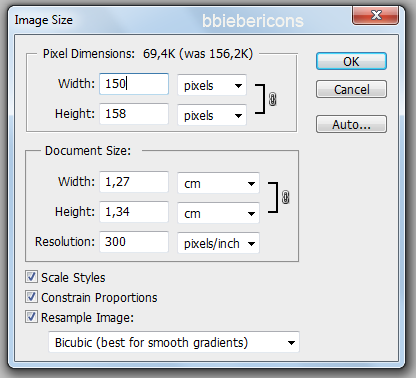
4- Go to Image > Image Size… or press Alt+Ctrl+I and resize the width to 150 and height to 140 until 160 and press ok
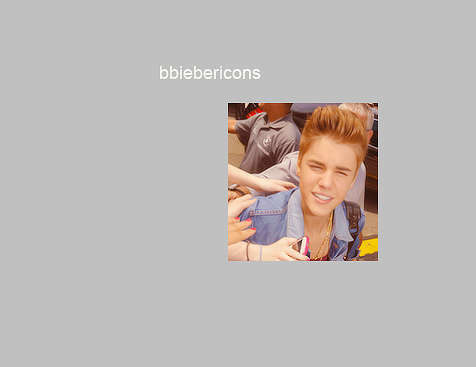
5- Now you put a coloring on the icon, in my case i’m going to use my own psd but you can find another one here https://www.tumblr.com/tagged/psd and flatten the image

6 - Now that you put the psd on the picture, you have to use topaz, if you don’t have installed you can find the link here http://yeahps.tumblr.com/tagged/download too, my settings of topaz are this one http://a-benzo.tumblr.com/post/21354903421/could-you-please-share-with-me-your-topaz-settings
the picture must look like this
7 - Now to go to Filter > Sharpen > Smart Sharpen
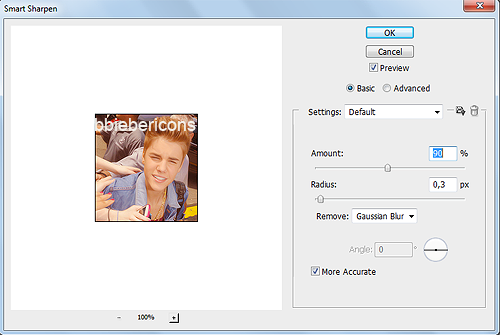
8 - Press ok and save the icon in PNG, it will look like this.

AND DONE. I HOPE THIS HELPED YOU, PLEASE LIKE THIS POST IF YOU READ IT AND PUT THE CREDITS IF YOU REPOST THE TUTORIAL <3
littlestarcabin liked this
equinocci0x liked this
seventeenvibes-blog liked this
 flwrblush liked this
 portugl liked this
mangogator liked this
 sleepforeverbabe liked this
 goldeneyedgabriel liked this
luluxaj reblogged this from bbiebericons
unravelhowell liked this
bbeautifulflaws liked this
rcdshades liked this
cuteae-blog reblogged this from bbiebericons
aleatheia-blog1 liked this
slayingixons liked this
jaureguiniall liked this
 innocenceslost liked this
 swagcons liked this
angelwithashotguni liked this
mileycyraz-blog liked this
dreams-of-banners liked this
harry-my-sexy-curls liked this
 dreadfullybroken liked this
 dempsiew-blog liked this
rebbits-blog liked this
alltowexll-blog liked this
blissful-vxgue liked this
quileutes liked this
nexttodrbieber liked this
allowin-g-blog liked this
wheresmyluv-blog liked this
fabuzayn-blog reblogged this from bbiebericons
j-vertonghen liked this
bbiebericons posted this
- Show more notes