Many developers rely on Linux, but often work in a Windows infrastructure environment. Often it’s not feasible to install a flow-blown VSphere or XenServer setup when everything else runs on Windows Server and there’s limited hardware, but virtualization has many advantages. Enter Hyper-V, which can be looked after by Windows system administrators, but let you use Linux in virtual machines as you would in any other virtualized environment.
With a few caveats mind you…
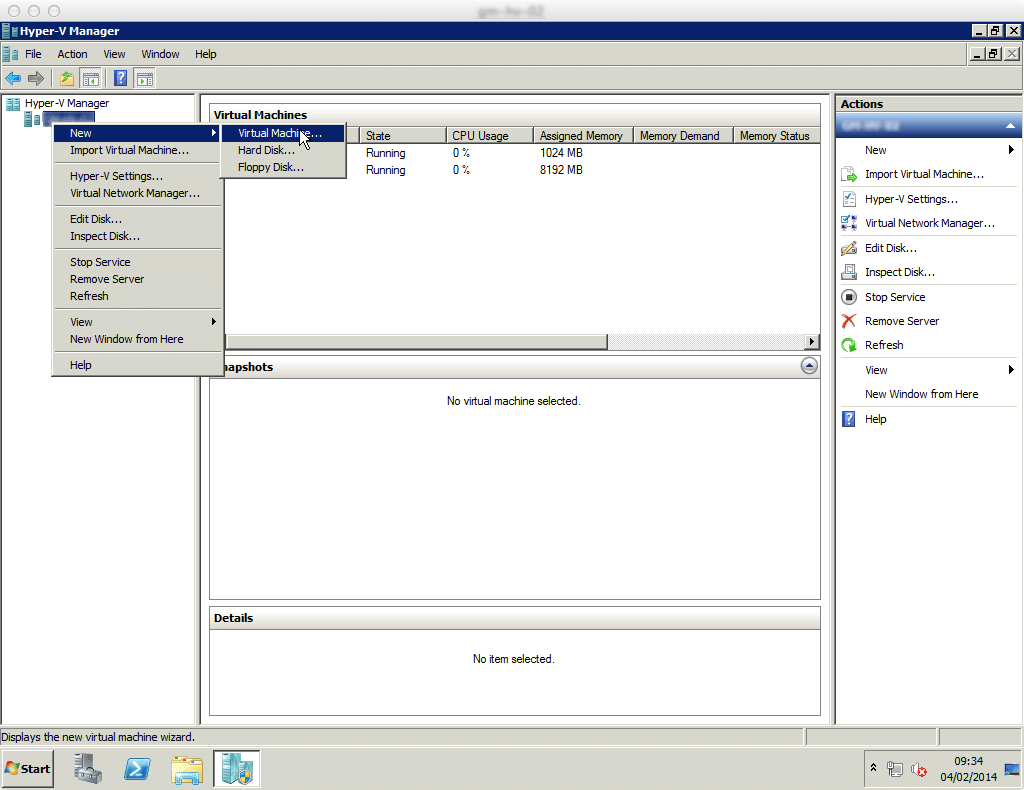
Create a new Virtual Machine
Creating a Virtual Machine in Hyper-V is much the same as any other virtualization platform, simply click through the wizard to set it up. The only real choice at this stage is how to configure the initial IDE disk that the server will use to boot from.
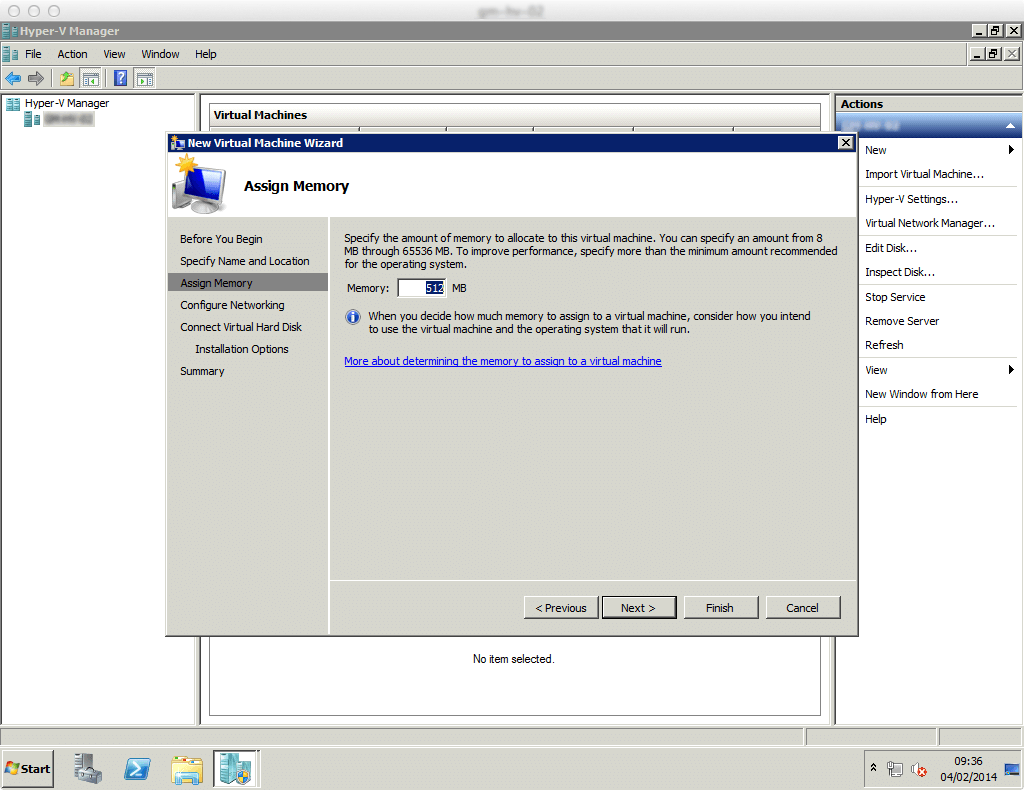


Setup bootable IDE hard drive
The VM will need a bootable hard drive to install CentOS on. Due to Hyper-V restrictions this must be an IDE hard drive and cannot be larger than 128GB. This is due to the IDE-emulation that Hyper-V uses, which hopefully will be fixed in a future release.
If you need additional storage (as if often required) you can add a second IDE or SCSI hard drive, which is explained later.
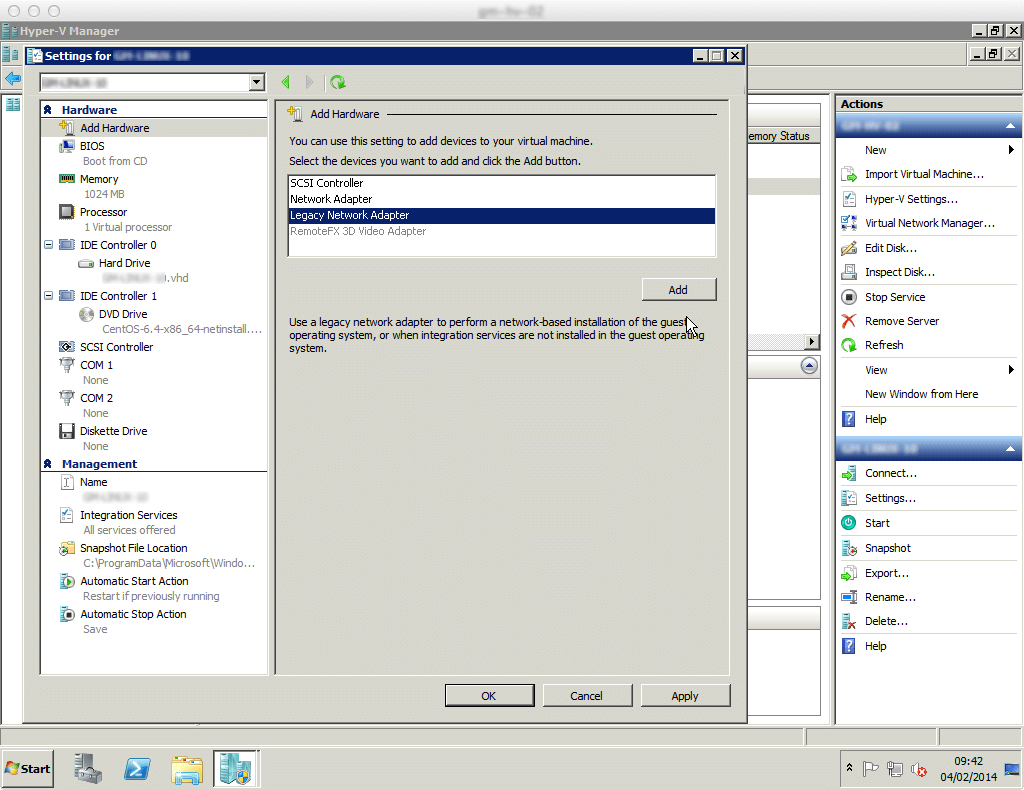
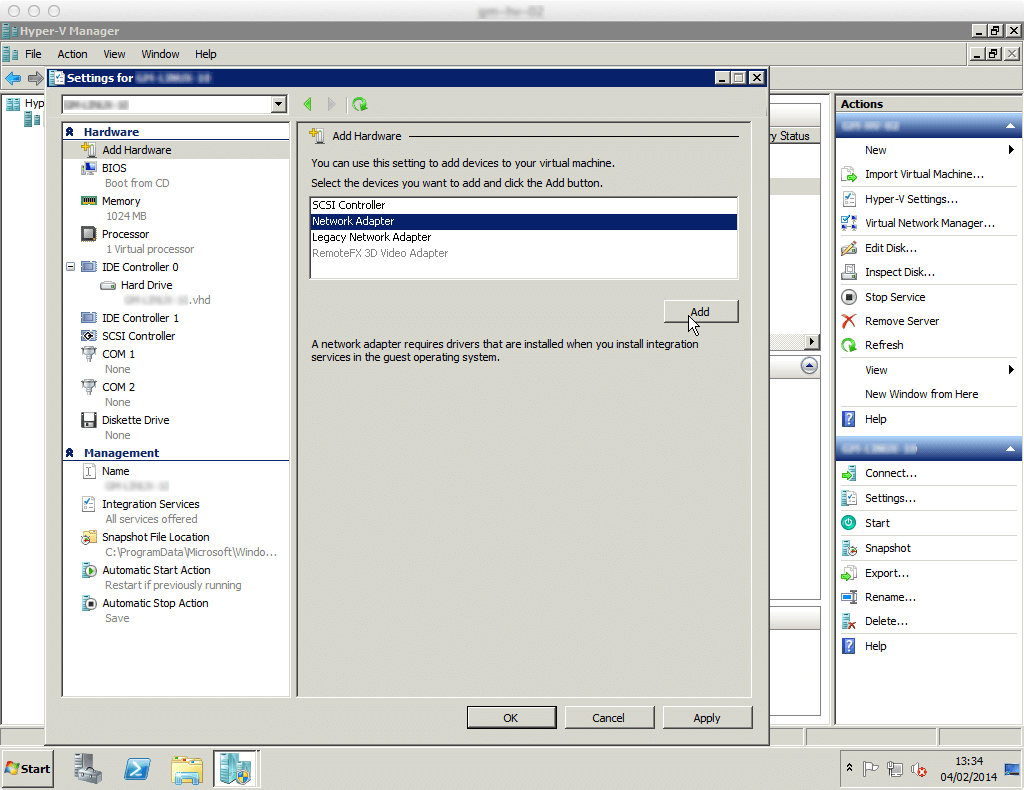
Changing Network Adapter
One thing that needs to be done pre-installation if you are installing from a netinstall ISO, or otherwise want to use networking during the installation process, is to change the Network Adapter. This is because Linux won’t understand how to interact with the synthetic network adapter initially, and you can’t load the drivers until after installation is complete.


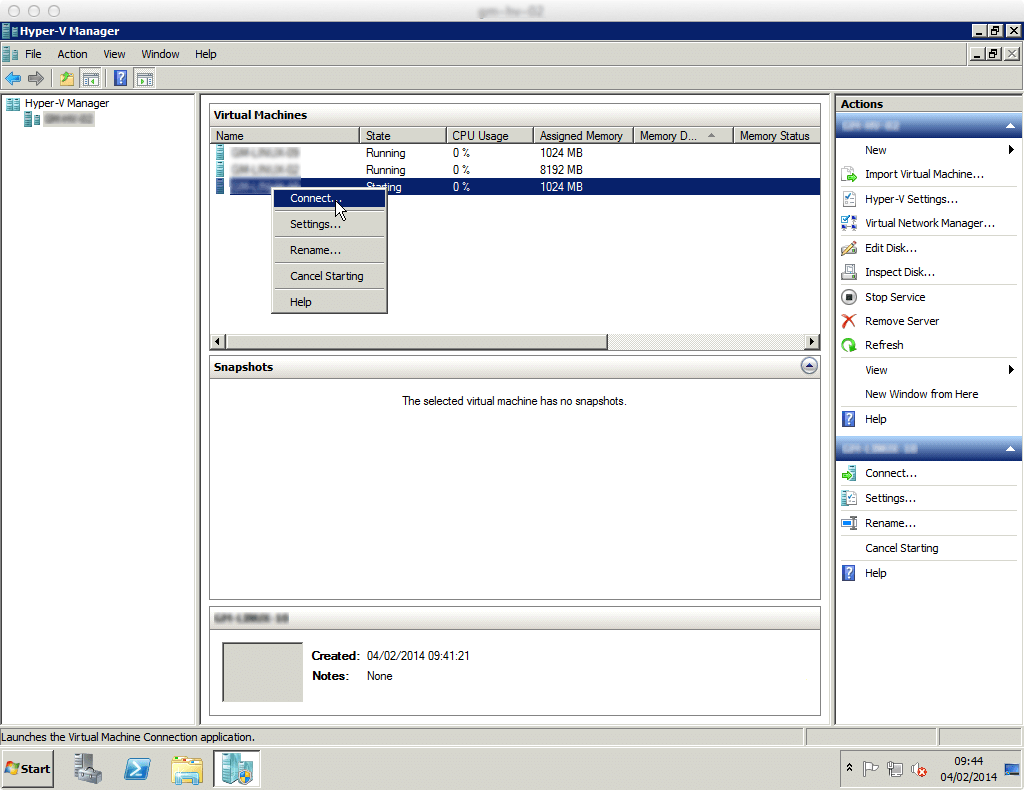
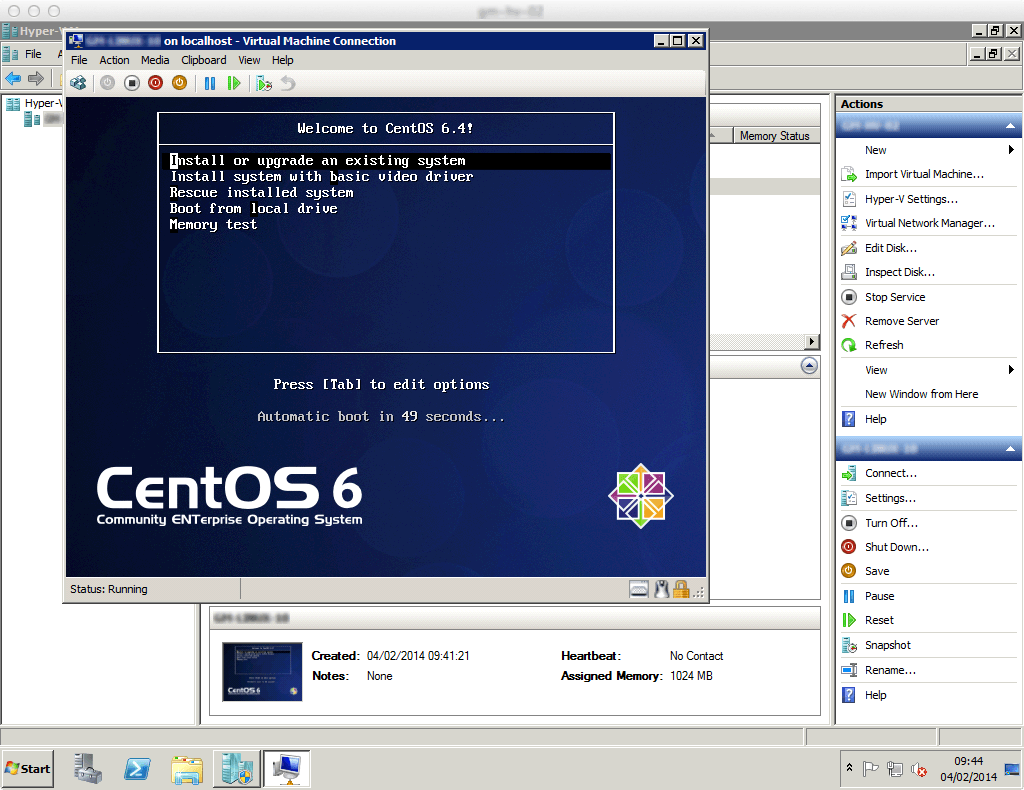
Install CentOS
Use any of the ISO’s that you can download from a CentOS mirror, although I found using the net install the easiest as it verifies that your networking is up and running before you install (it can be a pain to sort out post-install if eth0 isn’t detected)


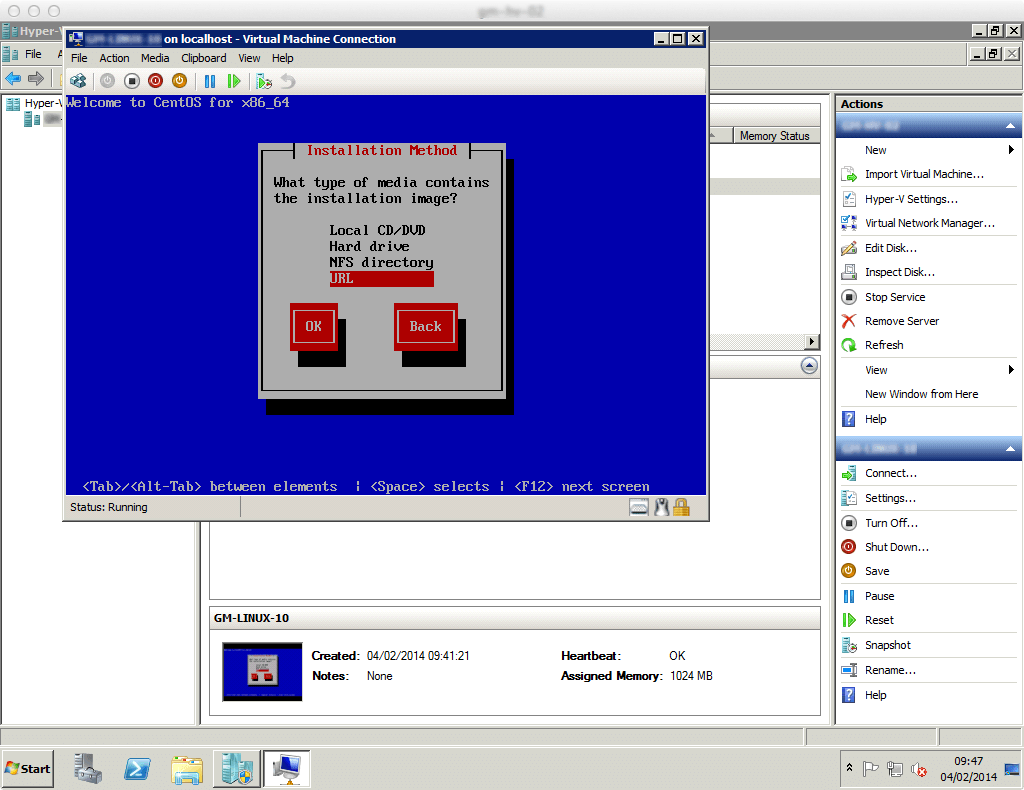
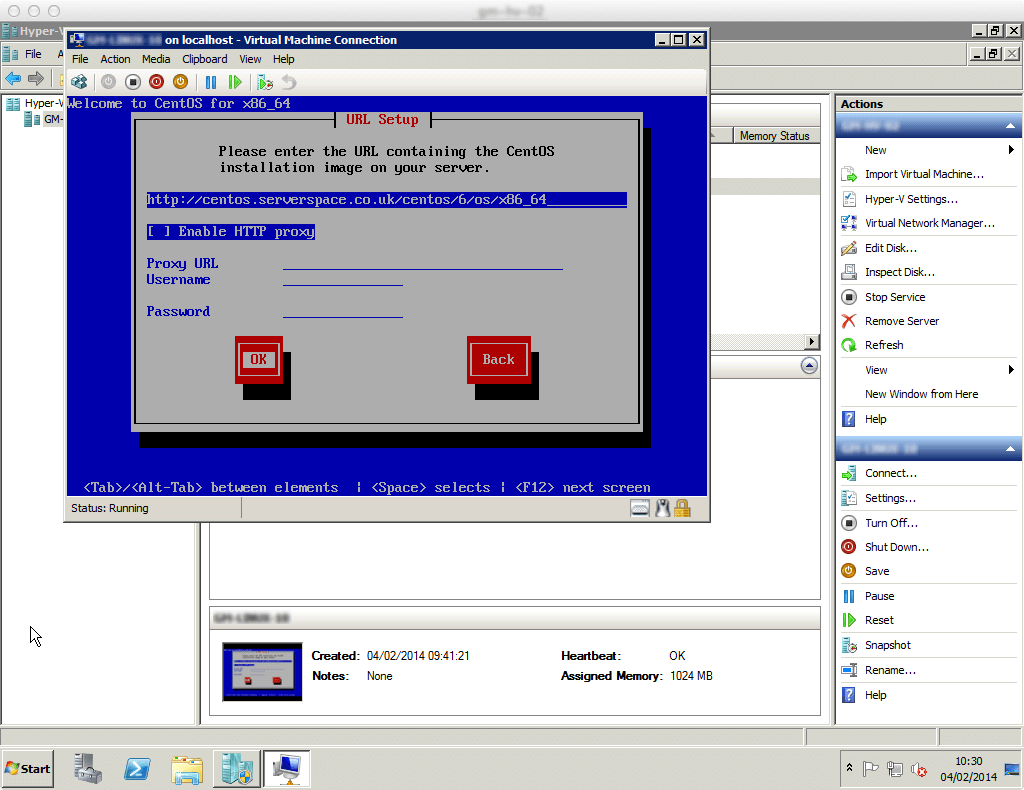
Installing from URL
If you want to install from a URL as opposed to a CD/DVD ISO (which is my preferred method) you need to both configure networking then point the installer at a URL to install from. I commonly use the University of Kent mirror although there are plenty of other CentOS mirrors.


Graphical installation
Once the net install has downloaded the files required to install, the graphical installer will boot. The only major decision to make it to ensure you use all of the virtual hard drive created (even if it is dynamically resizing, which it is by default)


Install Linux IC
Get the latest Linux Integrated Components from Microsoft (currently 3.4) Mount the Linux Integrated Components ISO and copy the files to the virtual machine somewhere, then run the installer
mkdir /opt/linuxic
mkdir /mnt/cdrom
mount /dev/cdrom /mnt/cdrom
cd /mnt/cdrom
cp * -R /opt/linuxic/
cd /opt/linuxic
cd RHEL63
./install.sh


You should then get the message
Linux Integration Services for Hyper-V has been installed. \
Please reboot your system.
Once this has completed you will be able to access the synthetic networking and storage adapters that come with Hyper-V. Reboot the virtual machine you should have access to the network adapter (instead of the legacy network adapter) and SCSI virtual disks, as explained below.
Configure synthetic network adaptor
To configure the synthetic network adapter instead of the legacy adapter, once Linux IC are installed you can turn off the VM and switch them over. If CentOS installed successfully with the legacy network adaptor, it should be configured as eth0.
With the VM turned off, go into the settings and copy the dynamic MAC address of the legacy network adaptor into the synthetic network adaptor (labelled just network adapter) and set the MAC address to be static.


Once you boot the VM, CentOS should switch to using the new network adaptor as eth0 in place of the old legacy network adaptor, and should work with no additional configuration.
Setup additional hard drive
On the assumption that you will use the 2nd IDE channel for mounting CD/DVD images (such as the Linux IC .iso) you can add additional hard drives via SCSI. In theory once Linux IC are installed the SCSI emulation should be faster than the IDE emulation…
If you need help partitioning, formattting and mounting the new disk there is a guide for adding a new disk drive to a CentOS system on Techotopia.
fdisk /dev/sdb
Create a new primary partition on the drive using all available space, then write the changes to the device. As a shortcut just type n, p, 1, (empty), (empty), w
/sbin/mkfs.ext4 -L /var /dev/sdb1
mv /var /var_old
mount /dev/sdb1 /var
Comment from Wikipedia:
“.vhdx disk format supporting virtual hard disks as large as 64 TB with power failure resiliency”
This is for Hyper-V on Windows Server 2012.
http://en.wikipedia.org/wiki/Hyper-V#Windows_Server_2012_2
Interesting, I’d like to see how the synthetic disk controllers handle these; hopefully our Windows boxes will get upgraded from Windows Server 2008 R2 at some point
Thanks this really helped me.
Linux VM was working fine on Windows 2008 R2 Hyper-V, with only the legacy network adapter. After transferring it to Windows 2012 R2 I could not get the network working at all. Just adding the synthetic adapter the way you showed solved the problem.
Hi,
How do we install LIS 4.1 or 4.0.11 on CentOS 6.8?
I didn’t find any folder Centos68 or RHEL68 in the ISO.
Other versions give error. “./install.sh” from root gives error too.
I’m afraid I haven’t had a chance to work with Hyper-V in a couple of years so I’m not sure